Appendix B: Transmitter Installation
iConnect
Installation Manual
100
LED Indication
Table B-5: LED Indication (EL-4714)
LED Indica tion
Red (fast flash for 4 seconds) Outgoing transmission.
Green Operation successful
Amber Low battery
Registration Procedure
The keyfob must identify itself to the iConnect
Control System as follows:
1. Set the system to registration mode.
• Go to the main menu and select [9]>[1]>[2] (Programming > Devices > Keyfobs)
• Select a Keyfob and press '
√ʹ.
2. Press one of the buttons on the Keyfob, making sure that the Keyfob’s green LED lights up when the button is
pressed.
A flashing red LED indicates a communication problem between the Keyfob and the system.
3. As soon as 'Save?' appears press '
√ʹ.
During registration, maintain a minimum 1 meter distance between the keyfob and panel.
Deleting a Keyfob
To delete a Keyfob from the system:
1. Set the system to Delete mode.
• Go to the main menu and select [9]>[1]>[2] (Programming > Devices > Keyfobs).
• Select a Keyfob (1-19) and press '√ʹ
2. Press >6 > '
√ʹ.
3. Press and hold the Keyfob button for at least eight seconds. The initial red LED flashing indicates the Keyfob is
attempting to contact the system. After the flashing stops, a red/green flashing LED begins and when it stops,
the keyfob unregistration has succeeded.
Battery Replacement
If the LED blinks during transmissions, this indicates that the battery is low and need replacing.
Batteries must be replaced within seven days of receiving a low battery indication. The
estimated battery life is 2 years (avg. 4 activations per day).
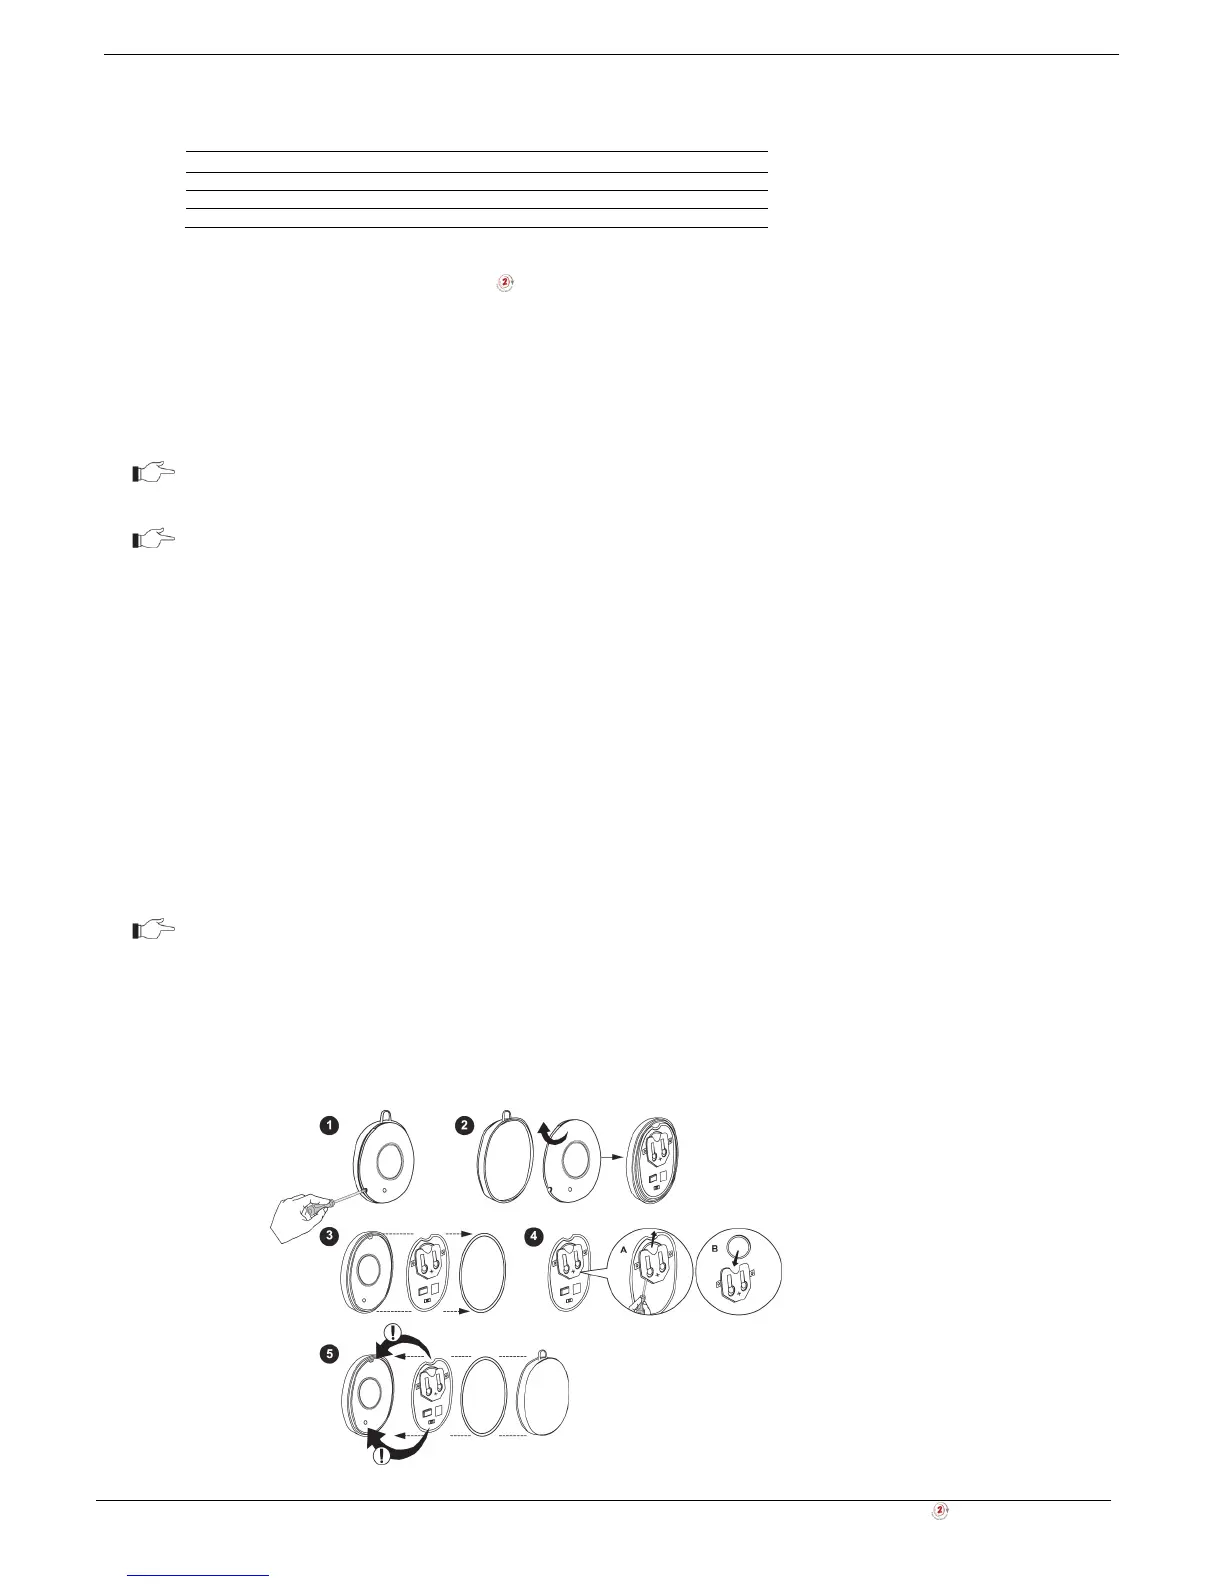
To replace the battery:
1. Insert a small screwdriver into the pry-off slot. Carefully twist the screwdriver to separate the front and back of the
casing (1-2).
2. Observing correct polarity, replace the battery (3-4).
3. Close the casing making sure that the front and back click shut (5).
Figure B- 36: Replacing the EL-4714’s batteries