60
Element4 Gas Fireplaces EuropeanHome.com
APPENDIX FOUR
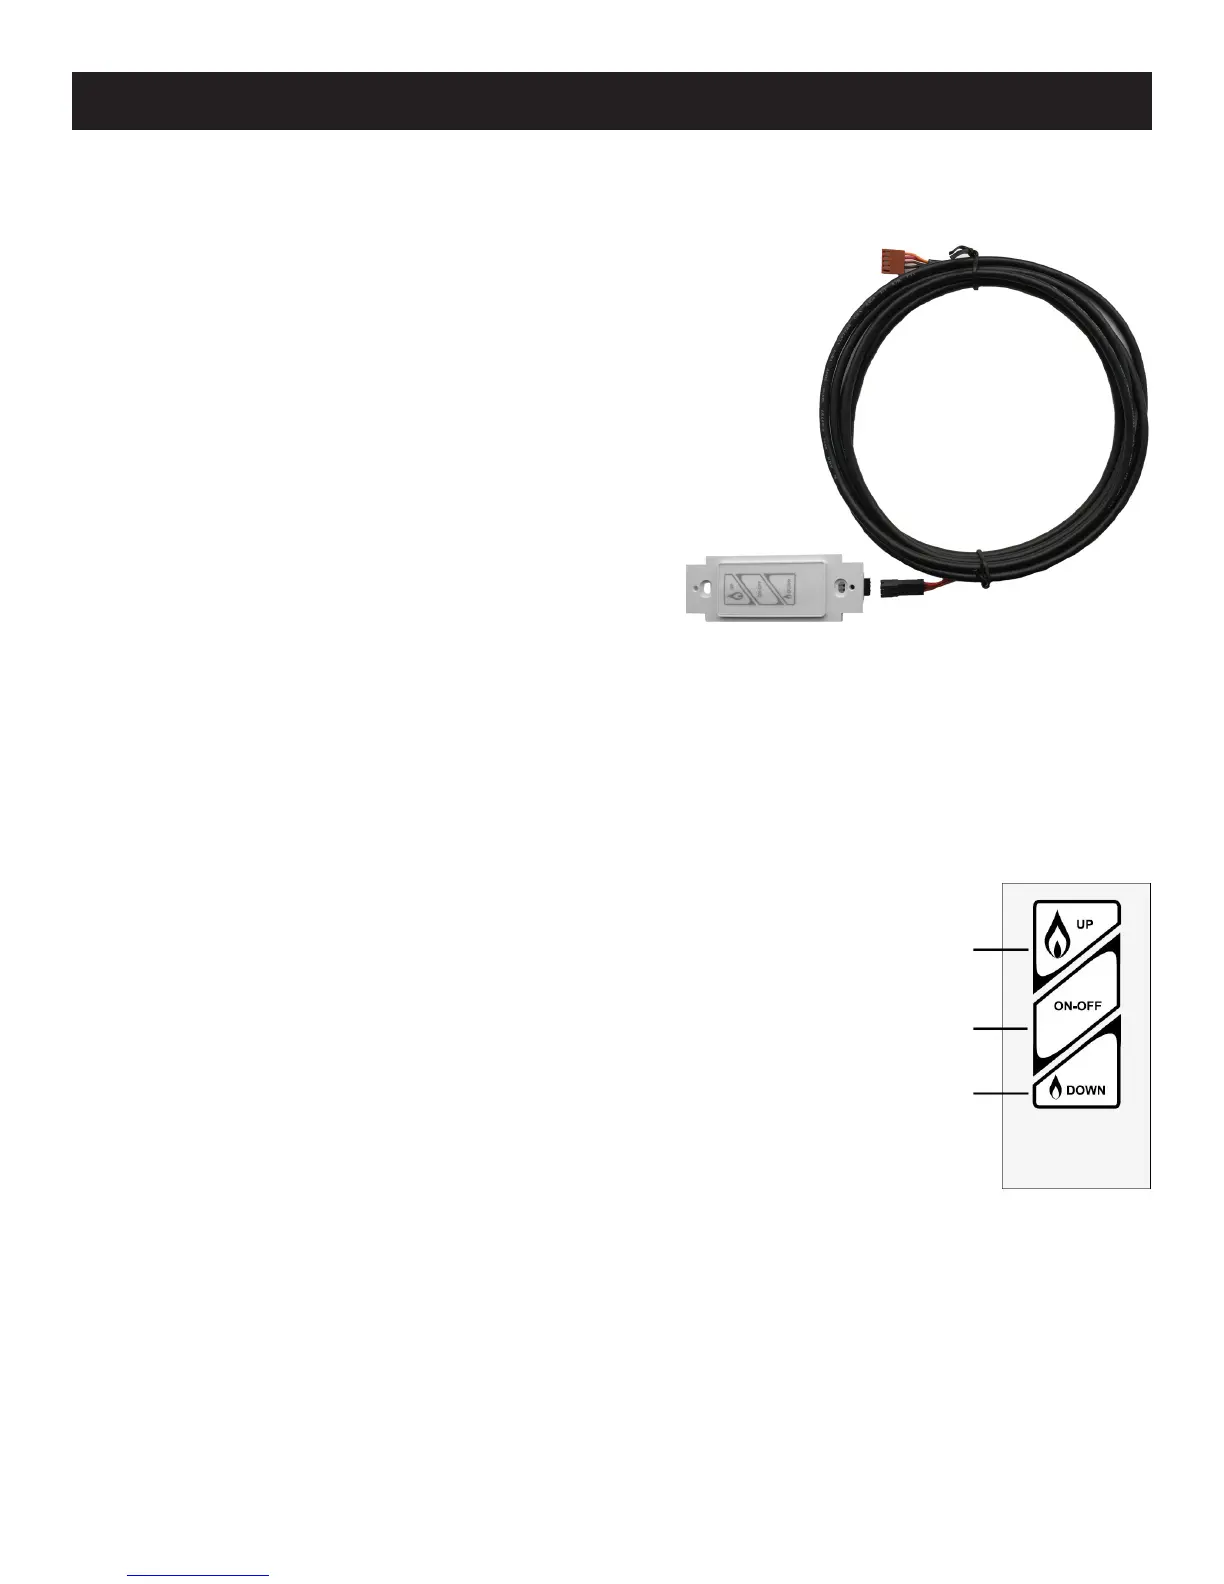
INSTALLING AN OPTIONAL WALL SWITCH
1. Install a single-gang electrical workbox (not supplied) at the
desired location - no more than 26 feet as the cable runs.
2. While keeping the black connector (A) inside the work box,
thread the black 4-wire cable through the workbox and bring
the red connector (B) to the location of the receiver.
3. Connect the black connector (A) to the wall switch, the red
connector (B) to the receiver.
4. Test for proper operation then screw the wall switchplate to
the workbox with the two screws provided and attach the
faceplate (included).
A
B
USING THE WALL SWITCH
Note that, with the wall switch, you can turn the replace on and o and adjust the ames up
and down. The rear burner, however, can only be turned on/o with the remote control (model
applicable).
• Turn replace ON: Press the ON/OFF button until a short beep conrms the start sequence
has begun then release the button.
• Increase the ame height: Press and hold the UP button.
• Decrease the ame height: Press and hold the DOWN button.
• For ne adjustment tap the UP or DOWN button as necessary.
• Turn replace OFF: Press the ON/OFF button.
UP
ON/OFF
DOWN