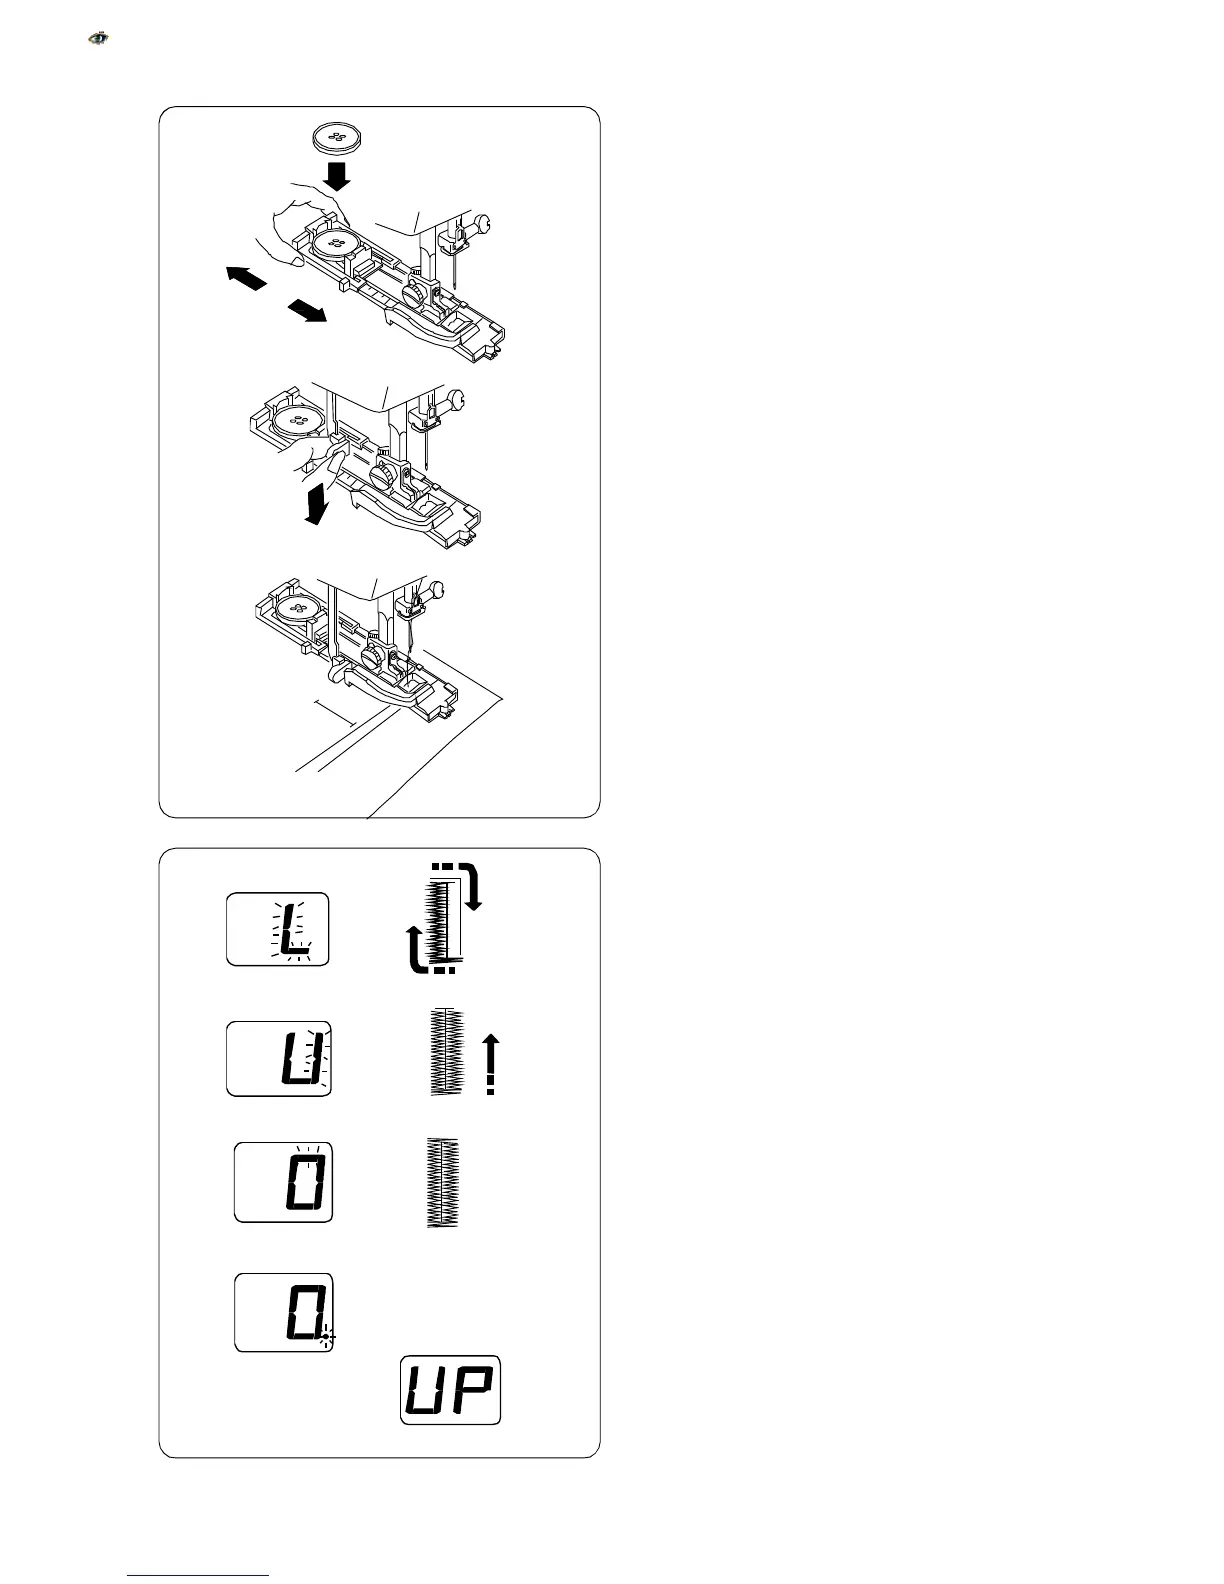
Extend the buttonholder to the back and place the
button in it. Push the holder together tightly around
the button.
Placing the button in the automatic buttonhole foot
automatically sets the size of the buttonhole. The
buttonholder on the foot adjusts for a button up to
2.5 cm (1”) in diameter.
Pull the buttonhole lever down as far as it will go.
Mark the buttonhole area on the fabric. Place
both
threads
to the left
under
the foot. Insert the garment
under the foot and lower the needle at the starting
point. Then lower the buttonhole foot.
While sewing a buttonhole, the LED readout flashes
which portion is currently being sewn.
A flashing “.” in the LED readout signals that the but-
tonhole is finished.
Raise the presser foot and the readout signal disap-
pears.
NOTE:
If presser foot is not raised and another stitch
is selected, this warning message will appear.
40