November 2022
Installation, Operation and Maintenance Manual
MAC050515 EN Rev. 0
15Assembly Instructions
Section 10: Assembly Instructions
10.2 Pinion Assembly
1. Lightly grease all O-Rings, O-Ring grooves, bearing grooves, and pinion.
2. Assemble the top pinion bearing (9) to the pinion, ensuring that the recess
openings are facing away from the gear form, then assemble items (8), (17),
and (18).
3. Lightly grease the pinion bores in the body (11) and insert the pinion being careful
not to damage the O-Rings.
NOTE:
The snap ring (Circlip) (6) has one side with bevelled edges which must go DOWN onto the
thrust washer (25); the square edge side must face UPWARDS.
4. When the pinion is in place, install the DURASTRIP thrust bearing (5), thrust washer
(25) and the snap ring (Circlip) (6) into the
narrow groove at the top of the pinion
(ensuring
the snap ring ts properly into the groove).
5. Only open the snap ring (Circlip) (6) enough to just clear the pinion diameter
as opening too far will damage the snap ring. If damage occurs replace with a
new part.
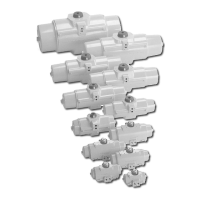
Piston assembly for
“Standard” operation
Pinion dot
One body dot for
standard mode
Piston assembly for
“Reverse” operation
Two body dots for
reverse mode
Pinion dot
10.3 Alignment of Pinion for Correct
Piston Assembly
Standard rotation is clockwise with the pistons moving towards each other (when viewed
from above the slot at the top of the pinion, refer to Figure 5).
Figure 5 Pinion Alignment
(a) (b)

 Loading...