Do you have a question about the Emerson Micro Motion 4200 and is the answer not in the manual?
This manual provides information on planning, mounting, wiring, and initial setup of the Micro Motion transmitter.
This document uses criteria for hazard messages based on ANSI standards Z535.6-2011 (R2017) for safety.
See approval documentation or download from the Micro Motion web site for related manuals and data sheets.
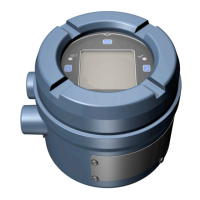
A 4200 Meter consists of the transmitter and the sensor components.
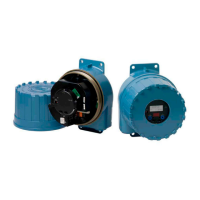
The 4200 transmitter is ordered for one of two installation types indicated by the fifth character of the transmitter number.
Provides a checklist for proper installation, including safety messages and location guidelines for components.
Details the maximum cable length allowed between the sensor and transmitter, determined by cable type.
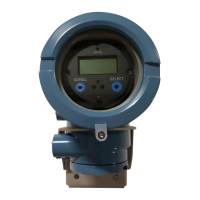
Describes mounting and wiring requirements for integral-mount transmitters, noting no separate wiring is needed.
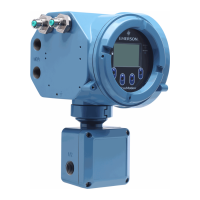
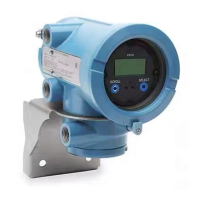
Details options for mounting the transmitter to a wall or flat surface, or to an instrument pole, with prerequisites.
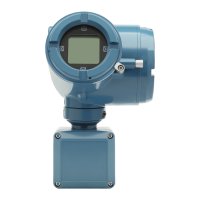
Procedure for wiring the 9-wire remote-mount transmitter to the sensor, including prerequisites and steps.
Instructions for grounding the transmitter and sensor separately in 9-wire remote installations, with prerequisites.
Procedure to rotate the transmitter on the sensor in 45° increments for easier access to interface or terminals.
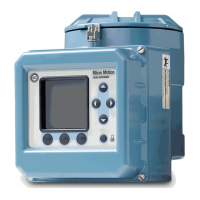
Procedure to rotate the transmitter's user interface orientation by 360° in 90° increments via software selection.
Procedure to rotate the sensor wiring junction box on remote-mount transmitters up to +/- 180 degrees.
Details installation types for the 4200 transmitter, including general configuration with diagrams and component labels.
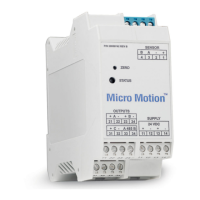
Lists available signal channels (Channel A and Channel B) and their configurations, including mA, Frequency, and Discrete outputs.
Lists barriers verified by Micro Motion for the 4200 transmitter, with vendor and barrier model numbers.
Details channel power requirements, focusing on Channel A mA HART output supply voltage and loop resistance.
Procedure to remove the wiring access cover and identify activated transmitter channels and their configurations.
Procedure for wiring the mA/HART output for Channel A in various installation types (explosion-proof, intrinsically safe, nonhazardous).
Procedure for wiring the mA output for Channel B in various installation types, noting power is supplied via Channel A.
Procedure for wiring the externally-powered Frequency Output or Discrete Output for Channel B.
Refer to the Safety Manual for installation and commissioning of SIL-compliant mA/SIL output.
Ensures covers and seals are closed before powering up; describes turning on power and automatic diagnostic routines.
Procedure to access the guided setup screen from the display main menu via Startup Tasks.
Procedure to activate capacitive buttons on the transmitter display, noting they can be used through the lens.
Instructions to configure the display backlight, which requires an additional 1V and is set to OFF by default.
Procedure to connect HART terminals to a Field Communicator for data download/upload, including resistance requirements.
| Brand | Emerson |
|---|---|
| Model | Micro Motion 4200 |
| Category | Transmitter |
| Language | English |