Do you have a question about the Emerson MICRO MOTION 2700 and is the answer not in the manual?
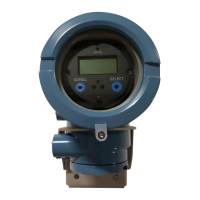
Introduction to the manual, transmitter model code, and communication tools.
Provides information to configure, commission, use, maintain, and troubleshoot the transmitter.
Identifies the transmitter by its model number and options.
Details the various communication tools and protocols for transmitter interface.
Lists supporting documentation for installation and operation.
Procedure for powering up the transmitter and initial diagnostic checks.
Instructions for checking the flowmeter for error conditions.
Steps to establish the initial connection to the transmitter.
Procedure to adjust the transmitter to match sensor unique traits.
Checks the accuracy of the mass flow rate reported by the transmitter.
Determines if stored zero value is appropriate or if field zero can improve accuracy.
Overview of the configuration and commissioning process.
A general guide to the transmitter configuration and commissioning process.
Lists default values and ranges for commonly used parameters.
Procedure to enable access to the transmitter's off-line menu for configuration.
Steps to unlock the transmitter configuration if it is write-protected.
Returns the transmitter to a known operational configuration.
Parameters controlling how mass flow is measured and reported.
Specifies the unit of measure for the mass flow rate.
Smooths out small, rapid fluctuations in process measurement.
Specifies the lowest mass flow rate reported as measured.
Parameters controlling how liquid volume flow is measured and reported.
Controls whether liquid or gas standard volume flow measurement is used.
Specifies the unit of measurement for the volume flow rate display.
Specifies the lowest volume flow rate reported as measured.
Parameters controlling how gas standard volume flow is measured and reported.
Controls whether liquid or gas standard volume flow measurement is used.
Specifies the unit of measure for the gas standard volume flow rate.
Specifies the lowest gas standard volume flow rate reported as measured.
Controls how forward flow and reverse flow affect flow measurement.
Parameters controlling how density is measured and reported.
Specifies the units of measure displayed for density measurement.
Controls how the transmitter detects and reports two-phase flow.
Smooths out small, rapid fluctuations in process measurement.
Specifies the lowest density value reported as measured.
Parameters controlling how temperature data from the sensor is reported.
Specifies the unit used for temperature measurement.
Smooths out small, rapid fluctuations in process measurement.
Enables temperature correction for liquids using API standards.
Guides through loading and setting up a concentration matrix.
Guides through loading and setting up a concentration matrix.
Guides through loading and setting up a concentration matrix.
Lists API reference tables, process fluids, and calculation values.
Calculates concentration data from process temperature and density.
Guides through loading and setting up a concentration matrix.
Adjusts process measurement to compensate for pressure effects on the sensor.
Steps to configure pressure compensation using ProLink II.
Steps to configure pressure compensation using ProLink III.
Steps to configure pressure compensation using the Field Communicator.
Presents standard units for Pressure Measurement Unit.
Control process variables shown on display and display behaviors.
Controls the language used for process data and menus on the display.
Control process variables shown on the display and their order.
Set display precision (number of decimal places) for each variable.
Set Update Period to control display data refresh frequency.
Configure display to scroll through variables or show a single variable.
Enable or disable the display backlight.
Enable or disable the status LED blinking for alarms.
Configure transmitter to allow operator actions via display.
Control whether operator can start/stop totalizers and inventories from display.
Configure whether operator can reset totalizers from the display.
Configure single command to acknowledge all alarms from the display.
Control operator access to display off-line menu sections.
Configure data polling and process variable calculation rates.
Control rate at which process data is polled and variables calculated.
Apply different algorithm to calculation of process variables.
Control transmitter's response to process and device conditions.
Controls delay before fault actions are performed.
Control fault actions performed when an alarm is detected.
Parameters to identify or describe the flowmeter.
Store a description in transmitter memory.
Store a short message in transmitter memory.
Store a static date in transmitter memory.
Store the serial number of the sensor component.
Store the type of material used for sensor's wetted parts.
Store the type of material used for the sensor liner.
Store the sensor's flange type in transmitter memory.
Configure Channel B to operate as a frequency or discrete output.
Parameters controlling how the process variable is reported via mA output.
Select the variable reported over the mA output.
Scale the mA output by defining the relationship between process variable and mA.
Specifies the lowest flow rate reported via the mA output.
Smooths out small, rapid fluctuations in process measurement.
Controls mA output behavior during an internal fault condition.
Parameters controlling how the process variable is reported via frequency output.
Selects the variable reported over the frequency output.
Controls how the output indicates the ON (active) state.
Defines the relationship between output pulse and flow units.
Ensures ON signal duration is great enough for frequency receiving device.
Controls frequency output behavior during an internal fault condition.
Parameters controlling which condition is reported via discrete output.
Controls which flowmeter or process condition is reported via discrete output.
Indicates flow rate relative to configured setpoint.
Controls discrete output behavior during an internal fault condition.
Notification of process changes or specific transmitter actions.
Provides notification of process changes based on HI/LO setpoints.
Notification and optional actions for process variable changes.
Controls how the transmitter communicates using digital communications.
Supports HART communication via primary mA terminals.
Supports HART communication via RS-485 terminals.
Controls Modbus communication via RS-485 terminals.
Specifies values reported via digital communications during faults.
Use sensor simulation to test system response and tune loops.
Save and restore transmitter configuration sets to a PC.
Lock the transmitter configuration to prevent changes.
Application for process data legal for custody transfer.
Steps to set up the application for OIML or NTEP compliance.
Steps to set up the application for OIML or NTEP compliance.
Covers recording, viewing, and acknowledging process variables and alarms.
Suggests recording process variable measurements for diagnostics.
Provides information about process fluid state and flowmeter operation.
Displays mass flow, density, temperature, and drive gain by default.
Displays process variables on the main screen of ProLink III.
Interprets the status LED to indicate current alarm condition.
View active alarms and acknowledge individual alarms.
View and acknowledge alarms directly on the transmitter display.
View and acknowledge alarms through ProLink II.
View and acknowledge alerts through ProLink III.
View alarms using the Field Communicator.
Details alarm data stored in transmitter memory.
Read totalizer or inventory values from the display.
Start or stop totalizers and inventories as a group.
Start or stop totalizers and inventories via the display.
Resets totalizer values to zero.
Resets mass, volume, or gas standard volume totalizers via display.
Resets inventory values to zero.
Details modifications to transmitter functions when Weights & Measures is installed.
Specifies approved methods for custody transfer data reading.
Details changes to measurement and reporting based on transmitter security.
Explains disallowed operations/maintenance when application is installed.
Procedure to switch between secured and unsecured modes.
Steps to switch modes using ProLink II.
Steps to switch modes using ProLink III.
Steps to switch modes using the switching utility.
Procedure to clear the security breach alarm.
Procedure for replacing the core processor in a Weights & Measures installation.
Procedures to evaluate and maintain flowmeter accuracy.
Run tests, view results, and set up automatic execution.
Details minimum versions for transmitter, core processor, and communication tools.
Ensures smooth test operation when conditions are stable.
Procedure to run a Smart Meter Verification test using the display.
View results from current and previous Smart Meter Verification tests.
Set up and run tests at a defined future time or on a schedule.
Establishes a baseline for process measurement by analyzing sensor output.
Procedure to zero the flowmeter using the transmitter display.
Procedure to zero the flowmeter using ProLink II.
Procedure to zero the flowmeter using ProLink III.
Procedure to zero the flowmeter using the Field Communicator.
Compares flowmeter measurements to an external measurement standard.
Calculates volume meter factor from density reference.
Establishes relationship between calibration fluid density and sensor signal.
Steps for D1 and D2 density calibration using ProLink II.
Steps for D1 and D2 density calibration using ProLink III.
Steps for D1 and D2 density calibration using Field Communicator.
Optional calibration to improve density measurement accuracy.
Steps for D3/D4 density calibration using ProLink II.
Steps for D3/D4 density calibration using ProLink III.
Steps for D3/D4 density calibration using Field Communicator.
Establishes relationship between calibration fluid temp and sensor signal.
Indicates alarm status via transmitter's status LED.
Lists status alarms and recommended actions.
Common flow measurement issues and troubleshooting steps.
Common density measurement issues and troubleshooting steps.
Common temperature measurement issues and troubleshooting steps.
Troubleshooting for issues with the mA output.
Troubleshooting for issues with the frequency output.
Use simulation to reproduce conditions and test system.
Ensures proper transmitter operation by checking power supply wiring.
Troubleshoots power-supply and output problems due to wiring.
Ensures proper operation by checking sensor and transmitter grounding.
Verifies transmitter and remote device communication.
Tests mA, frequency, and discrete outputs via the display.
Tests mA, frequency, and discrete outputs using ProLink II.
Tests mA, frequency, and discrete outputs using ProLink III.
Tests mA, frequency, and discrete outputs using Field Communicator.
Identifies and reduces radio frequency interference affecting outputs.
Troubleshoots HART communication loop wiring.
Verifies HART address and loop current mode settings.
Checks if HART burst mode is enabled and disables if necessary.
Addresses inaccurate mA output trim values.
Checks LRV and URV configurations for unexpected output values.
Controls mA output behavior during an internal fault condition.
Ensures correct frequency output value by checking pulse width.
Verifies correct configuration of frequency output scaling method.
Controls frequency output behavior during an internal fault condition.
Ensures correct flow direction setting for accurate readings.
Verifies cutoff configurations to prevent incorrect zero flow reporting.
Identifies and addresses issues caused by slug flow.
Diagnoses process, sensor, or configuration problems indicated by drive gain.
Collects drive gain data for diagnosing process and equipment conditions.
Diagnoses process or equipment problems indicated by low pickoff voltage.
Collects pickoff voltage data for diagnosing process and equipment conditions.
Identifies shorts that can cause sensor to stop working.
Identifies electrical shorts in sensor coils.
Interprets core processor LED states for meter conditions.
Details LED states for standard and enhanced core processors.
Tests core processor resistance for proper communication.
Overview of ProLink II software for transmitter configuration and data access.
Allows reading process data, configuring, and performing maintenance.
Details available connection types for ProLink II to transmitter.
Steps to connect via the service port.
Connects directly to mA terminals or HART loop.
Connects directly to RS-485 terminals or network.
Connects directly to RS-485 terminals or network.
Visual representation of ProLink II menu structure.
Overview of ProLink III software for transmitter configuration and data access.
Allows reading process data, configuring, and performing maintenance.
Details available connection types for ProLink III to transmitter.
Steps to connect via the service port.
Connects directly to mA terminals or HART loop.
Connects directly to RS-485 terminals or network.
Connects directly to RS-485 terminals or network.
Visual representation of ProLink III menu structure.
Overview of the Field Communicator for device configuration and data access.
Connects to transmitter for data reading, configuration, and maintenance.
Visual representation of Field Communicator menu structure.
Details typical factory configuration values and ranges.
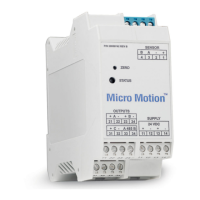
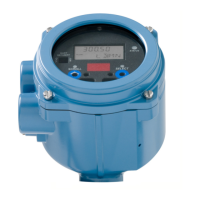
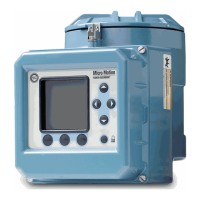
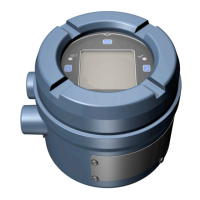
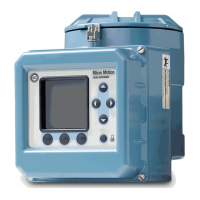
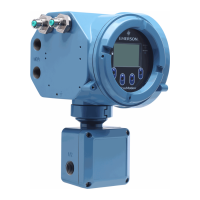
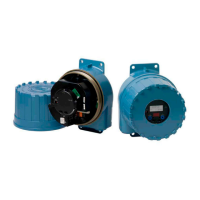
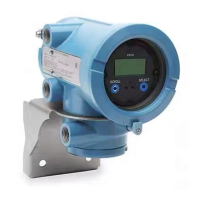
Describes five different transmitter installation types.
Details power supply wiring terminals and grounding requirements.
Illustrates I/O wiring terminals for transmitter connections.
Chronological record of changes and improvements to the NE 53 feature.
| Model | 2700 |
|---|---|
| Type | Transmitter |
| Communication Protocol | HART |
| Enclosure Rating | NEMA 4X (IP66) |
| Hazardous Area Approvals | ATEX, IECEx, FM, CSA |
| Operating Temperature | -40 to 150 °F (-40 to 65 °C) |
| Ambient Temperature Range | -40 to 150 °F (-40 to 65 °C) |
| Weight | 8 lb (3.6 kg) |
| Output Signals | 4-20 mA, pulse, frequency, alarm |