10
REFRIGERANT PROCESSING
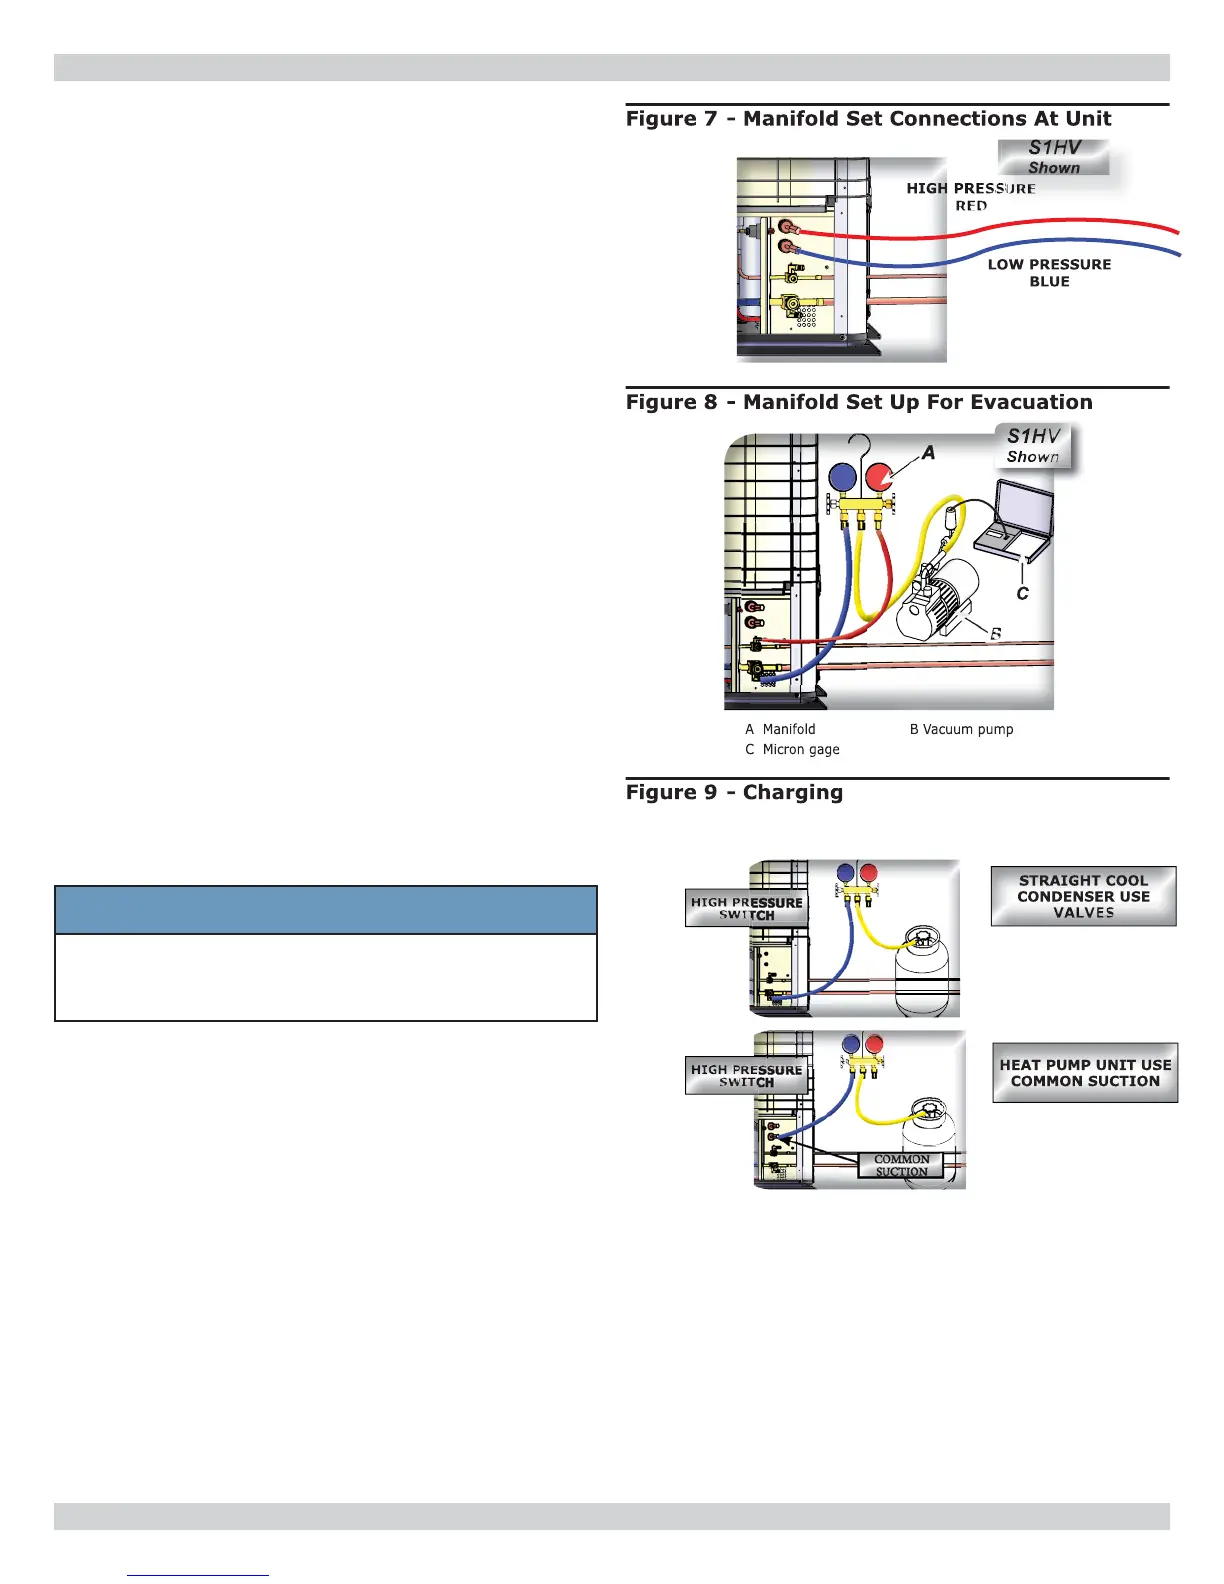
Refrigerant Processing
1.
Attach manifold set, vacuum pump, & Micron Gauge.
See Figure 8 .
2.
Evacuate line to 500 microns or less to insure all
moisture has been removed and there are no leaks.
(Figure 21, page 19)
A. Evacuate
B. Pressurize with 100psi N2 or Nitrogen
C. Evacuate again
D. Charge with R410A
3.
Verify evacuation and leak free joints. Back-seat valves
(counter-clockwise) to open and allow factory charge to
fi ll lines and indoor unit. See Figure 9 .
Refer to refrigerant charge table for specifi ed charge.
4.
Charge to proper weight. Charge based on feet of
interconnect. Only add/remove R410A in liquid
form. See Table 4, Page 11 .
5.
Install all panels removed to this point. Panels are
required for proper air fl ow.
All systems require fi eld charge adjustments. Refer to
“Refrigerant Charge Tables” for proper weight charge
and Operation Charts for proper system pressures and
temperatures at different outdoor conditions. Sub-cool
should be used for fi nal system charge.
Charge with dial-a-charge or weighed in with scale.
NOTICE
It is illegal to discharge refrigerant into the
atmosphere. Use proper reclaiming methods &
equipment when installing or servicing this unit.
Units are delivered pre-charged with refrigerant for
condenser coil and air handler. Charging of fi eld installed
piping is required. Refer to refrigerant charge table for
proper amount to be added for applications interconnect
piping. Unit service valves are solid brass, for sweat
connections.
Pressure test all fi eld installed piping with nitrogen. Use
vacuum pump to evacuate tubing and indoor unit to 500
microns or less, with service valves remaining front seated
(closed).
Before releasing refrigerant from condenser, insure
manifold gauge set is closed so as not to lose vacuum when
shutting down the pump.