47
SENTO, SENTO PRO Carrycot+, ERGO+, FLAT+ v. 2.0
SE
SE
2-13
133-155
NO
2-13
110-132
FI
2-13
87-110
DK
2-13
60-86
DE
2-13
37-59
EN
2-13
14-36
SE
SE
2-13
276-301
PL
2-13
252-275
LV
2-13
228-251
LT
2-13
203-227
ES
2-13
179-202
EE
2-13
156-178
CZ
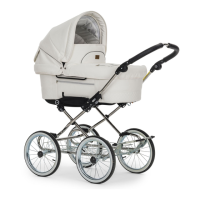
Carrycot
1) Assembly of the carrycot
1.1 To erect the carrycot pull the bar
using the easy pull handle along the
bottom of the carrycot towards the
plastic stops. Repeat both in the foot
end and the head end. *Assemble the
inner fabric with the zipper
WARNING
• Make sure the metal bars are rmly
attached to the carrycot frame before
the carrycot is erected. If the metal
bars are not in place, the fabric may be
damaged.
• Never use the carrycot if it is not
correctly tensioned. In other words,
make sure that the carrycot is tight and
that both metal brackets are correctly
positioned in the recesses of the base
plate.
1.2 Remove the mattress from the
plastic bag (discard safely). Place the
mattress.
WARNING
• Do not use a additional mattresses in
the carrycot. Only use the Emmaljunga
original mattress that comes with the
pram.
• Risk of suffocation. Do not let children
play with plastic bags.
1.3 Press both buttons on the inside of
the hood and pull it up. Attach the
apron using the velcro straps on each
side of the carrycot. The hood can be
folded up and down in the desired
position by pressing both buttons on
the inside of the hood.
1.4 The hood is attached to the carrycot
with velcro strips.
1.5 To ad ventilation open the zipper and
roll the fabric upwards.
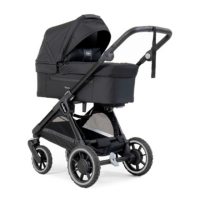
2) Attach/remove the carrycot
2.1 Engage the brake. Lift the carrycot
with the handle and place it onto the
chassis. Press the carrycot downwards
until it locks into place, you will hear a
“click” on both sides. Make sure the
indicator is completely green.
INDICATOR FOR
CORRECT FASTENING
The carrycot + is tted with indicators on
each side to show whether the carrycot +
is correctly attached.
Green=correctly attached to the chassis
Red=not correctly attached to the chassis
WARNING
• Always check that the carrycot is
properly attached in the locked
position on both sides.
2.2 Engage the brake. Under the carrycot
base, push the button and pull the
handle towards you. Lift the carrycot
upwards.
2.3 WARNING
• Never use the carrycot in the position
with the hood placed towards the
handlebar.
• The hood on the carrycot should
always be placed away from the
handlebar
2.4 WARNING
• Always use the carrycot lifting handle
as illustrated. This is very important!
• Never leave the carrycot near the
stairs, on the top of a table or in places
where it can fall off.
• Do not use the carrycot as a cradle
outdoors or on uneven surfaces.
• Do not use the carrycot as a bed for
your child.
• Never lift the carrycot with the lifting
handle as illustrated. This is very
important!
3) Insect net
3.1 Attach the Insect net using the zip on
the edge of the hood.
3.2 To secure the insect net fasten the
press stud to the inside of the hood.
Repeat on the other side.
 Loading...