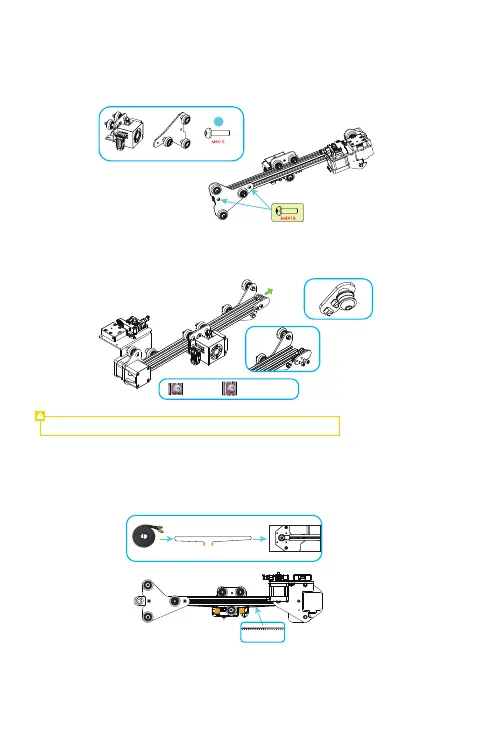
Note: To lock the ship-type nut, it must be perpendicular to the profile slot.
Install the printhead kit and X-axis passive component
A.Install the printhead kit along the X-axis profile slot
B.Fix the Z-axis passive component to the other end of the X-axis profile with two M4X16 hexagonal
cylindrical head spring washer combination screws;
Installation of X-axis adjusting component
Loosen the screws of the X adjusting component, slide the ship-type nut along the profile slot and then
pre-lock it with a tool;
Install the X-axis belt
A.Thread the belt through the pulleys of the motor and X adjusting component, then snap the ends with the
copper sleeves onto the printhead kit in the position shown;
B.Adjust the position of the X adjusting component to make the belt be tensioned.
Tighten up
①
①
②
②
Downward
24
a:Fasten it
b:Then embed it