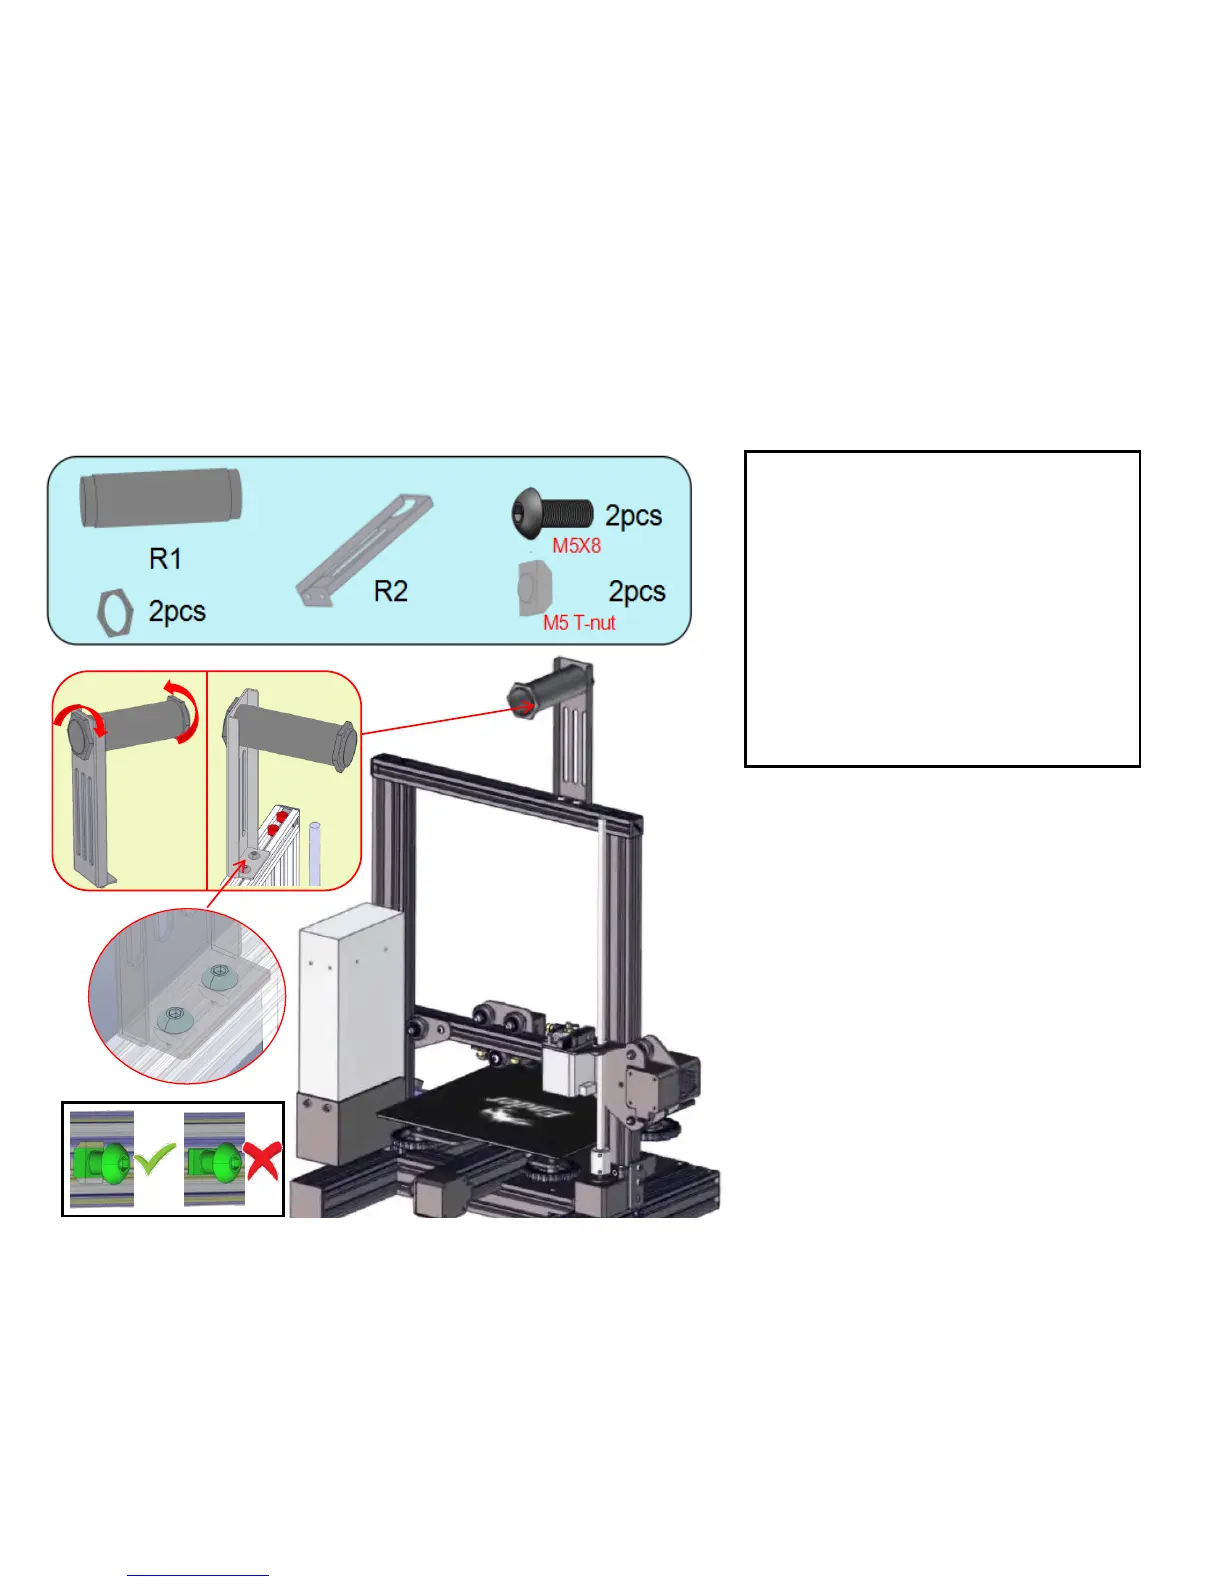
Step 11. Rack installation
Step 1. Install one end of the plastic tube (R1)
on the sheet metal bracket (R2), hand-tighten
the plastic nut on the end of the plastic tube
(R1) and tighten by hand.
Step 2. Use a M5x8 screw to pass through the
hole of the sheet metal bracket (R2). Hand-
unscrew the M5 T-nut until it it is on the last
few threads of the screew.
Step 3. Align the T-nut with the top aluminum
profile groove and tighten with an Allen key.
Step 4. The Ender-3 mechanical part installation
has been completed.
Prepare the following parts:
a. Plastic tube(R1)-(1x)
b. Plastic nut (2x)
c. Sheet metal bracket(R2)-(2x)
d. M5x8 Hex Drive Rounded Head
Screws (2x)
e. M5 T-nuts (2x)
f. 4mm Allen Key
2 1