Maintenance Cleanfit CPA871
60 Endress+Hauser
Tighten the lock nut
A0030344
40 Assembling the rinse connection
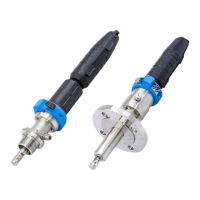
4 Lock nut AF19
5 Rinse connection adapter AF17
1. Turn the lock nut (item 4) on both of the rinse connection adapters (item 5) as far as
possible in the direction of the arrow.
2. Insert the rinse connection adapters with O-rings into the support housing (open-ended
wrench or socket wrench AF 17 mm).
3. Tighten the lock nut (AF 19 mm) in the opposite direction to the arrow.
4. Mount the support housing on the assembly. Pay attention to the positioning pin.
5. Tighten the securing screws with a torque of 4 Nm.
Test for leak-tightness
Use the plug to check that the assembly is sealed tightly:
1. Seal the rinse chamber outlet with the plug.
2. Apply pneumatic pressure to the rinse chamber inlet (max. 6 bar absolute pressure).
3. Hold the assembly under water as far as the rinse chamber. In so doing, do not
submerge the drive in the water.
The test is successful if no air bubbles appear.
 Loading...