0.1.v ediuG tratS kciuQ
Refer to User’s Manual for complete instructions 2
Confirm Password field. Then click on the
Apply buon.
4. Click on the Apply buon to save the
changes.
System Properes
1. Click on the System Properes link on the
System secon. This feature allows you to
configure the device as an Access Point or
Client Bridge.
2. Device Name: Specify a name for the
device – this is not the SSID.
3. Country/Region: Select the region from the
drop-down list.
4. Operaon Mode: Select Client Bridge,
Access Point, Client Router, WDS Bridge or
Mesh radio buon.
5. Click on the Apply buon to save the
changes.
IP Sengs
1. Click on the IP Sengs link on the
System secon. This feature allows you
to configure the LAN interface using a
stac IP address or as a DHCP client.
This IP address is also used to access the
web-based interface.
2. IP Network Seng: Select Obtain an IP
address automacally (DHCP) radio
buon if the Access Point is connected
to a DHCP server. This will allow the
Access Point to pass IP addresses to the
clients associated with it. Or you may
select Specify an IP Address radio
buon if you would like the device to
use a stac IP address. In this case, you
would be required to specify an IP
address, subnet mask, default gateway
IP address and DNS.
3. IP Address: Specify an IP address
4. IP Subnet Mask: Specify the subnet
mask for the IP address
5. Default Gateway: Specify the IP address
of the default gateway.
6. DNS: Specify the IP address of the DNS.
7. Click on the Apply buon to save the
changes.
Note: If you change the IP address here, you
may need to adjust your PC’s network sengs
to access the network again.
Wireless Network & Security
1. Click on the Wireless Network link on
the Wireless secon. This feature allows
you to configure the wireless mode,
channel, SSID, and security sengs.
2. Wireless Mode: Depending on the type
of wireless clients that are connected to
the network, you may select B, G,
B/G-mixed or SuperG.
3. Channel: Select a channel from the
drop-down list. The channels are based
on the country’s regulaon.
4. You may configure up to four different
wireless profiles. Click on the Edit
buon to modify the profile and place a
check in the Enable box to acvate the
profile.
5. SSID: The SSID is named shared amongst
all the points of the wireless network.
The SSID cannot exceed 32 characters.
6. VLAN ID: If you have enabled VLAN
tagging on your network, specify the
VLAN tag ID.
7. Suppressed SSID: Place a check in this
box if you would like to hide the SSID. By
enabling this feature, wireless clients
will not be able to watch the SSID of this
access point in a site survey.
8. Staon Separator: This is also known as
layer 2 isolaon. Clients connected to
this Access Point will not be able to
directly communicate with each other.
9. Security Mode: By default, the security
is disabled. Refer to the user’s Manual
to configure the security features such
as WEP, WPA, WPA-PSK, WPA2,
WPA2-PSK, WPA-Mixed and WPA-PSK
Mixed.
10. Click on the Apply buon
to save the
changes
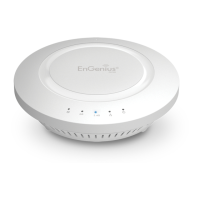
Quick Start
Guide
Wireless Access Point & Client Bridge
 Loading...