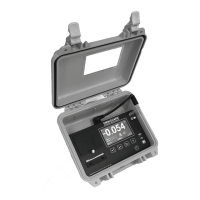
Page 10
Omniguard™ 4 Owner’s Manual
Page 11
Engineering Solutions Inc
Date & Time
The date and time settings are used as a reference time-stamp for
all logged events.
To change the Date & Time --
1. Press MENU to view the Main Menu.
2. Highlight DATE & TIME using ▲/▼ and press SELECT to change
the setting.
3. Use ▲/▼ to change the month.
4. Press 3/4 to advance to the day, using ▲/▼ to change.
5. Repeat the procedure for the year.
6. Press 3/4 to advance to the time. Use ▲/▼ to set the hours
and minutes, use the 3/4 keys to move from one to the
other.
Note: the unit operates on a 24 hour clock.
7. Press SAVE to save the updated settings and return to the Main
Menu. Press EXIT to return without changing the settings.
Alarm Setpoint Selection
The normal operating window is the area between the Alarm 1 and
Alarm 2 setpoints. These setpoints can be set anywhere within the
operating range of the unit; +/- 0.250” WC in increments of 0.005”WC.
The Omniguard 4 can also operate in units of mmWC or Pascals.
(See Pressure Units.)
Alarm 1: (default is -0.025”WC)
• upper setpoint of operating window
Alarm 2: (default is -0.100”WC)
• lower setpoint of operating window
The Omniguard 4 can be used in both positive and negative pressure
monitoring applications. The procedure for setting of Alarm setpoints
is the same for both applications.
Negative Pressure Application -- Asbestos or lead abatement
example settings: Alarm 1 @ -0.020” WC
Alarm 2 @ -0.050” WC
Positive Pressure Application -- Clean room or HVAC system
example settings: Alarm 1 @ +0.050” WC
Alarm 2 @ +0.025” WC
Normal Power-Up Sequence
If the unit was properly turned off after the previous usage,
POWER OFF will print. Otherwise POWER FAIL will print,
indicating that an AC power failure may have occurred. Either
message will be followed by the date and time the unit was last
powered off.
A diagnostic test will automatically run and the unit will print the date,
time and the current alarm setpoints. The unit will then immediately
begin to monitor containment pressure.
Until the containment pressure has reached the operating window, the
status bar will indicate WAITING FOR PRESSURE and the STATUS
LED will flash green.
Note: Logging and printing of monitored pressure
readings does not begin until the containment
pressure has reached the operating window!
You will need to customize the factory Alarm 1 and Alarm 2
setpoints for your jobsite requirements!
Once the containment pressure reaches the operating window (the
area between the Alarm 1 and Alarm 2 setpoints) the status bar
changes from WAITING FOR PRESSURE to NORMAL and the
STATUS LED changes to a steady green. NORMAL OP is then
printed along with a time-stamp. The STATUS LED changes to orange
to warn of an impending Alarm condition when the pressure is within
0.005”WC of the Alarm setpoints.
Contractor Name
The Omniguard 4 can store the name of the Contractor that is using
the unit. The Contractor name will appear in all Job logs and printed
Reports. Only one name can be stored.
To set the Contractor Name --
1. Press MENU to view the Main Menu.
2. Highlight CONTRACTOR NAME using ▲/▼.
3. Press SELECT to view or change the setting.
4. Use the ▲/▼ keys to change the character. Upper and lowercase
letters and numbers are all usable characters to enter.
5. Use the3/4 keys to move to the next/previous character to
set.
6. When the entire name has been entered, press SAVE to save the
new name and return to the Main Menu.
Pressing the EXIT key will return you to the Main Menu without saving
the updated Contractor Name.
-0.050"
Alarm 2
-0.020"
0.000"
NORMAL OPERATING WINDOW
Alarm 1
ogiii hi and lo
INCREASING
VACUUM LEVEL
Negative Pressure
(containment)
Application
 Loading...