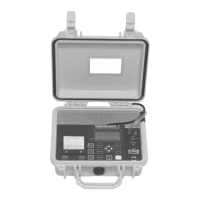
Page 12
Omniguard™ 4 Owner’s Manual
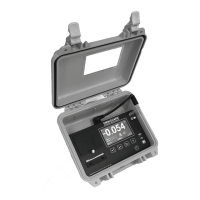
Page 13
Engineering Solutions Inc
new Job name. The previous job will end and a summary of it will
print, followed by a NEW JOB message.
Pressing the EXIT key will return you to the Monitor
Screen without starting a new job.
When completed, the screen will display Ending Last Job. After a few
moments the unit will automatically return to the Monitor Screen.
The memory has a capacity to store approximately 120+ days of
normal operation and 400 alarm messages. When the memory is full,
the new data will begin to overwrite the oldest data.
Note: Overwritten data cannot be retrieved.
Example of Printout after START JOB is pressed--
Alarm Condition
Once the containment pressure reaches the operating window, the
unit will be in normal operation and the alarms will be armed. If the
containment pressure rises or falls outside the operating window,
the following will occur:
1. Internal buzzer and the Remote Auxiliary Alarm (if present) will
sound and will remain active until ALARM SILENCE is pressed.
2. Any accessory devices (Telephone Autodialer, Cellular Wireless
Modem, or WiFi Adapter) will activate and will remain active until
the correct pressure is restored and the unit returns to normal
operation
3. The status bar will change to >>ALARM<< and begin flashing.
The STATUS LED will flash red.
4. Printer will indicate which alarm setpoint was exceeded. The print/
log rate will increase to the preset alarm rate. Printouts will show
the time followed by the pressure reading.
Example of Setting Alarm Levels
This is an example of setting the alarm levels for negative containment
area with an operating window of -0.020” to -0.050” WC.
To change the Alarm Setpoints --
1. Press MENU to view the Main Menu.
2. Highlight ALARM SETPOINTS using ▲/▼.
3. Press SELECT to view or change the setpoint values.
4. Use ▲/▼ to set Alarm 1 to -0.020”WC. The value will change
in 0.005” increments. The bar graph at the right of the screen
indicates the relative operating window size within the operating
pressure range of the unit.
5. Press 3/4 to highlight Alarm 2. Use ▲/▼ to set the value to
-0.050”WC.
6. Press SAVE to save the updated settings and return to the Main
Menu.
Pressing the EXIT key will return you to the Main
Menu without saving the updated settings.
Once the containment pressure reaches a value between -0.020” and
-0.050” WC the unit will be in normal operational mode.
Then, if the containment pressure ...
... rises to -0.019” WC, Alarm 1 will activate.
... falls to -0.051” WC, Alarm 2 will activate.
Starting/Ending A Job
The START JOB key is used to end the current job, which will complete
the job log and cause a Job Summary report to print, as well as start
and name the new job.
START JOB will not erase any previous job logs, nor will it alter any
other settings (such as the Alarm Setpoints). A report for the previous
job can be printed at any time.
Note: It is a good idea to print a report of the
previous job (using PRINT JOB) before pressing
the START JOB key. A report for the previous job
may also be printed at a later time by selecting
PRINT/VIEW JOB LOGS from the main menu.
To end the previous job and start a new Job --
1. Press the START JOB key.
2. Use the 3key to move to the cursor to the beginning of the line.
Then use ▲/▼ keys to change the character. Upper and lowercase
letters and numbers are all usable characters.
3. Use the4 key move to the next character to set.
4. When the entire name has been entered, press SAVE to save the
END JOB
Johnson Bldg
JOB SUMMARY
JOB NAME:
Johnson Bldg
JOB START:
10-26-08 05:38
JOB END:
11-01-03 17:09
TIME IN NORMAL OP:
6 days 10 hrs 23 mins
NUMBER OF ALARMS:
2
TIME IN ALARM:
16 mins 28 secs
START JOB
Wilson Remodel
o
Ending Current Job
Summary of Ended Job
Starting New Job
 Loading...