© 2019 Enphase Energy Inc.
2. Install the Wall-Mount Bracket
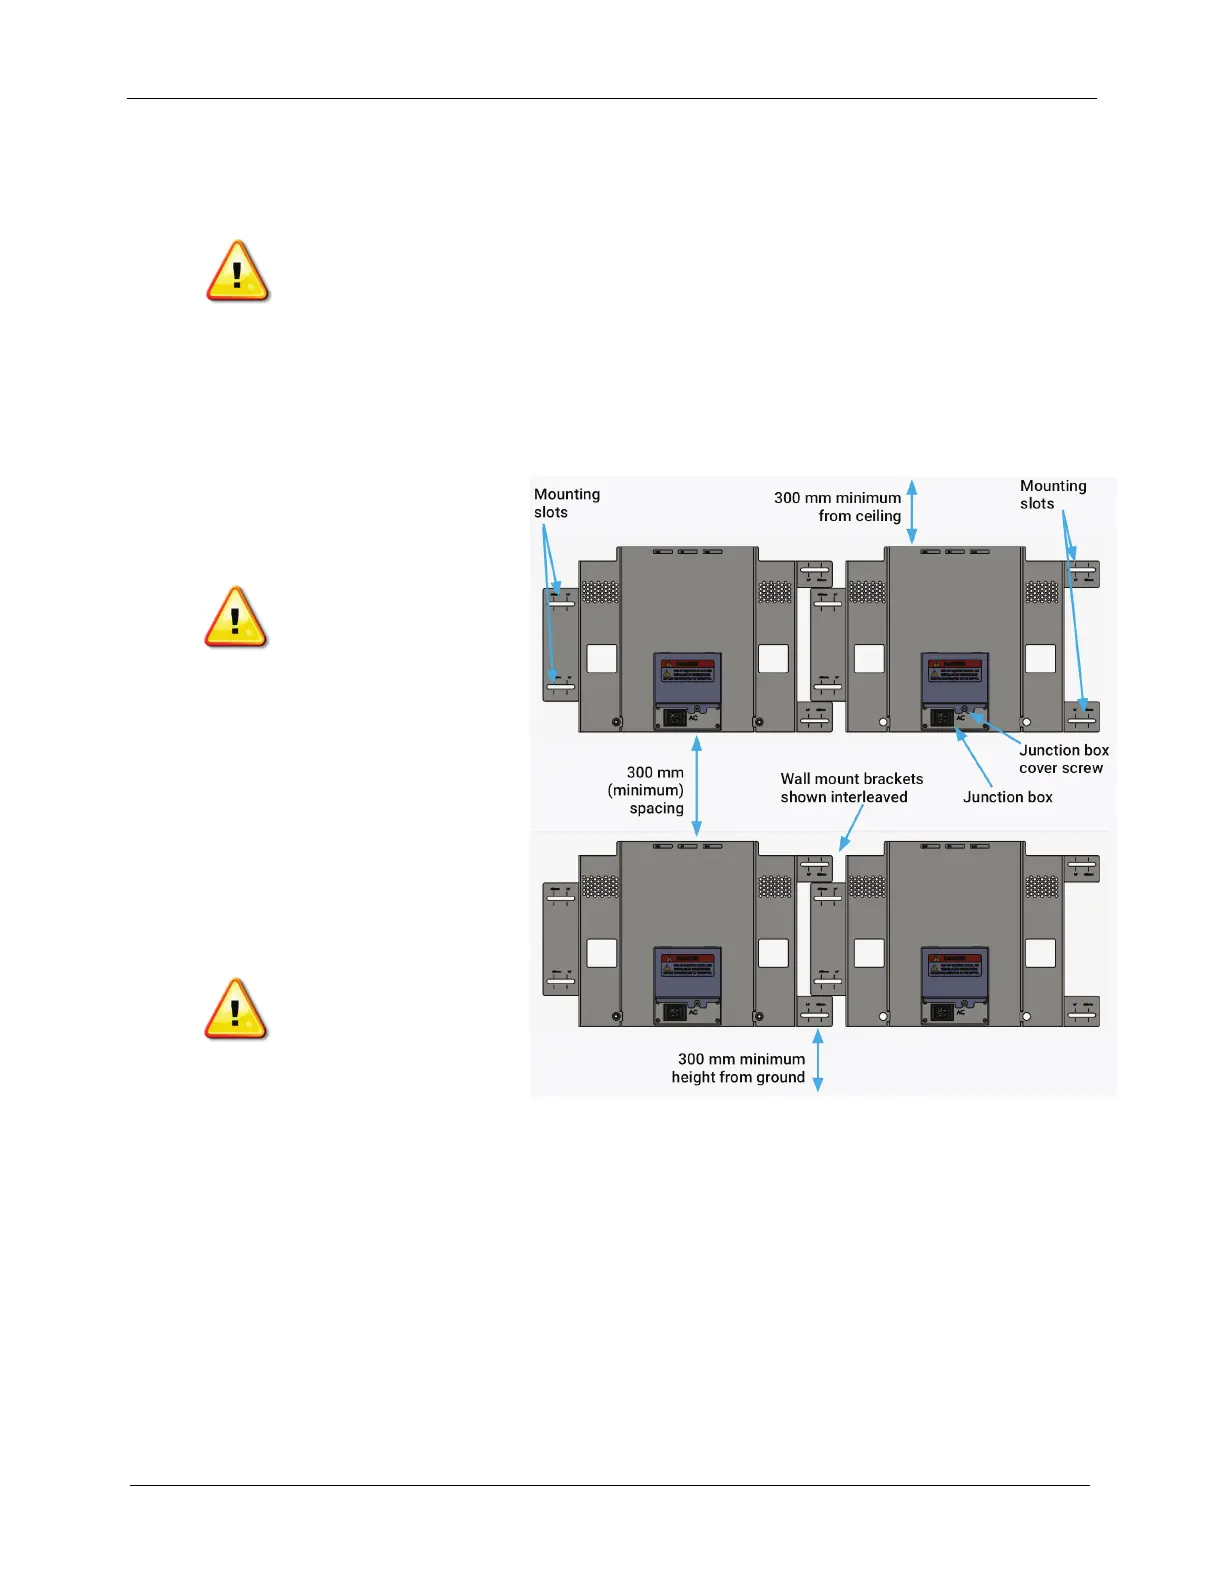
a. Make sure that the wall-mount bracket matches the wall stud spacing and that the lowest wall-
mount bracket position meets clearance requirements as shown.
WARNING! Risk of injury and equipment damage. Protect the AC Battery from damage and
improper use.
b. Remove the appropriate knockout(s) for the planned entry into the wall-mount bracket junction box:
• If wiring inside the walls, use the knockout(s) at the back of each junction box. If using a conduit,
use the knockouts at the bottom of the junction box.
• If installing only one battery or if installing the last battery in an array, use only one knockout.
• Loosen the screw securing the junction box cover and remove the cover. Keep the cover handy
as you will need it later.
c. Starting at battery position closest
to the power source, mark a level
line on the wall as a guide.
WARNING! Multiple risks.
Make sure not to drill or
attach into electric wiring
or pipes that are in the
wall!
d. Place the wall-mount bracket on
the wall so that the mark on the
bracket aligns with the centre of
the stud. Use a level to keep the
top of the wall-mount bracket flat,
and attach each corner of the wall-
mount bracket using one screw
and washer for each slot.
e. Verify that the wall-mount bracket
is solidly attached to the wall.
WARNING! Risk of injury
and equipment damage.
Do not mount an AC
Battery on a bracket that
is not properly mounted.
f. If installing additional batteries,
install the adjacent wall-mount brackets in an interleaved fashion, as needed. Be sure to align the
mark on the adjacent wall-mount bracket to the centre of the wall stud. A small gap in between the
adjacent wall-mount brackets is normal. You may install another row of wall-mount brackets above
the one already installed. Maintain at least 300 mm (one foot) clearance between rows.
Brackets are available in two widths to accommodate 450mm and 600mm stud-spacing. Bracket types and
dimensions are shown.
 Loading...