17
Initial Installation
QUALIFIED INSTALLERS ONLY
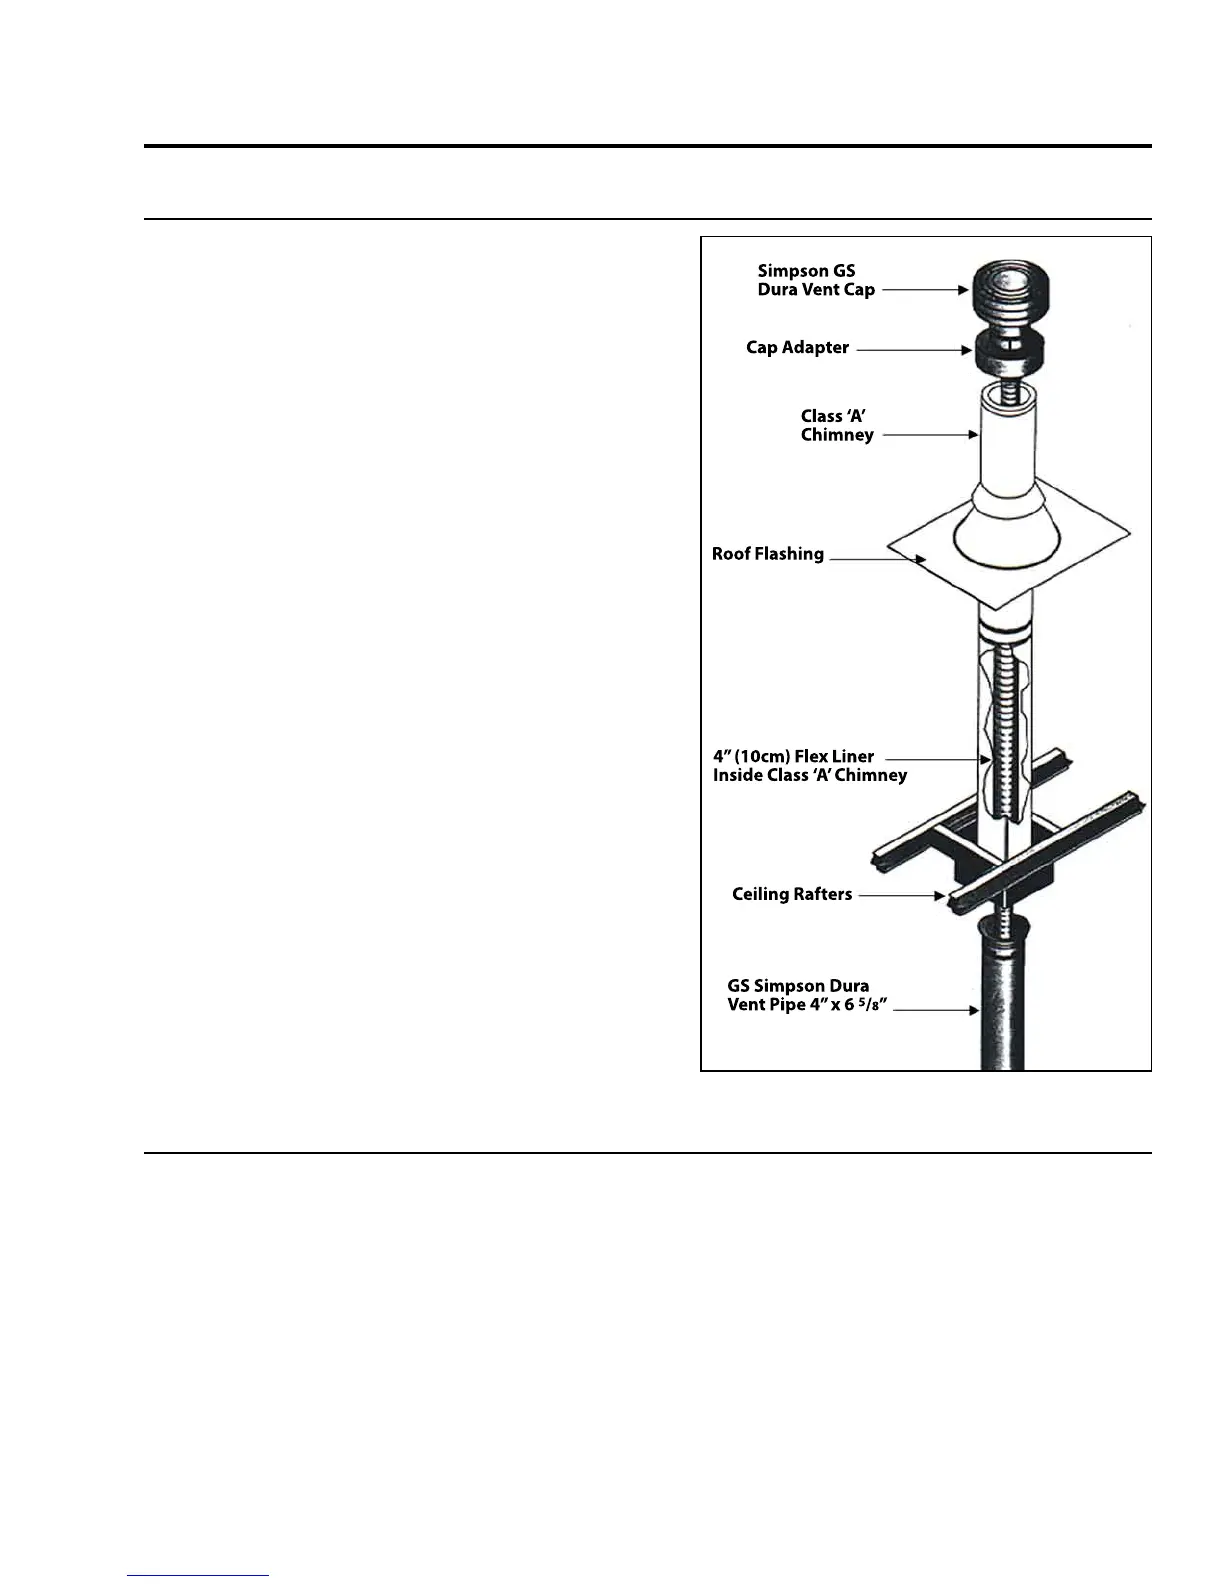
VENTING INTO A CLASS ‘A’ CHIMNEY:
This model is also certied and tested to vent into CLASS ‘A’
wood stove chimneys.
Place the freestanding direct vent appliance in the desired
location.
Use a conversion kit from Simpson Duravent (931, 932, or
933), or Security Chimney (SV4CCK1, SV4CCK2, or SV4CCK1).
Which kit is used will depending on the inner diameter of the
CLASS ‘A’ chimney that this appliance is to be vented into.
Place a bead of high temperature silicone or mil-pac at each
connection to ensure a tight seal.
NOTE: An approved 4” (10 cm) diameter ex liner must be
used in the application.
NOTE: Use Simpson Dura Vent from the top of the appliance
until this vent reaches the CLASS ‘A’ chimney. Install the retro
adapter to the top section of GS direct vent pipe and install the
ex liner to the retro adapter.
Fully line the CLASS ‘A’ chimney with a minimum 4” (10 cm)
ex liner to the top of the CLASS ‘A’ chimney.
Place a bead of high temperature silicone to the Simpson Cap
adapter and securely attach the ex liner to the adapter.
Secure the cap adapter to the CLASS ‘A’ chimney ensuring an
airtight seal.
Install the vertical termination cap.
Light the unit and ensure proper operation.
THE USE OF ANY EXISTING CHIMNEY AS AN AIR INTAKE
IS NOT COVERED UNDER THE ANSI Z21.88-2002 CSA
2.33a-2002 TEST METHODS AND THE RESULTING ITS/WH
PRODUCT CERTIFICATION. THE CODE AUTHORITY HAVING
JURISDICTION MUST BE CONSULTED PRIOR TO PROCEEDING
WITH THIS INSTALLATION METHOD.
4” (10cm) Flex Liner
Inside Class ‘A’ Chimney
GS Simpson Dura
Vent Pipe 4” x 6
5
/
8
”
Figure 24: Assembly of Venting into a Class ‘A’
Chimney.
CONVERTING TOP VENTED INTO REAR VENTED:
This unit has been shipped as a 30,000 Btu/hr top-vented freestanding unit. This unit can be converted to a rear
vented unit with a 36” (915 mm) snorkel for some installation applications.
1. To convert this unit to a rear vented model you must remove the ue pipe adapter and turn to the rear vent
position. See sections ‘Installation of Rear Vented Appliance’.
2. Carefully remove the trivet and the stovetop. Place on a soft surface as not to damage the porcelain nishes.
3. Remove the four (4) screws that hold the ue connection to the unit body (see Figure 25). Carefully remove the
elbow being sure not to damage the gasket that is glued to the ue collar elbow.
4. Turn the elbow to the rear vent position and re-fasten with the screws removed form the previous step (see
Figure 26).
 Loading...