Initial Installation
QUALIFIED INSTALLERS ONLY
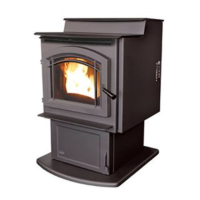
Figure 25: Step 3 of Converting Top Vented into Rear
Vented.
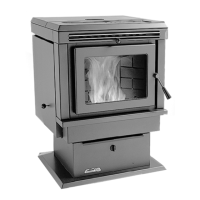
Figure 26: Step 4 of Converting Top Vented into Rear
Vented.
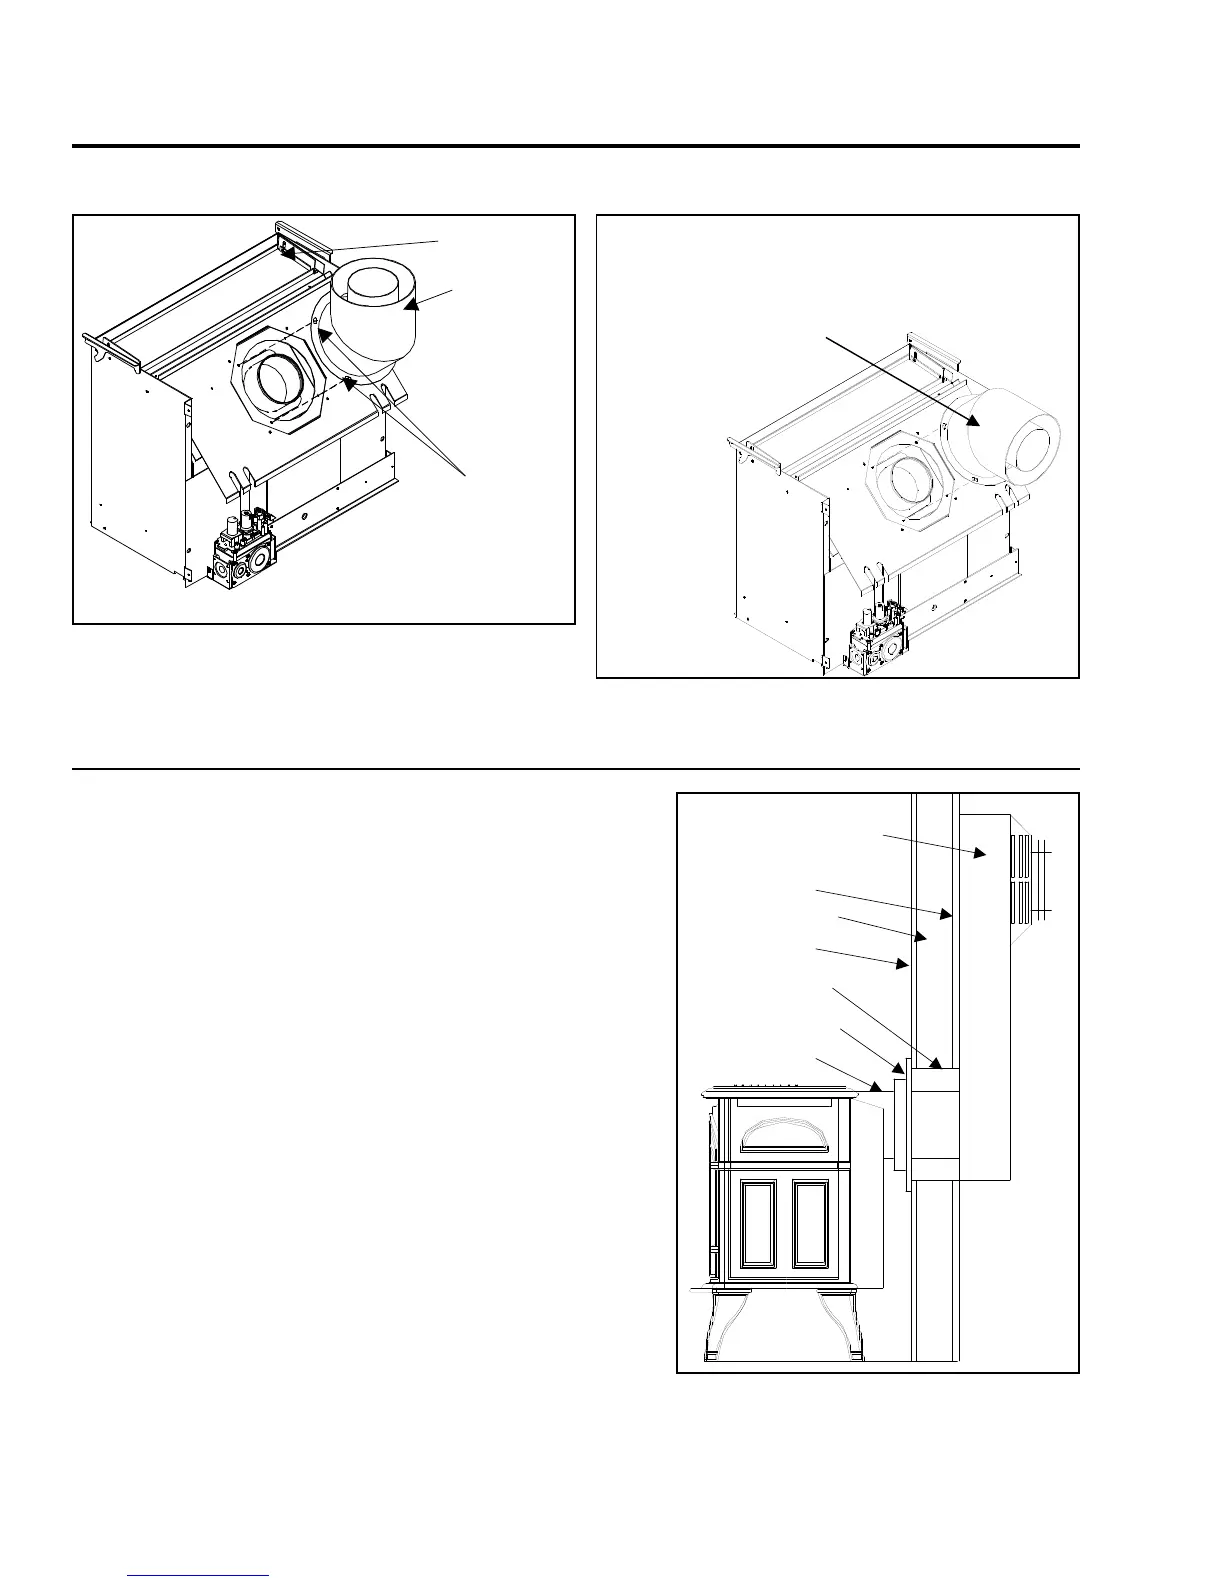
INSTALLATION OF REAR VENTED APPLIANCE:
Place the unit into position.
Attach a small section of pipe on the unit and mark exterior wall
where vent would pass through the wall.
Cut a 10” (25.4 cm) minimum hole in the wall to maintain clearances
to combustibles. Frame hole as shown in Figure 8.
Install a wall thimble.
Install interior nished collar.
Install the vent section through the wall.
THIS UNIT MUST BE VENTED WITH A 36” (91 cm) SNORKEL KIT IF
UNIT IS RATED FOR 30,000 Btu/hr NG and 26,000 Btu/hr LP.
Seal around the vent terminal to the structure using a non hardening
mastic.
Can not be used for 45° corner installations. See ‘Installation of
Top Vented; Horizontal Termination’ and ‘Installation of Top Vented;
Vertical Termination’ for corner installations.
Figure 27: Installation for Rear Vented;
30,000 Btu/hr.
18
 Loading...