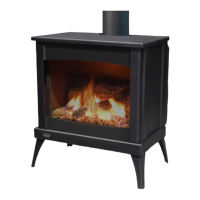
FREESTANDING DRAFTHOOD ADAPTOR:
This Drafthood Adaptor is a complete assembly and is ready to t onto your Westport in a vertical vent application
only. With the Drafthood Adaptor correctly installed and wired to the gas control valve. Your Direct Vent Fireplace
can be vented like a B-Vent Fireplace.
INSTALLATION:
WARNING: This Freestanding Drafthood Adaptor must be tted by a qualied service technician.
Step 1
Remove the Drafthood Adaptor from the packaging. Ensure the unit and wire harness are undamaged. If there is
damage contact your dealer, distributor, or courier company before starting this installation.
Step 2
Install the adaptor so the wires exit to the rear of the replace. Slide the Drafthood Adaptor over the outlet pipe of
the replace until the bottom of the adaptor collar stops on the top of the outlet. The Drafthood Adaptor must be
safely secured to the vent anges with either self-tapping screws and/or high temperature sealant.
WARNING: During the tting of the Drafthood Adaptor, ensure that the wires are not pinched between the adaptor
and the collar and/or ue outlet. Ensure that the opening of the Drafthood Adaptor is not blocked or obstructed.
Step 3
Being careful not to run any wiring tight across metal edges; connect them to the valve and “ON/OFF” switch (refer
to Figure 30).
Step 4
Adjust the restrictor plate to position 2.5 of 5. See the vent restrictor settings in the instruction manual.
Step 5
Adjust the embers on the burner so they don’t cover the burner ports.
WIRING DIAGRAM:
The replace connections are
labelled in Figure 30. When
installing the Drafthood Adaptor
onto a replace tted with an
optional wall switch or an optional
thermostat, remove one wire from
the switch to the gas valve and
connect the Drafthood Adaptor
harness as shown in Figure 30.
Initial Installation
QUALIFIED INSTALLERS ONLY
Figure 30: Wiring Diagram for Electrical Connection.
20
 Loading...