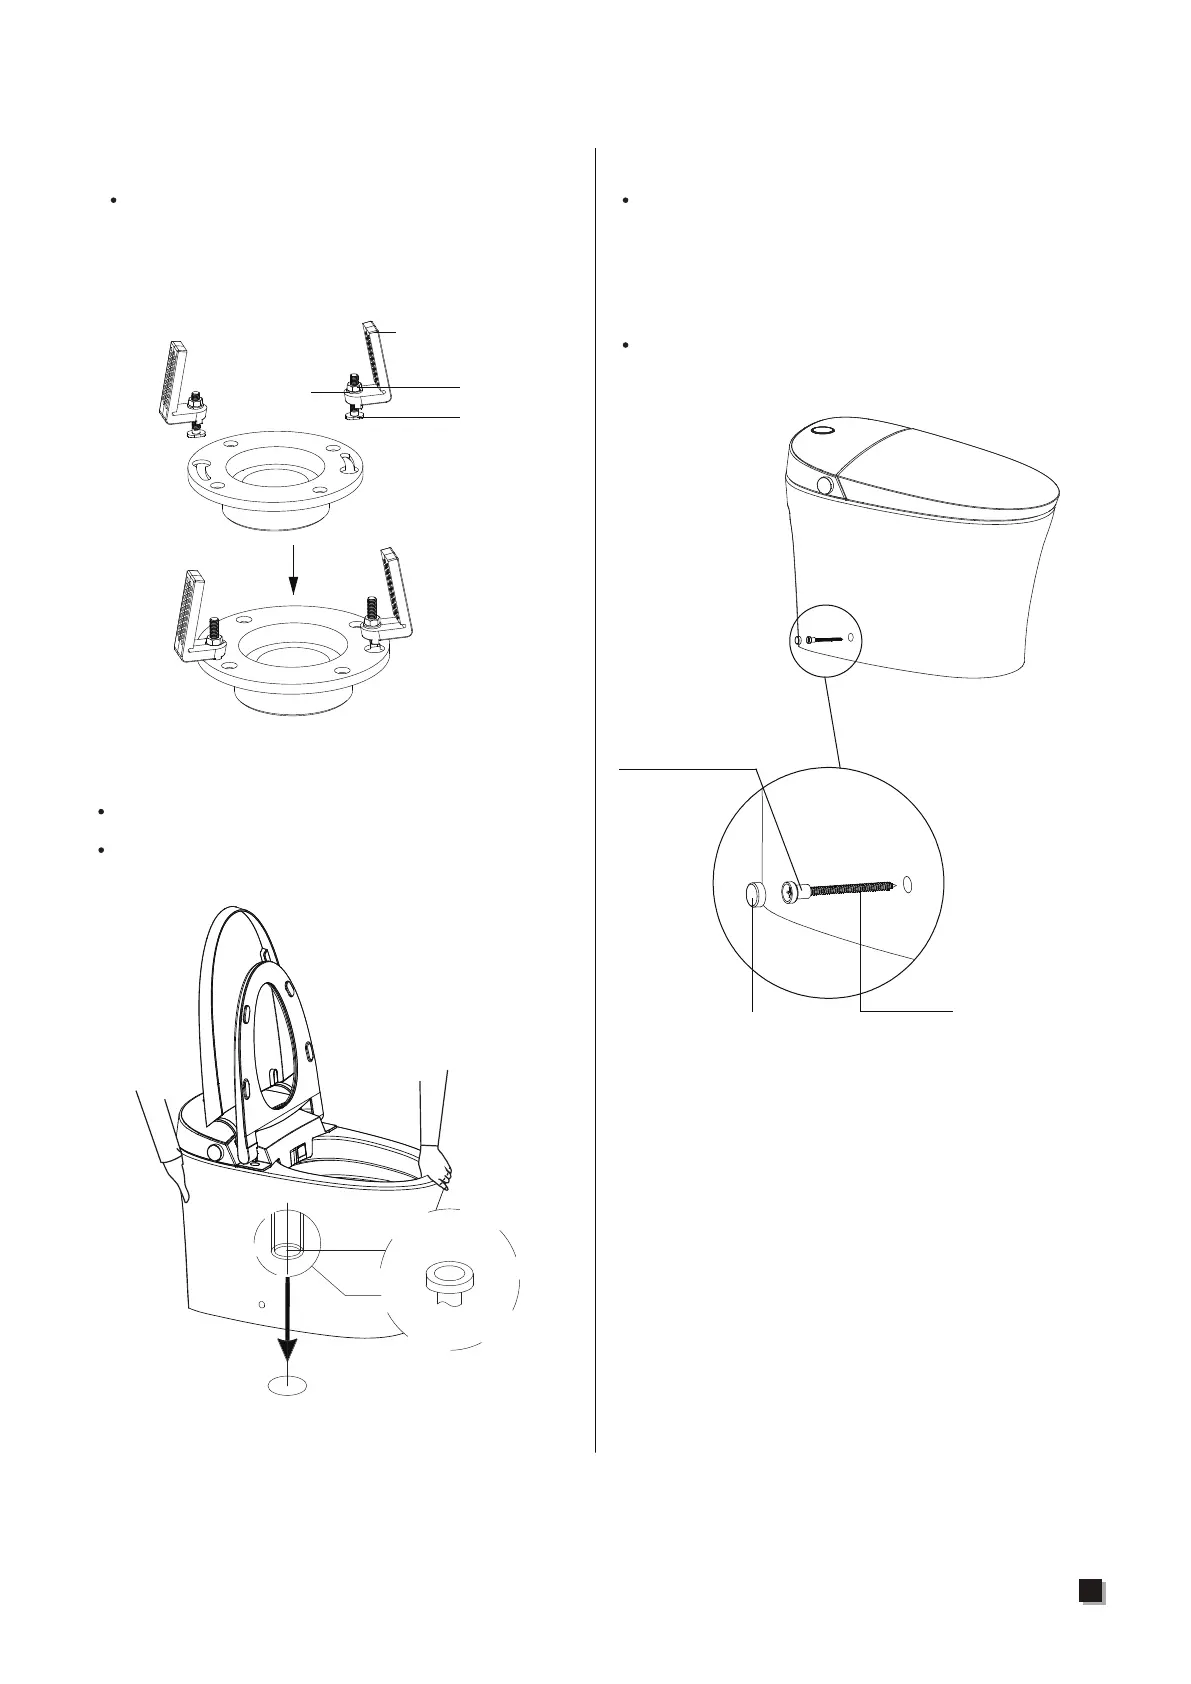
Nut
Bolt
4. Mounting bracket installation
Assemble the mounting bracket with
bolts and then install them to the
pre-installed flange plate on the ground
and lock tight with nuts.
Mounting bracket
Washer
Fixing sleeve
Screw
Decorative cap
6. Screw installation
Put the screw through the fixing sleeve
and then install it through the holes (on
both sides of the toilet ceramic) to the
mounting bracket on the ground. Lock
tight.
Install the decorative cap on the fixing
sleeve.
5. Ceramic toilet installation
Install a sealing flange into drain outlet.
Install ceramic toilet on the corresponding
position.
Toilet drain
outlet
Sealing flange
Note:
1. Two people are required to carry the toilet.
2. Please clean up the drain outlet;
3. Please make sure ceramic toilet outlet sits
perfectly on drain outlet.
11