14Placing / mounting VISION 3T
C Mounting the product on a wall
CAUTION
Danger of accidents or damages!
Drilling into e�g� cables and can lead to accidents�
> Check whether there are any cables or pipes in the wall�
The wall type is an example - other wall types may require dierent mounting.
1 Choose a position so that the camera meets the eye-height of meeting
participants
� Hold the mounting plate against the wall, balance it and add two
marks�
2 Drill two holes�
3 Insert the two dowels�
4 Hold the mounting plate against the wall and x it with the screws� Start on the
left and bring it in balance with the other screw�
5 Hold the collaboration bar and connect the required cables as the space is small
when nally mounted > see page 15�
6 Position the collaboration bar and tighten the screws�
1 2
15Connecting / preparing devices
Connecting / preparing devices
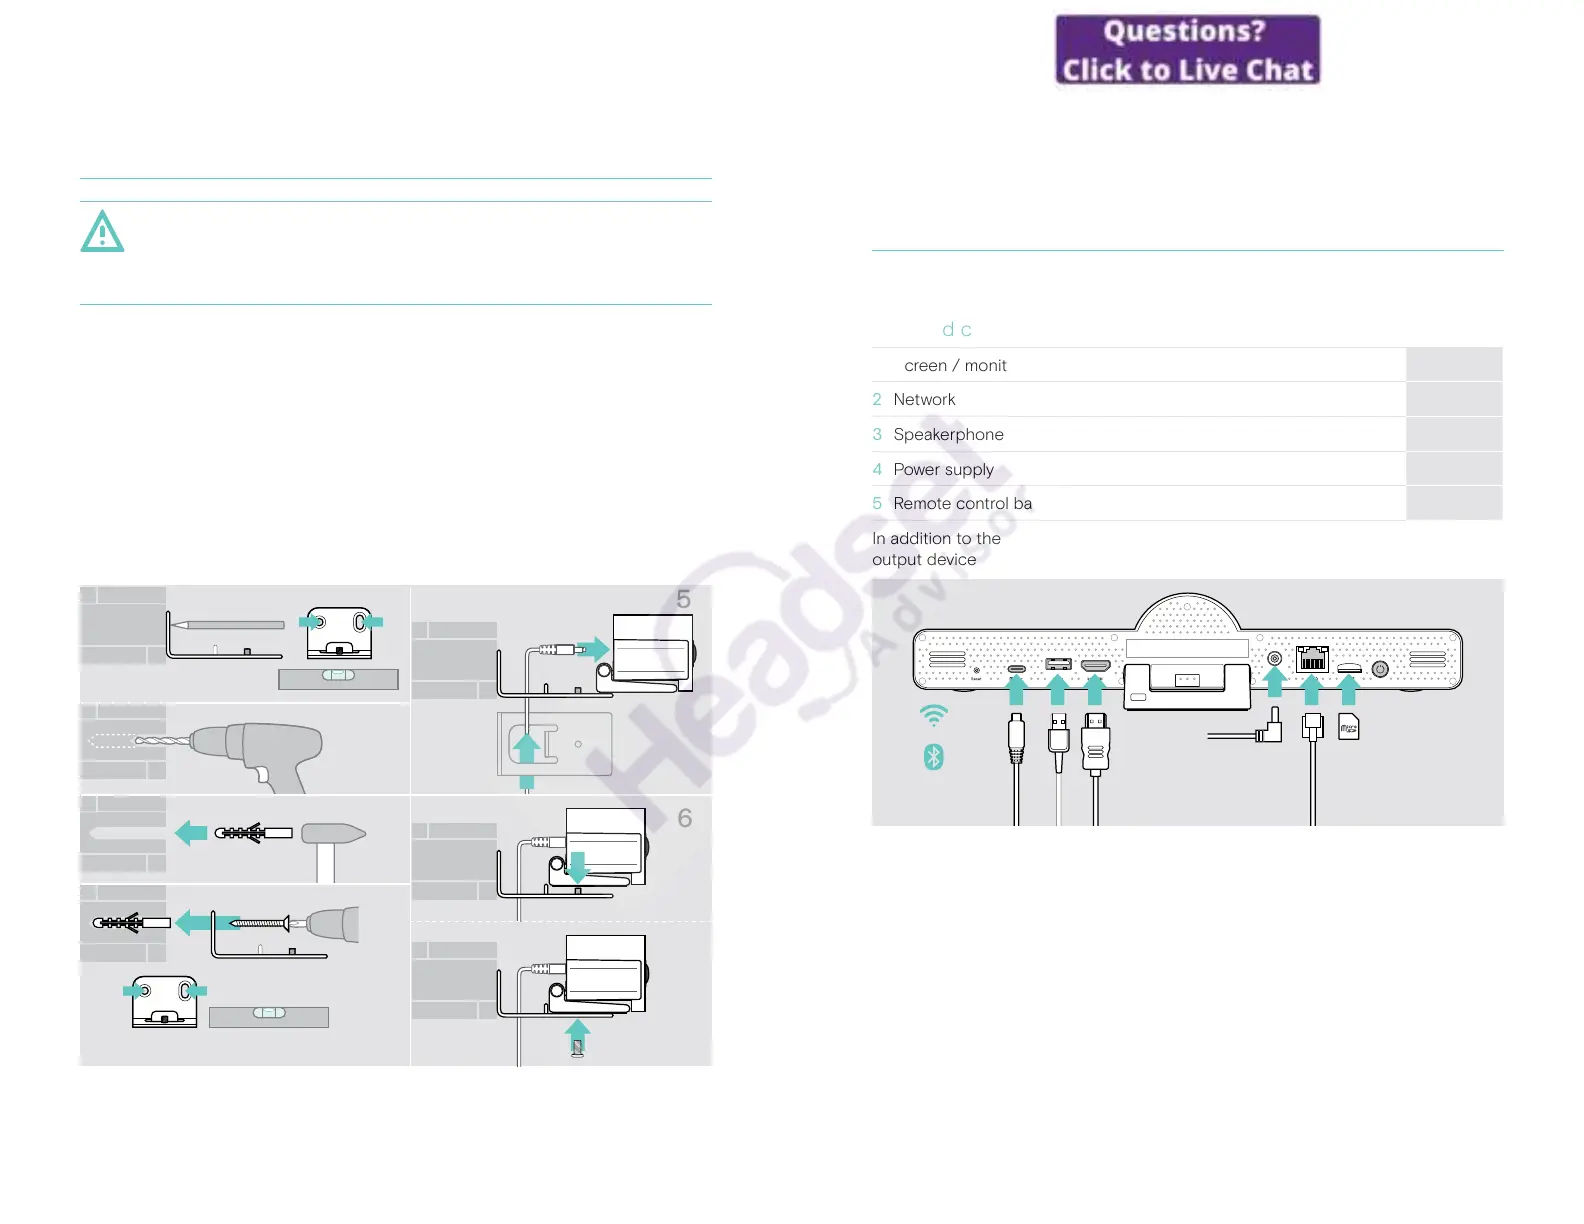
Connection possibilities
The collaboration bar with its speakerphone works as an All-in-one solution� You
only need a screen/monitor, internet access and a Microsoft Teams account�
Required connections & actions
Page
1 Screen / monitor 17
2 Network 18
3 Speakerphone 19
4 Power supply 20
5 Remote control batteries 21
In addition to the listed devices you can connect a variety of dierent in- and
output devices to the collaboration bar via the ports shown below�
For even more connection possibilities see EXPAND SP 30T User Guide�
 Loading...