D
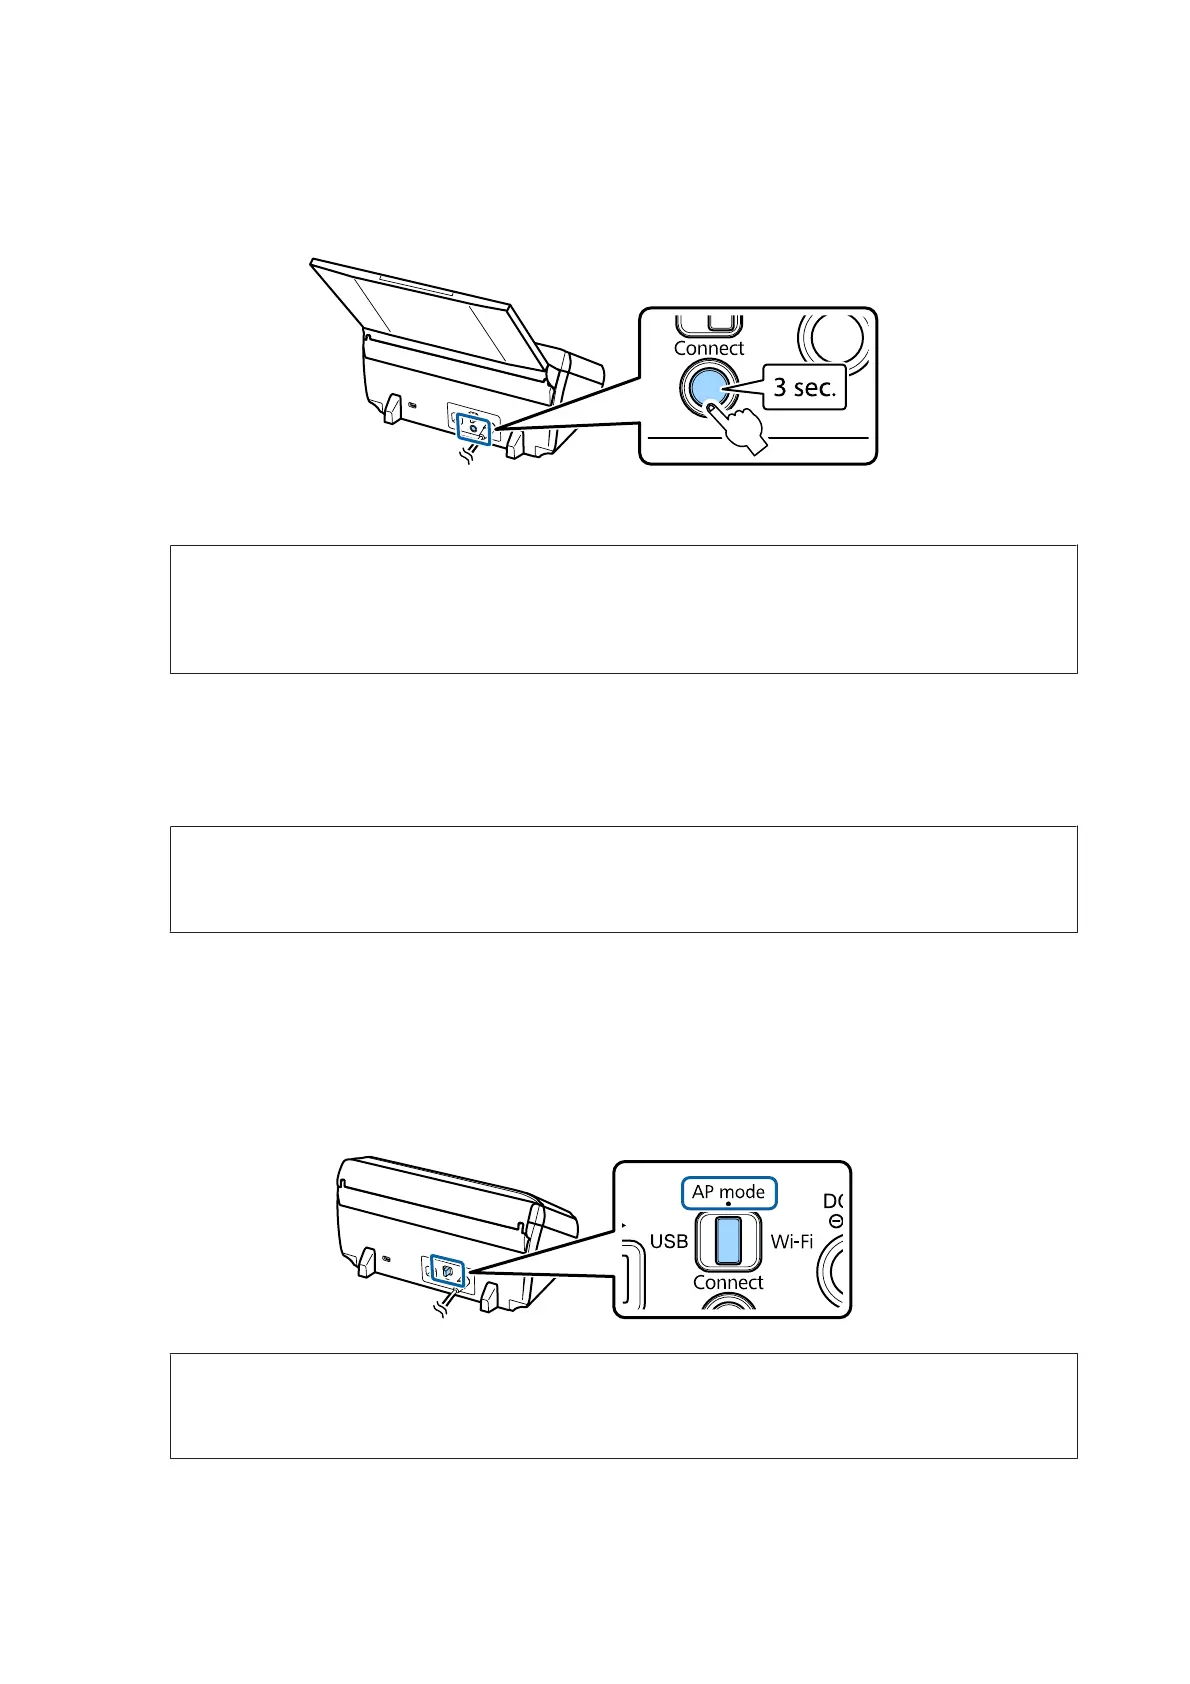
Hold down the Connect button on the product for at least three seconds, until the Status and Error lights on the
product flash alternately.
E
Press the Wi-Fi Protected Setup (WPS) button on the wireless router (access point).
Note:
If the wireless router (access point) does not have a WPS button, you can enable WPS using the software supplied
with your wireless router (access point). For more details, see the documentation supplied with the wireless router
(access point).
When the Status light on the product stays on, the connection has been established.
To scan you need to configure the scanning software on your computer.
& “Configuring Scanning Software on Your Computer” on page 19
Note:
See the following section if Wi-Fi setup fails.
& “Cannot connect to access point” on page 25
WPS PIN code
To perform the setup, enter eight numbers (PIN code) into the wireless router (access point). The PIN code for the
product is 01234565.
A
Set the connection mode switch on the product to AP mode.
Note:
Even though the WPS PIN code method sets up the product for an infrastructure network, you need to set the
connection mode switch to AP mode in this step.
DS-560 Network Guide
Using Product via Network
9
 Loading...