13
Adjust method:
Note:
Note:
Note:
Note: Every
Every
Every
Every time
time
time
time after
after
after
after the
the
the
the adjustment,
adjustment,
adjustment,
adjustment, before
before
before
before print
print
print
print another
another
another
another vertical
vertical
vertical
vertical calibration,
calibration,
calibration,
calibration, it
it
it
it is
is
is
is required
required
required
required to
to
to
to fasten
fasten
fasten
fasten the
the
the
the
3
3
3
3 screws
screws
screws
screws on
on
on
on the
the
the
the carriage
carriage
carriage
carriage plate.
plate.
plate.
plate. Keep
Keep
Keep
Keep adjusting
adjusting
adjusting
adjusting until
until
until
until the
the
the
the second
second
second
second pass
pass
pass
pass is
is
is
is perfectly
perfectly
perfectly
perfectly aligned
aligned
aligned
aligned with
with
with
with the
the
the
the first
first
first
first
pass.
pass.
pass.
pass.
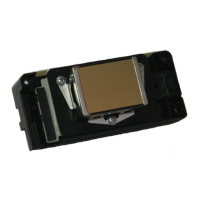
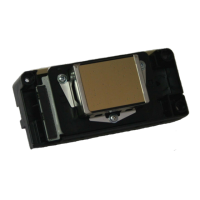
Moreover, after adjust the printhead vertical alignment, check the space between two printhead (note:
space between two printhead is 1 nozzle):
Case1: two printhead overlap
Case2 : two printhead separate
A. Loosen the 3 screws on the carriage plate:
B. Turn the screw anti-clockwise:
Two printhead
overlap , need to
adjust
Two printhead
separate , have to
adjust