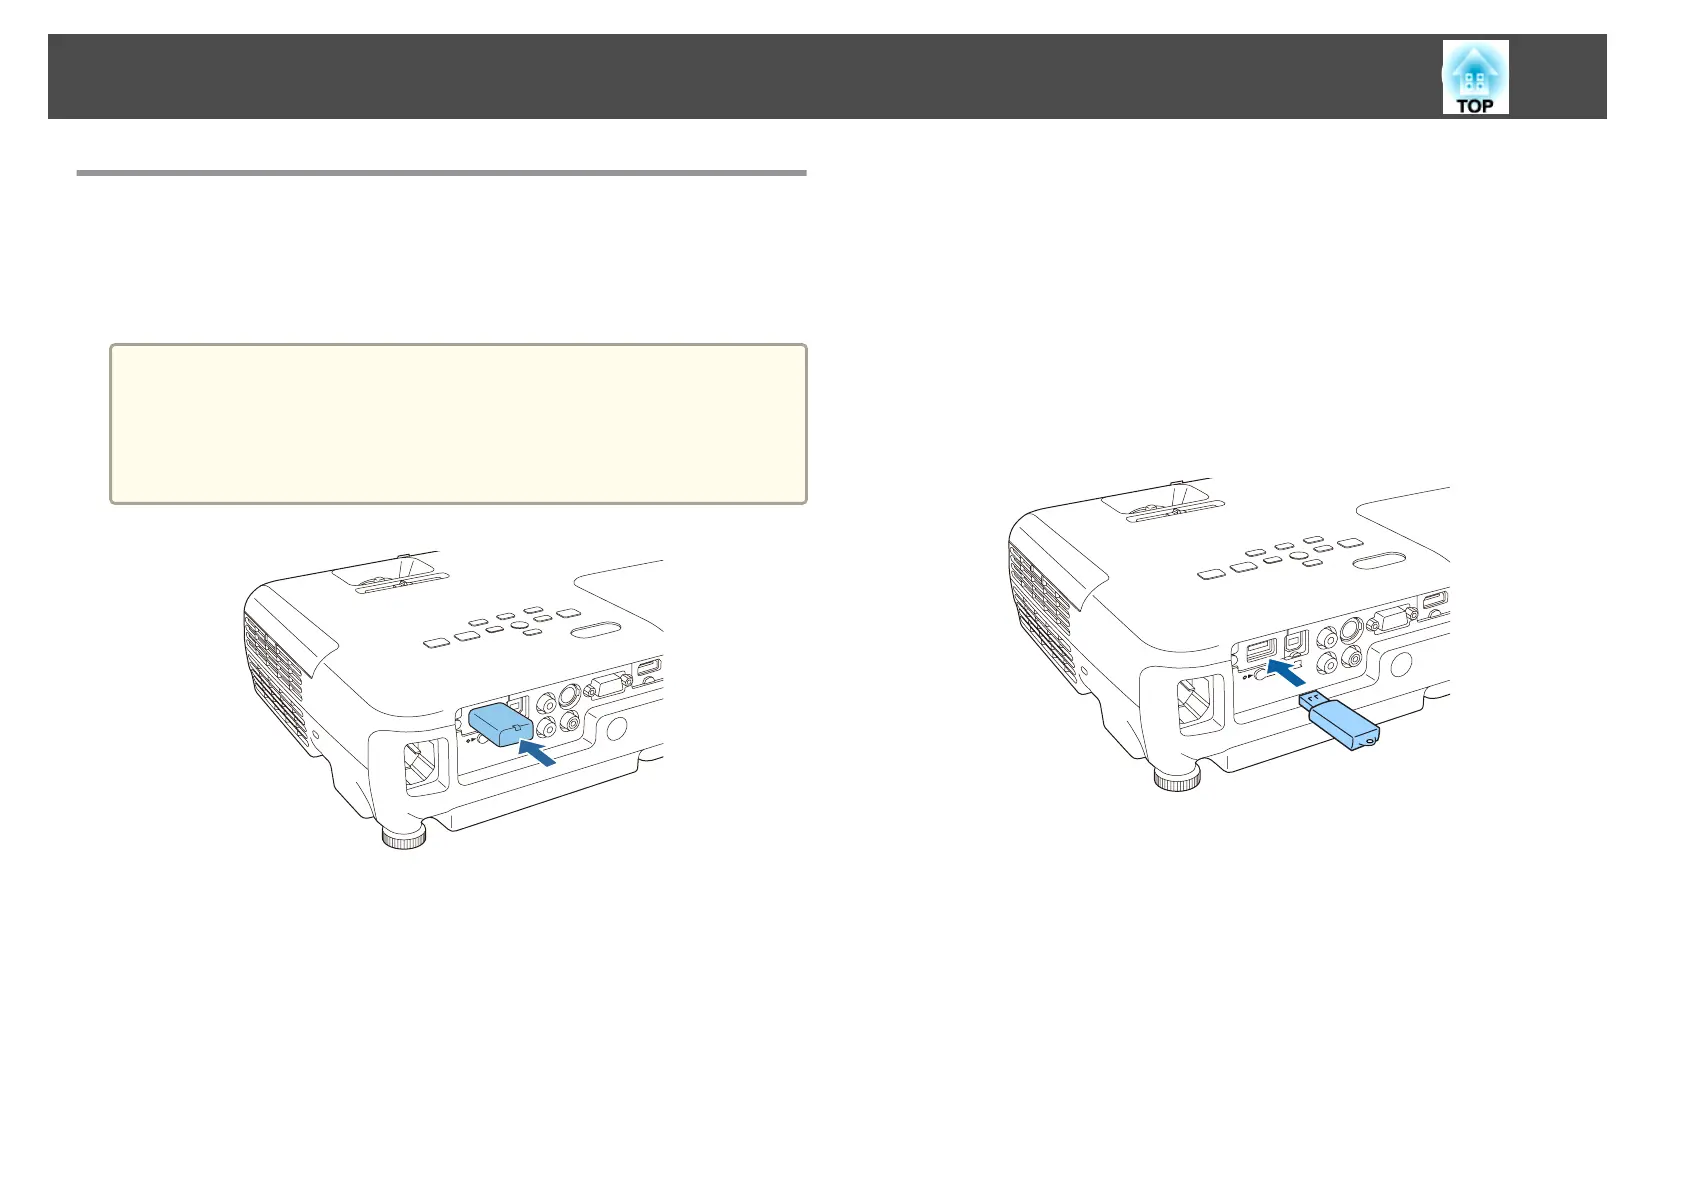
Installing the Wireless LAN Unit
By installing the supplied or optional wireless LAN unit, you can project a
computer screen over a network.
Connect the wireless LAN unit to the projector's USB-A port.
a
• When connecting to the network using wireless LAN, make sure you
make network settings from the Configuration menu.
s "Wireless LAN menu" p.78
• When moving the projector, make sure you remove the wireless
LAN unit for safety reasons.
Installing the Quick Wireless Connection USB Key
When installing the optional Quick Wireless Connection USB Key, you
need to remove the Wireless LAN unit first, and then connect the Quick
Wireless Connection USB Key to the USB-A port.
a
Turn on the projector, and then press the [LAN] button on the
remote control.
The LAN standby screen is displayed.
b
Check that the SSID and IP address information are displayed on
the LAN standby screen, and then remove the Wireless LAN
unit.
c
Connect the Quick Wireless Connection USB Key to the USB-A
port.
d
When the message "Network information update complete.
Remove the Quick Wireless Connection USB Key Adapter." is
displayed, remove the Quick Wireless Connection USB Key.
e
Reinstall the Wireless LAN unit on the projector.
f
Connect the Quick Wireless Connection USB Key to the computer
you are using.
For the steps from here on, see the User's Guide supplied with the
Quick Wireless Connection USB Key.
Connecting Equipment
26