After you install the color ribbon cartridge, run the self test as
shown on page 1-10.
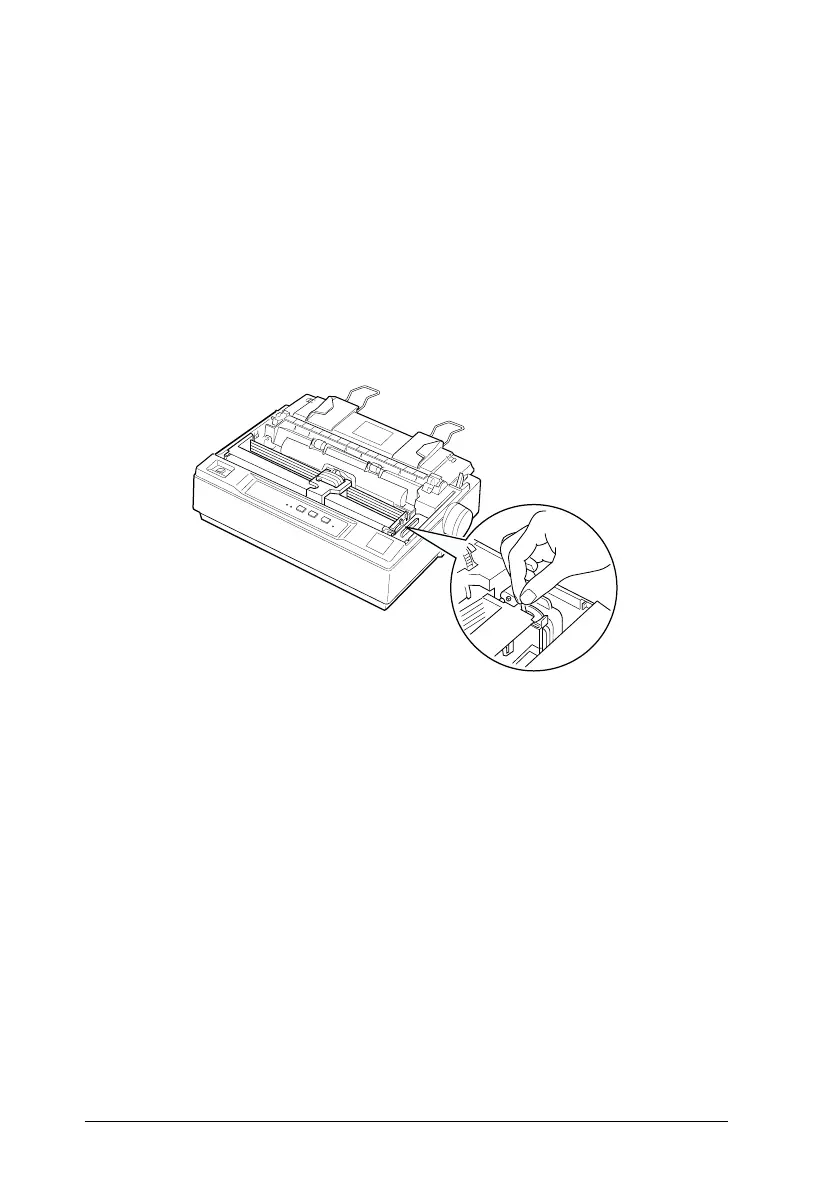
If the top or bottom edge of the characters in the self test are a
different color from the rest, adjust the ribbon angle. Check the
characters printed in red. If the top edge is blue, move the color
ribbon adjustment lever forward. If the bottom edge is yellow,
move the lever backward. Then print another self test to check
your adjustment. Repeat this process until the ribbon is properly
adjusted.
Note:
When you print using the color ribbon, the print speed is reduced.
To switch to the black ribbon, remove the color ribbon as shown in
the manual that comes with the color upgrade kit; then install the
black ribbon as shown on page 1-5.
You do not have to remove the motor unit.
BB2-28
L
Blueberry REV.F
A5 size Chapter 2
95/05/25
2-34
Using the Printer

 Loading...


