Canna/Clover
booklet.fm RevC
A5-Format booklet.fm
5/10/01 Durchlauf 2
R
Proof-Abzeichnung:
ABE M. Miyagawa, Takahashi_______
Takahashi _______
ABE G. Kok _______
7
EN
n Assembling the Printer
This section provides you with information on how to get your printer up and running.
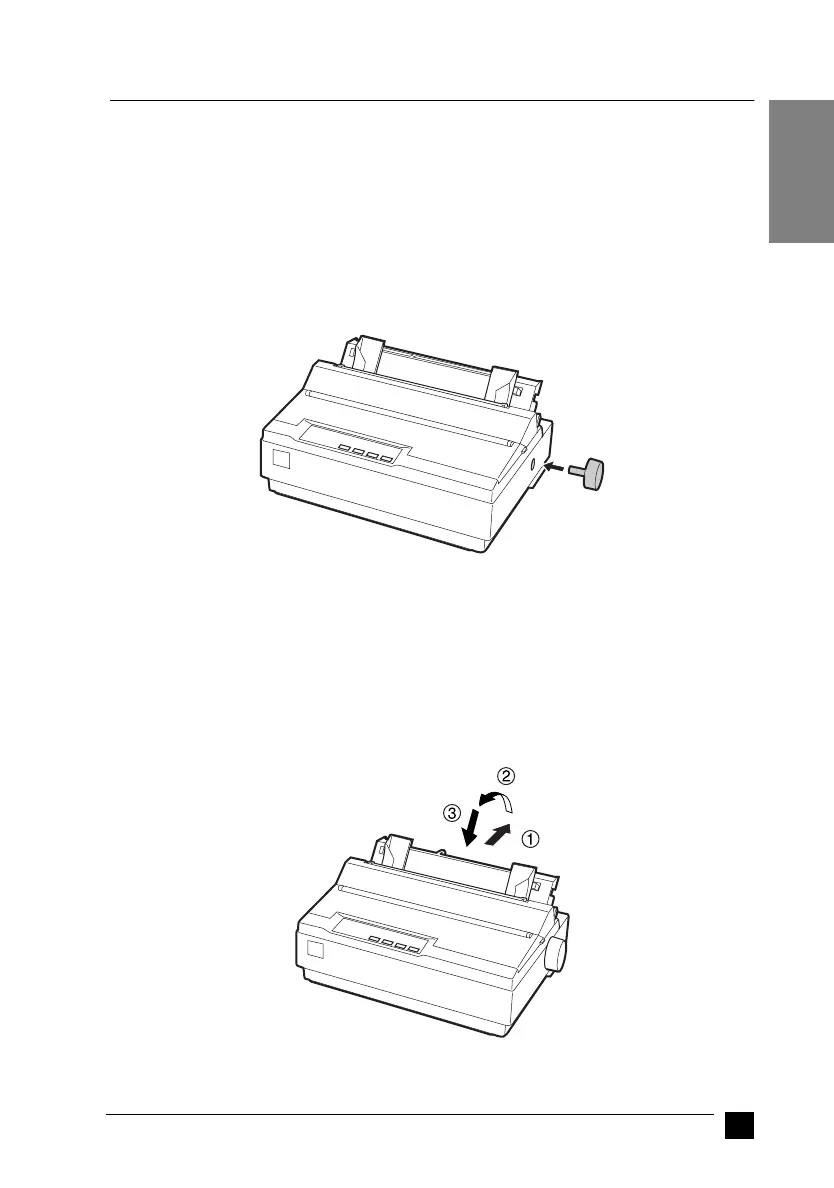
❚ Installing the paper-feed knob
The first step in assembling the printer is installing the paper-feed knob.
Follow these steps to install the paper-feed knob:
1. Insert the knob into the hole on the printer’s side and rotate it slowly until it slips
onto the shaft.
2. Push firmly on the paper-feed knob until it fits against the printer case.
❚ Attaching the paper supports
You should install the paper supports before you begin using the printer.
Follow these steps to attach the paper supports onto the printer:
1. Pull the paper guide backward. Raise it up, and then push it firmly until it fits in
place.

 Loading...


