Canna/Clover
booklet.fm RevC
A5-Format booklet.fm
5/10/01 Durchlauf 2
R
Proof-Abzeichnung:
ABE M. Miyagawa, Takahashi_______
Takahashi _______
ABE G. Kok _______
15
EN
1. Turn off both the computer and the printer.
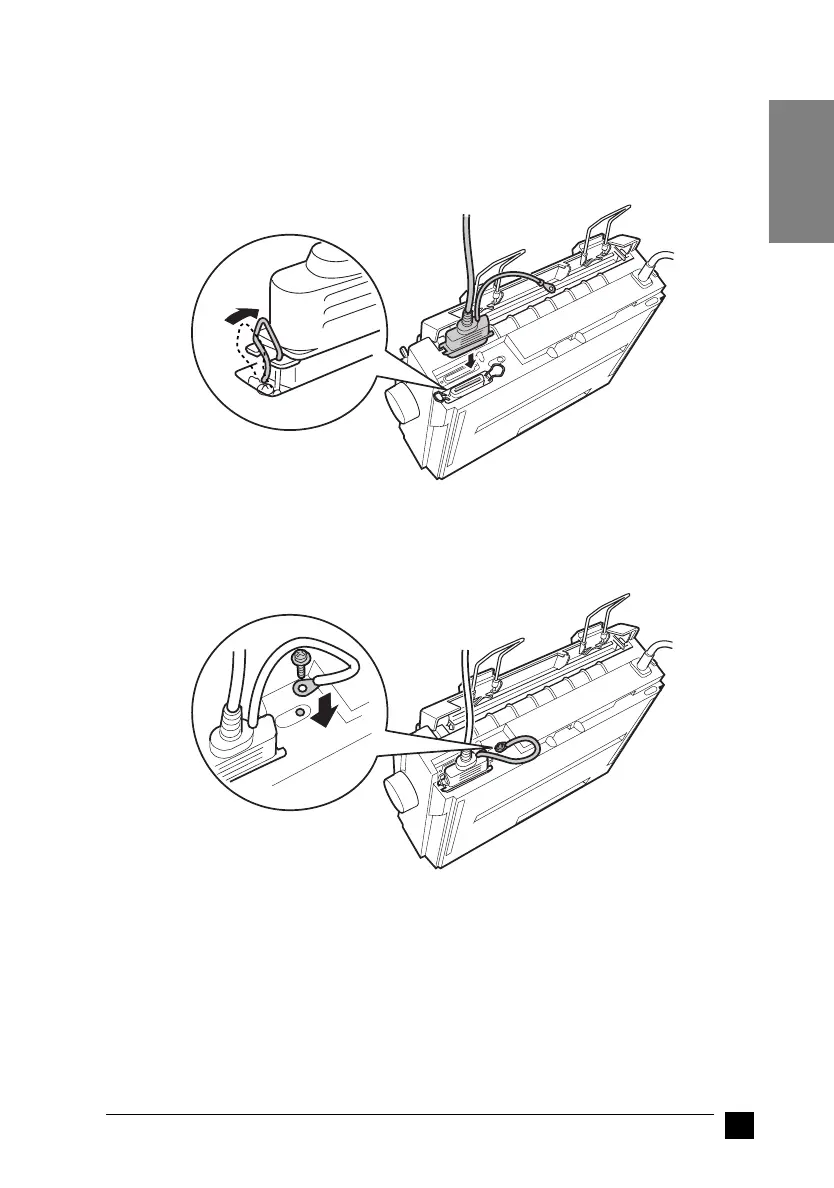
2. Plug the parallel cable connector securely into the printer’s parallel interface port.
Squeeze the wire clips together until they lock in place on both sides of the
connector.
Note:
If there is a ground wire at the end of the cable, attach it to the ground connector
located to the right of the parallel interface port.
3. Plug the other end of the cable into the computer’s parallel interface port. (If there
is a ground wire at the end of the cable, attach it to the ground connector at the
back of the computer.)
❚ Using the serial interface
You need a serial cable that has a DB-25 male connector on the printer side to use the
serial interface.
Follow these steps to connect the printer to the computer using the serial interface:

 Loading...


