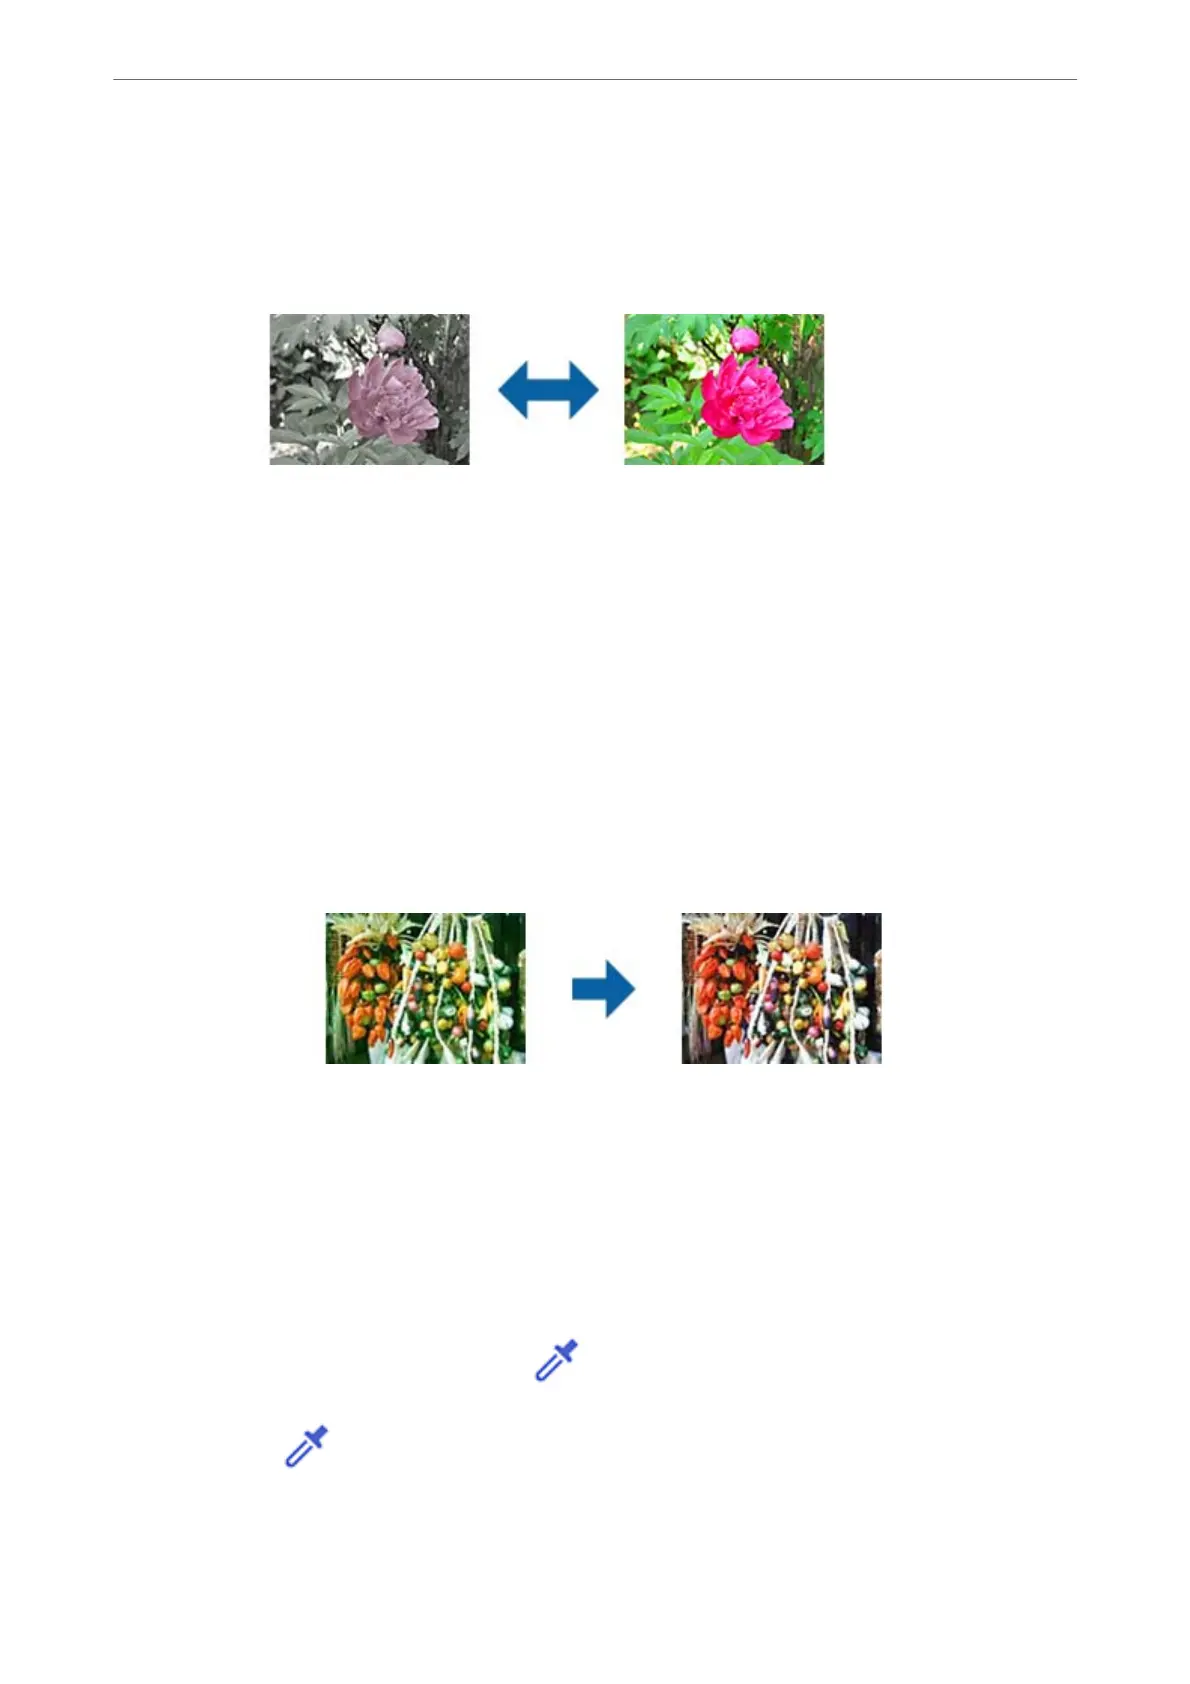
Saturation
You can adjust the saturation (color vividness) for the whole image. When you increase the
saturation, the colors become vivid. On the other hand, when you lower the saturation, the color
becomes neutral (gray).
Note:
is feature is not available depending on the settings in Image Type on the Main Settings tab.
Detailed Adjustments Button
Detailed Adjustments Screen
You can adjust the image quality for the scanned image by using a histogram or tone curve.
is allows you to output high-quality images while keeping image degradation to a minimum.
Reset button
Returns adjustments made on the Detailed Adjustments screen to their defaults.
Image Adjustment Tab
You can adjust the color balance and gray balance of the image.
Color Balance
Adjusts the color balance of the image. You can adjust the tint when photos are tinted
with red and green due to the weather or the lighting where the photo was shot.
Gray Balance Intensity
Adjusts the gray balance of the image. You can remove colors if they have too much of
an impact on the image due to the illumination and so on of specic colors.
Operations are available once you select the parts you want to make black and white or
gray (neutral) with the
button.
button
Use the eyedropper displayed on the preview image, and select the parts you want to
make black and white or gray (neutral).
Scanning
>
Advanced Scanning
>
Image Adjustment Features for Photo Mode
42
 Loading...