Managing Projectors 155
7. Do one of the following:
■ If your network assigns addresses automatically, turn on the
DHCP setting.
■ If your network does not assign addresses automatically, turn
off
DHCP and enter the projector’s IP Address, Subnet
Mask
, Gateway Address, and DNS Servers, as needed.
To enter numbers, use the pointer button on the remote
control to highlight the number you want to input, then press
the
Enter button.
8. When you’re done making all necessary changes, select
Return,
select
Setup complete, and then select Yes to confirm that you
want to save the changes. Press
Menu to exit the menu system.
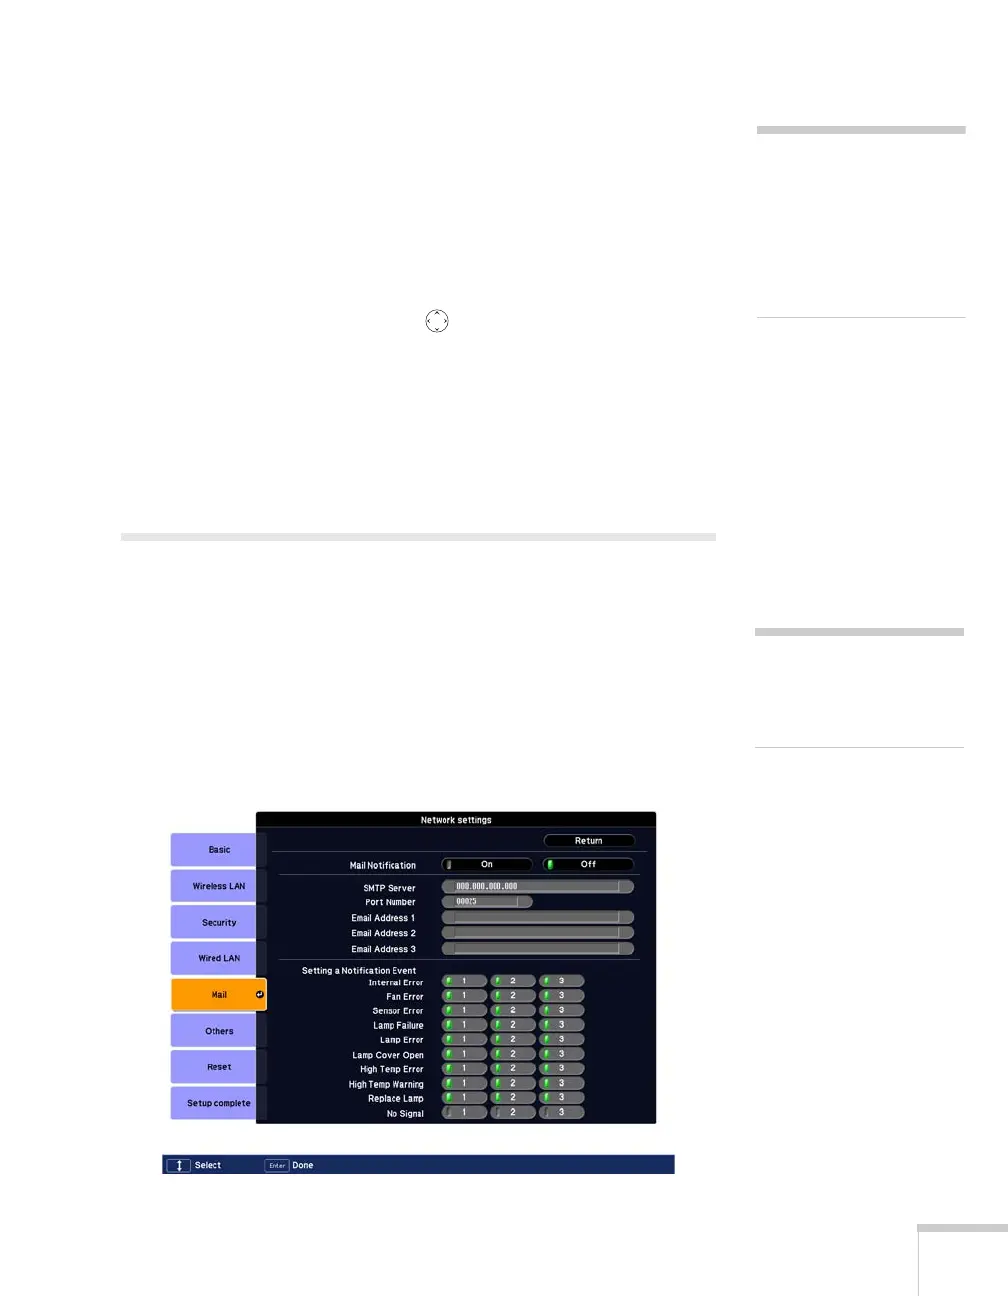
Using Projector E-mail Alerts
When this feature is enabled, the projector sends you an e-mail alert if
it has any problems.
1. Press the
Menu button on the remote control, select the
Network menu, then press Enter.
2. Choose
Network Configuration and press Enter.
3. Choose
Mail, then press Enter. You see the following screen:
note
If you’re a network
administrator, you can use
the SNMP option to enter a
trap IP address. This lets you
receive trap alerts for the
rojectors you’re monitoring.
note
You can also set e-mail alerts
from EMP Monitor (see
page 166).
 Loading...