1. Access the printer’s Web Cong and select Network Security Settings > SSL/TLS, IPsec/IP Filtering or
IEEE802.1X >
Certicate
.
2. Click Delete.
A
conrmation
message is displayed.
3. Click OK.
Related Information
& “Accessing Web Cong” on page 11
Updating a Self-signed Certicate
If the printer supports the HTTPS server feature, you can update a self-signed certicate. When accessing Web
Cong using a self-signed certicate, a warning message appears.
Use a self-signed certicate temporarily until you obtain and import a CA-signed certicate.
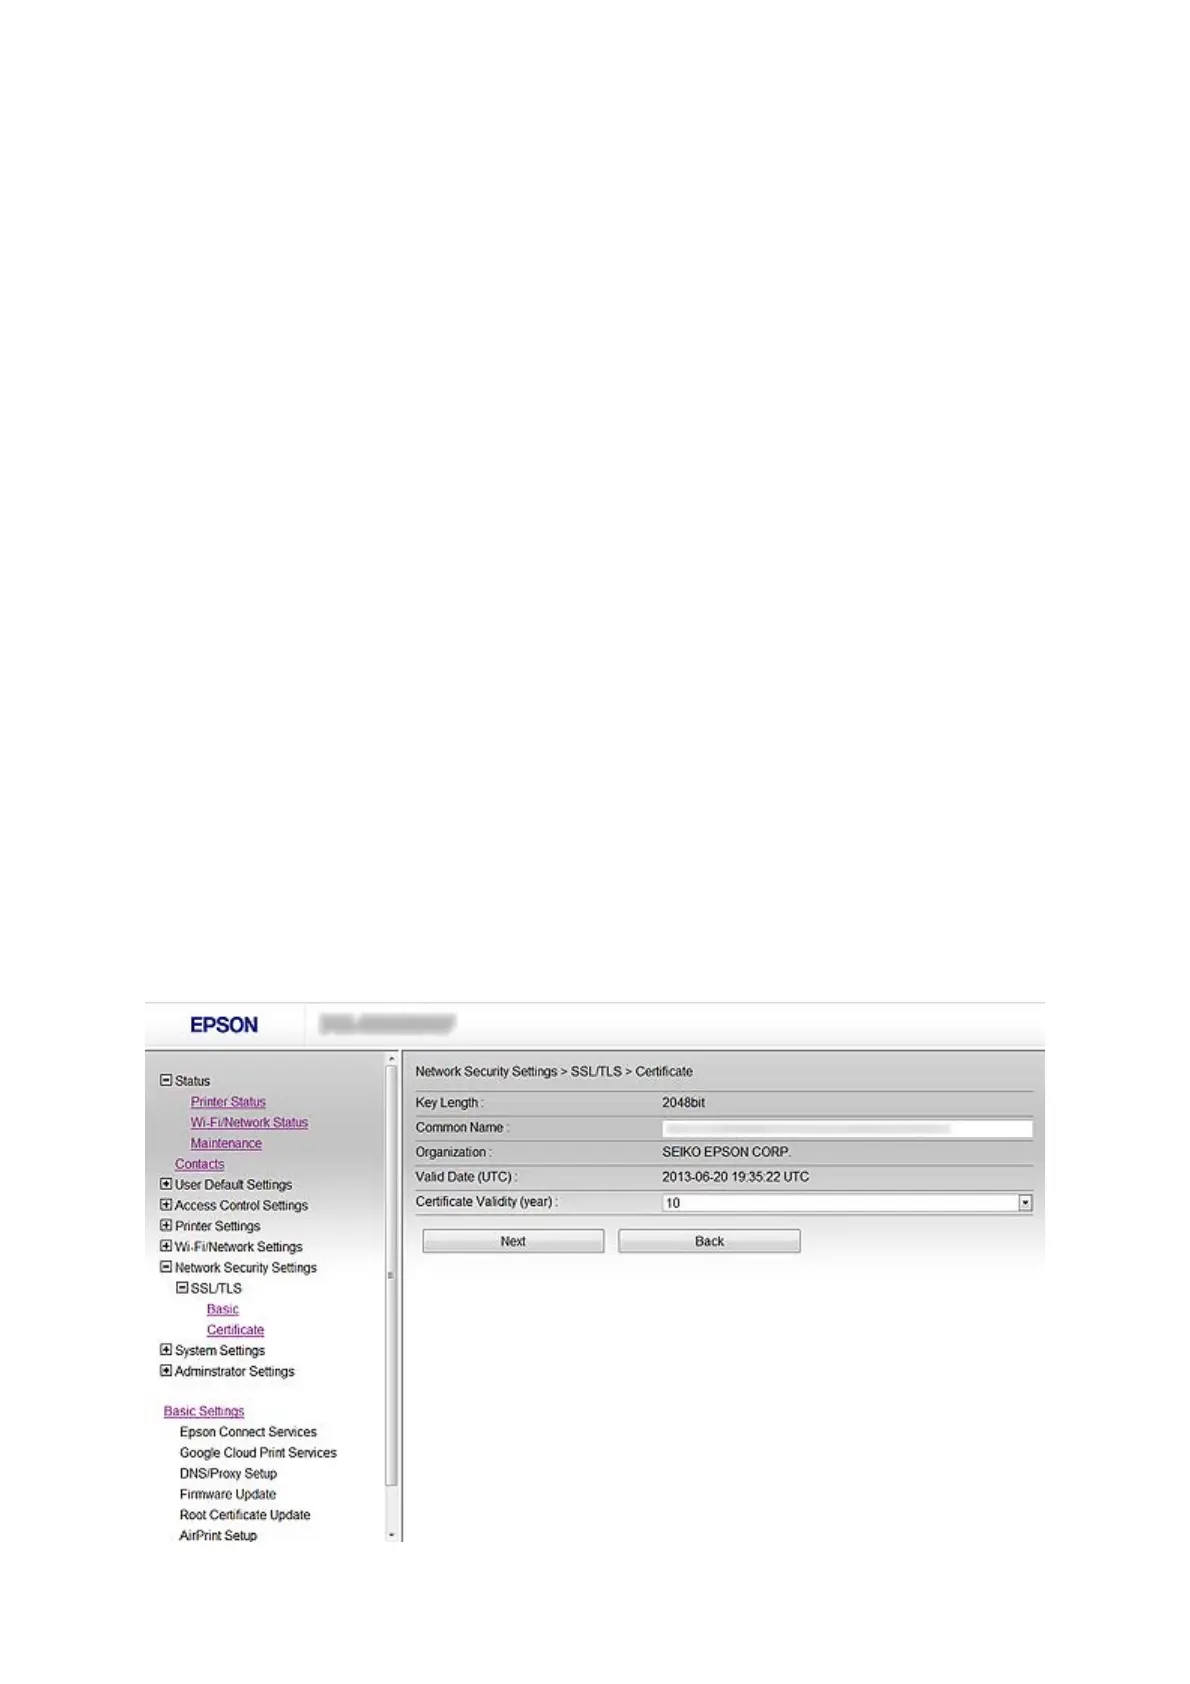
1. Access the printer’s Web Cong and select Network Security Settings > SSL/TLS > Certicate.
2. Click Update.
3. Enter Common Name.
Enter an IP address, or an identier such as an FQDN name for the printer. You can enter between 1 and 128
characters.
Note:
You can separate distinguished name (CN) with commas.
4. Specify a validity period for the certicate.
Administrator's Guide
Using the Printer in a Secure Network
35