L
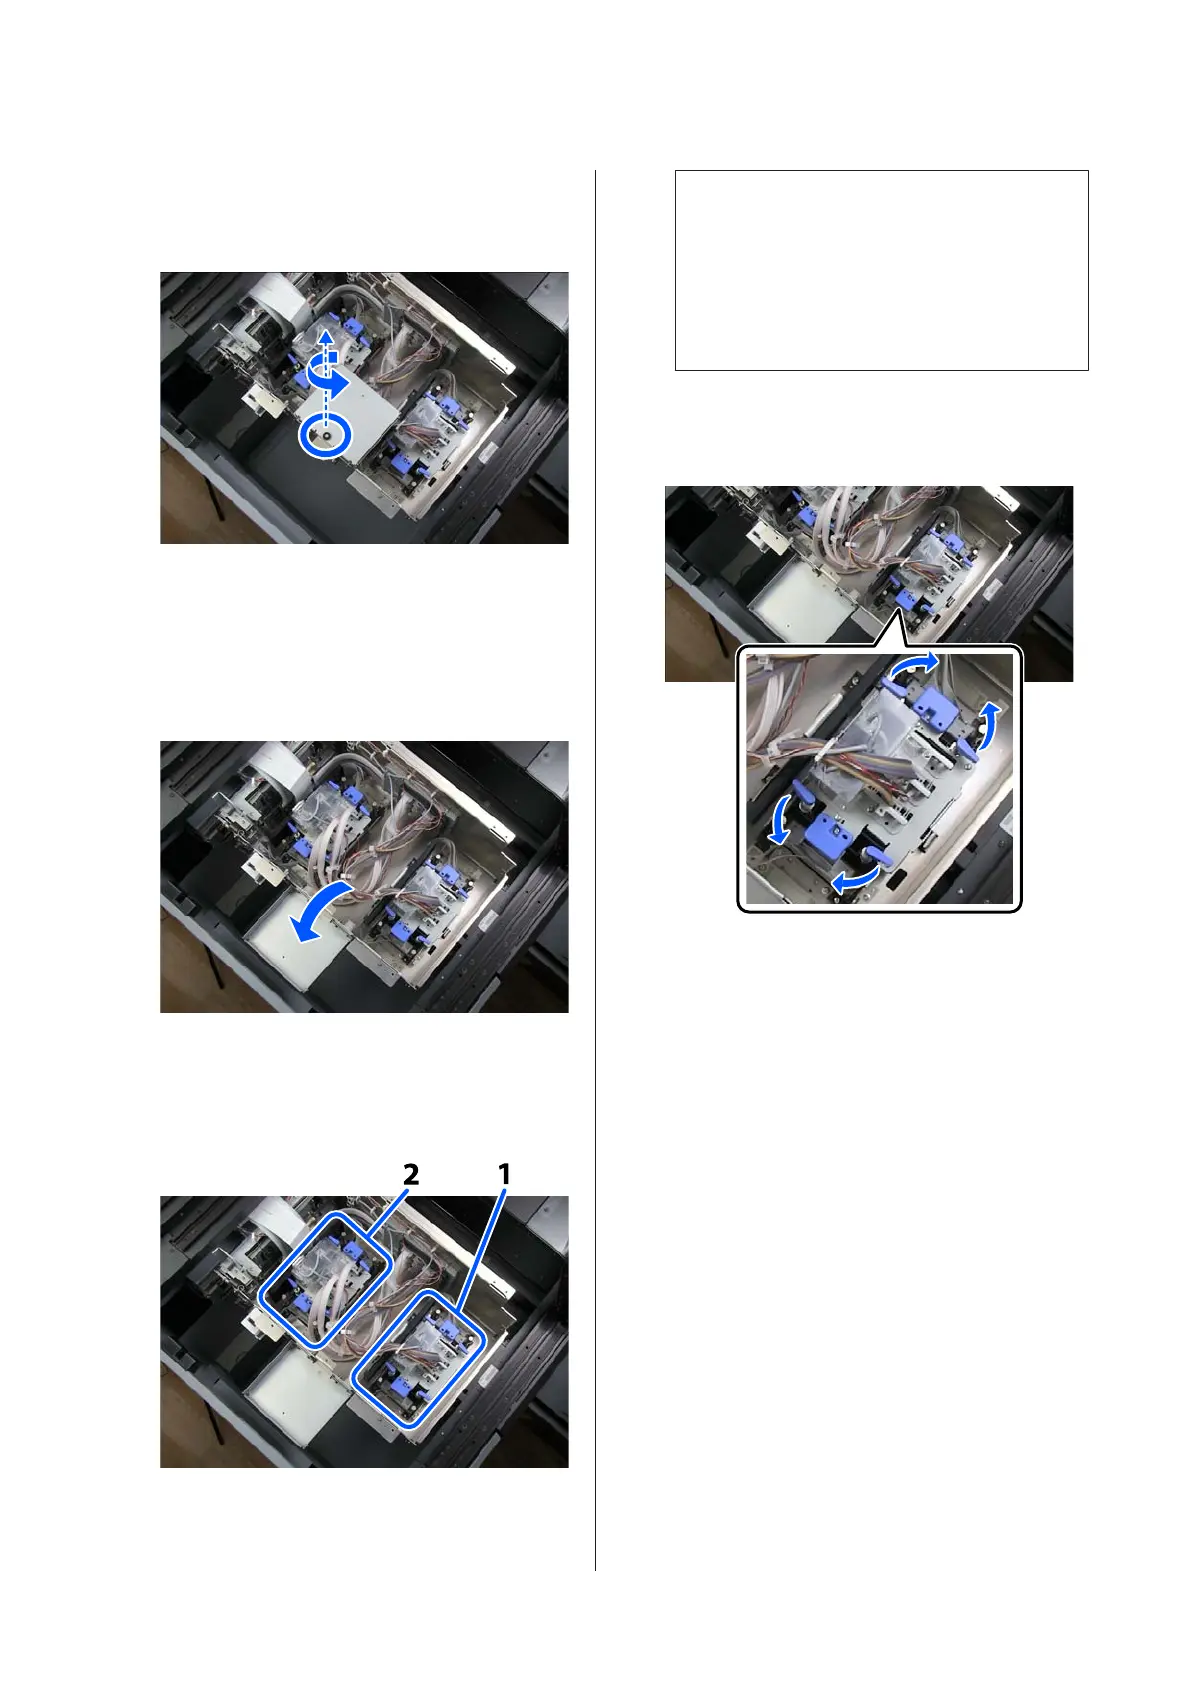
Turn the screw (1 pc) counterclockwise to
remove it.
Use your fingers to turn and remove the screw.
This screw is the same as the screws removed in
step 10. Keep this screw to use later, do not lose
it.
M
Put on the gloves, then open the temporary
platform.
N
Confirm the position of the Print Head you want
to replace.
The front one is Print Head 1 (color), and the
back one is Print Head 2 (white).
c
Important:
The replacement Print Head can be used for
either 1 or 2, but if you mistake the Print Head
to be replaced, you will need to redo this work.
Also, if the Print Head is installed incorrectly,
it cannot be reused.
O
Turn the fixing levers (4 locations) sideways to
release the locks of the Print Head you want to
replace.
SC-F3000 Series How to Replace the Print Head
Replacement Procedure
16
 Loading...