P
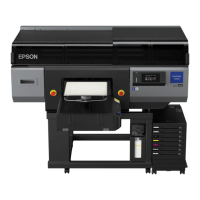
Move the Ink Damper Unit up and down a little
with both hands and lift it straight up, and then
place it on the temporary platform in the
orientation shown in the illustration.
c
Important:
Do not touch the bottom of the Ink Damper
Unit. There is a risk of deforming the ink
supply ports.
Q
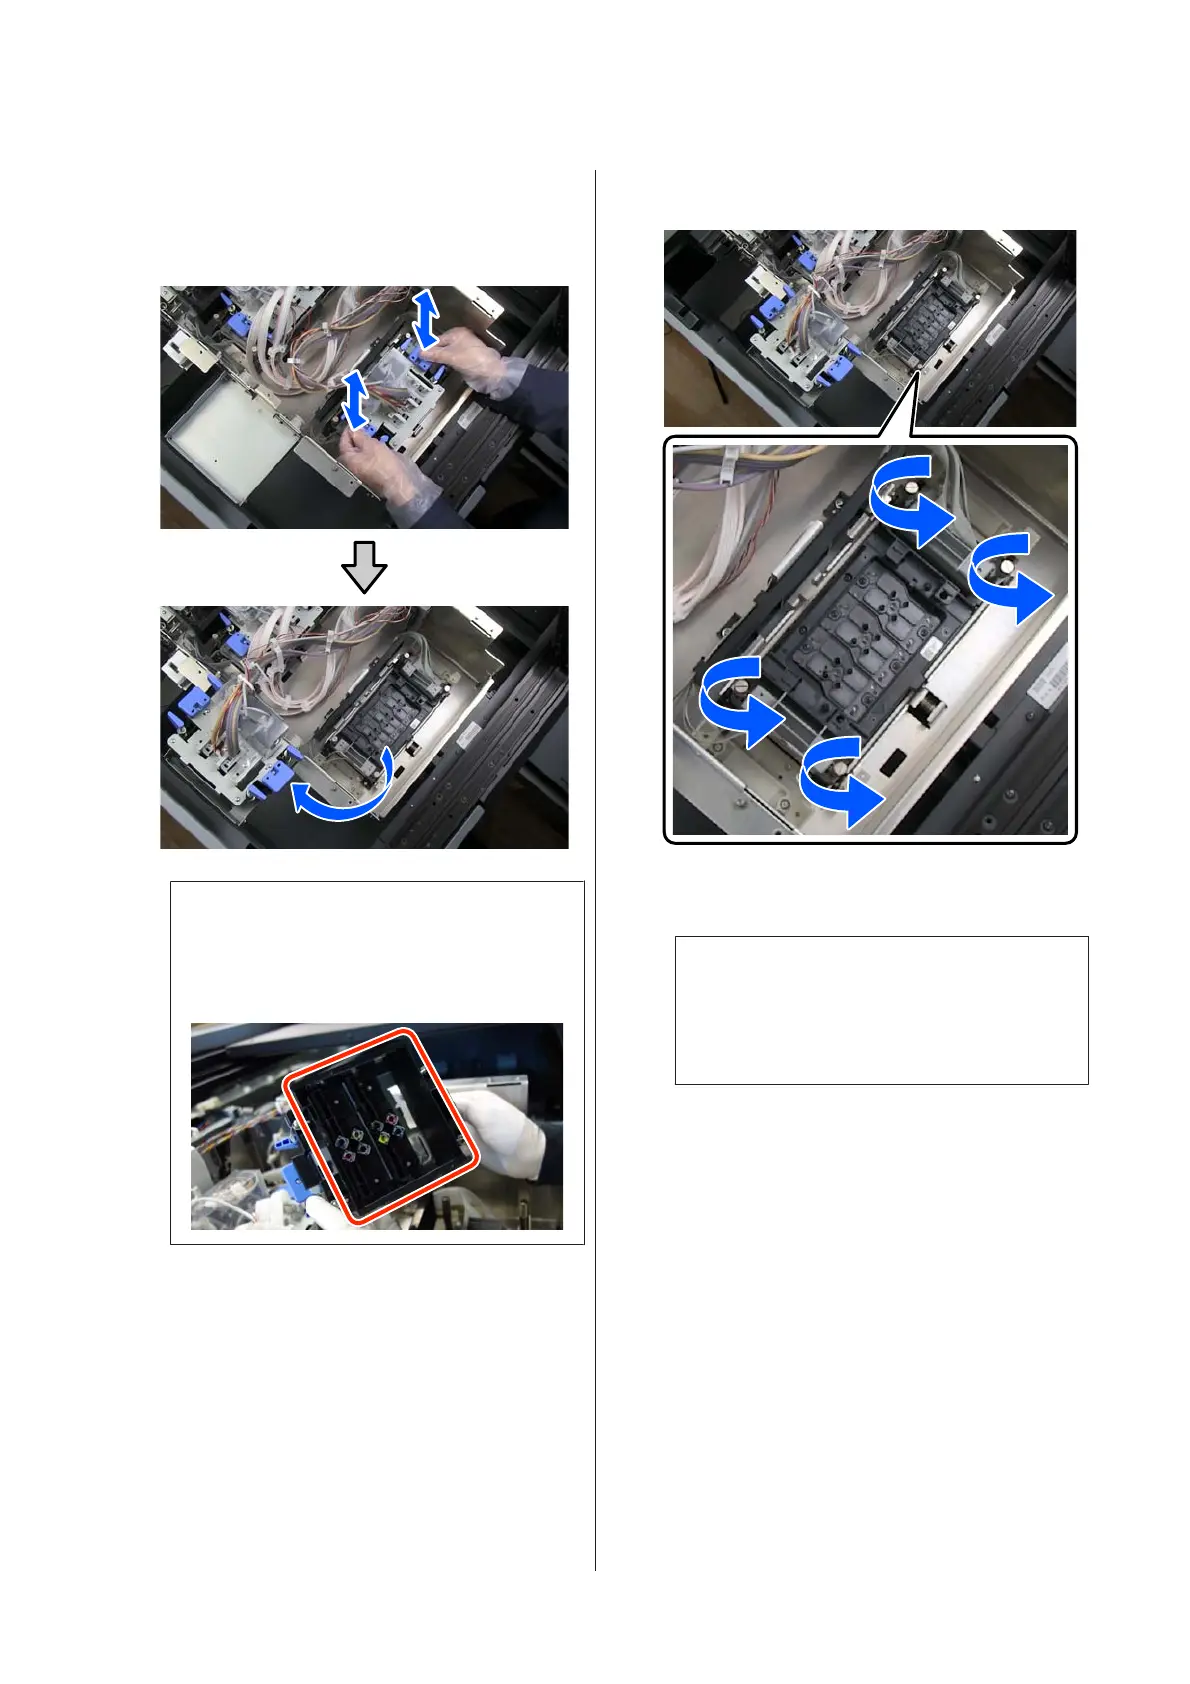
Use your fingers to turn the connector fixing
screws (4 pc) counterclockwise to loosen them.
If you cannot loosen the screws with your fingers,
use a coin or flathead screwdriver to loosen them.
You can loosen the screws, but they cannot be
removed from the connector.
R
Lift the right side connector straight up, and
place it on the holder.
c
Important:
Press down on the Print Head as you remove
the connector so the connector's pins are not
deformed or damaged.
SC-F3000 Series How to Replace the Print Head
Replacement Procedure
17
 Loading...