EPSON Stylus COLOR 600
1/97 EPSON Stylus COLOR 600 - 7
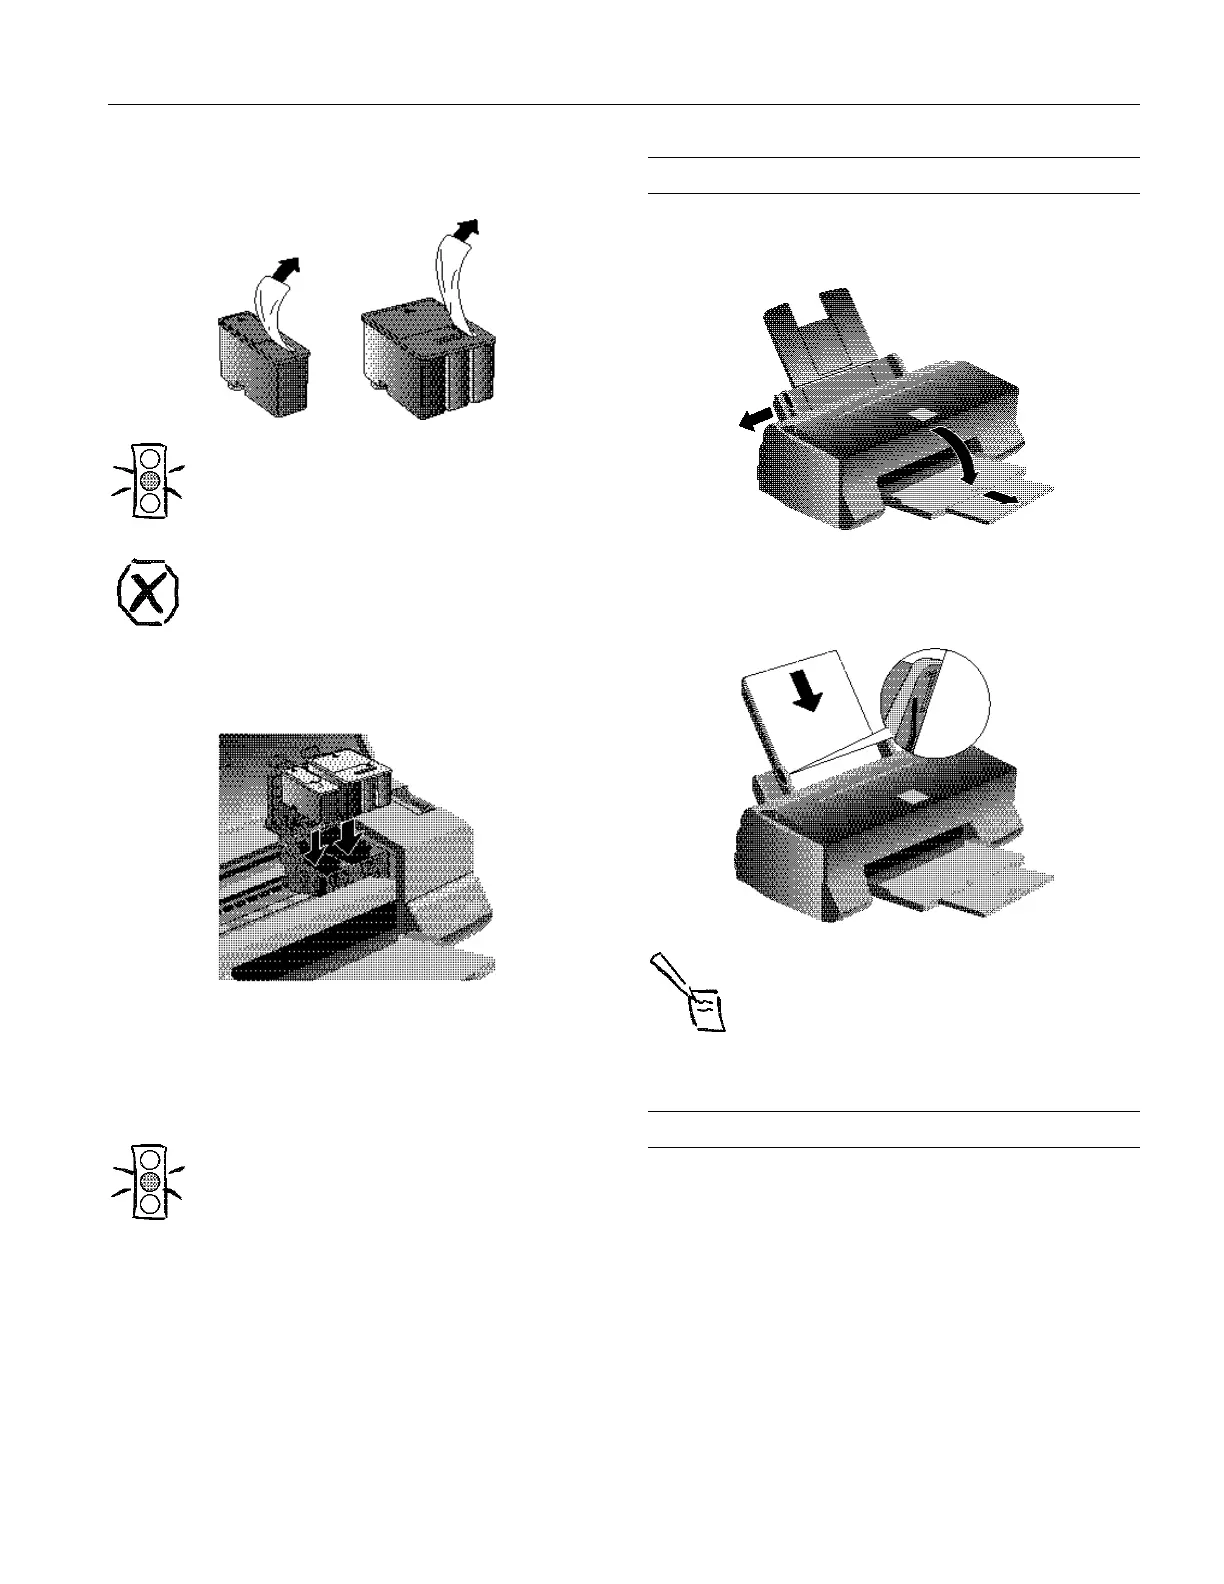
4. Open the ink cartridge packages. Remove the disposable
yellow portion of the tape seal on top.
Caution:
You must remove the tape seal from the top of the
cartridge or you will permanently damage it. Don’t
remove the tape seal from the bottom or ink will leak.
Warning:
If ink gets on your hands, wash them thoroughly with
soap and water. If ink gets in your eyes, flush them
immediately with water.
5. Lower the ink cartridges into their holders with the labels
face up and the arrows pointing toward the back of the
printer.
6. Push down the clamps until they lock in place.
7. Press the
R cleaning button to return the print heads to
their home position and charge the ink delivery system.
Charging can take up to five minutes, with the
P power
light flashing until its finished.
Caution:
Never turn off the printer when the
Ppower light is
flashing.
8. Close the printer cover.
Loading Paper
1. Slide the left edge guide all the way left and pull out the
output tray extension.
2. Fan a stack of plain paper and then even the edges.
3. Load the stack like this with the printable surface face up.
Push the paper against the right edge guide.
Note:
Don’t load paper above the arrow mark inside the left
edge guide.
4. Slide the left edge guide back against the stack of paper.
Testing the Printer
You can run a printer check to determine whether the
problem comes from the printer itself or the computer.
❏ If the results are satisfactory, the problem lies in software
settings, the interface cable, or your computer.
❏ If the printer check does not print correctly, you have a
problem with your printer.
Follow these steps to check the printer:
1. Make sure both the printer and computer are turned off.
2. Disconnect the interface cable from the printer.
 Loading...


