EPSON Stylus Photo R260/R265/R270, R360/R380/R390 Revision B
Disassembly/Assembly Removing Exterior Parts/Components 72
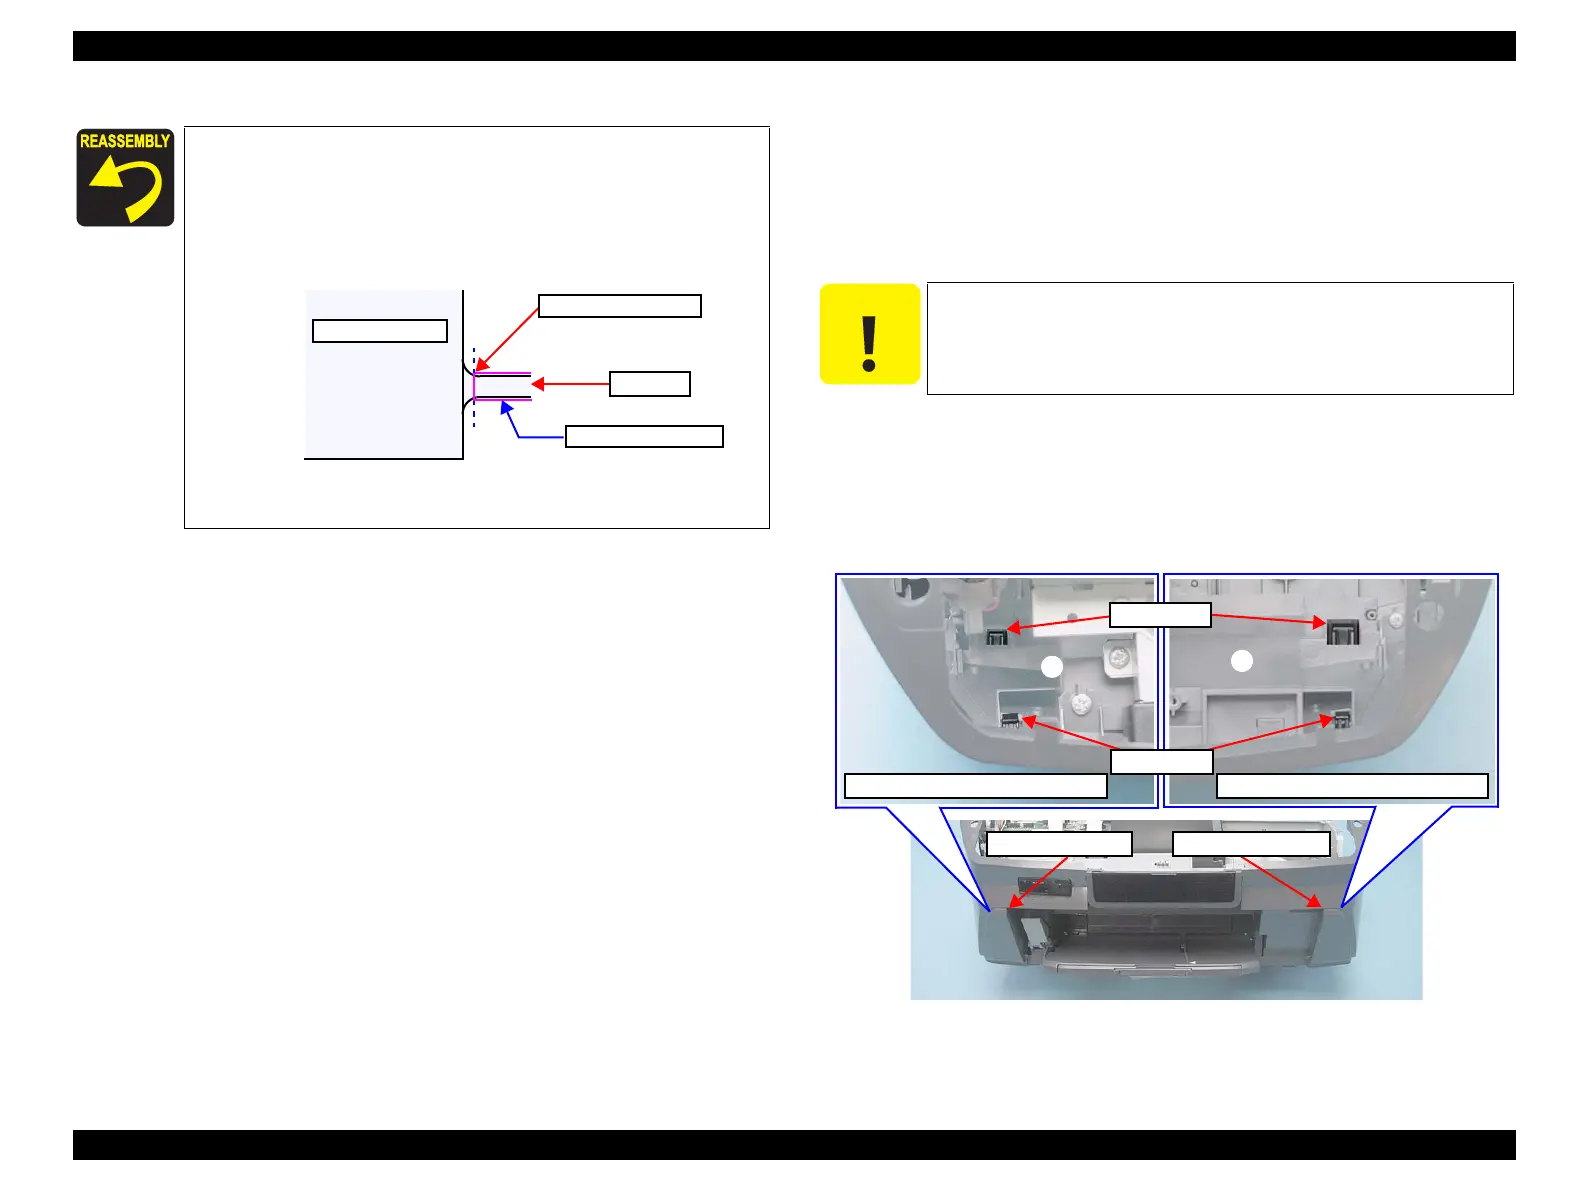
4.2.8 Right Front Housing / Left Front Housing
Parts/Components need to be removed in advance
Paper Support / Printer Cover / Front Cover / Right Housing / Left Housing / USB
Housing / Upper Housing / Panel Unit / EMI Frame / Waste Ink Tray
Removal procedure
1. Disengage the two tabs at (1) portion (inside the Front Housing) by lightly
pushing down the tip of the tabs. First disengage the lower tab and then
disengage the upper one.
2. Pull the Right Front Housing toward you to remove it.
3. Disengage the two tabs at (2) portion in the same manner, and remove the Left
Front Housing
Figure 4-33. Removing Left/Right Front Housings (1)
Wipe off any ink on the joint portion of the Waste Ink Tube
before reconnecting the tube. Ink on the joint portion makes
the tube likely to get disconnected.
Insert the Waste Ink Tube until its leading edge reaches the
point where the shaft of the Waste Ink Tray starts to widen as
shown below.
Figure 4-32. Cautions of installing the Waste Ink Tray
Tighten the screws in the order given in Fig.4-30.
Edge of the Tube
Tray Shaft
Waste Ink Tube
Waste Ink Tray
C A U T I O N
Take extra care to avoid injury from sharp metal edges. Before
starting, see the page given below to check the dangerous edges.
•“4.1.8 Sharp Metal Edges (Danger!)” (p.62)
Right Front Housing
Left Front Housing
2
Tab position of Left Front Housing
1
Tab position of Right Front Housing
Lower Tab
Upper Tab
 Loading...


