EPSON Stylus Photo R260/R265/R270, R360/R380/R390 Revision B
Disassembly/Assembly Disassembly of the Printer Mechanism 91
4.5.3 Printhead
Parts/Components need to be removed in advance
All exterior parts/ All control boards / Middle Housing
Removal procedure
1. Move the CR Unit to the center, open the Cartridge Cover and remove all Ink
Cartridges.
2. While disengaging the hook of the Head FFC Cover with a flathead screw
driver, slide the Head FFC Cover downward and remove it.
Figure 4-95. Removing the Head FFC Cover
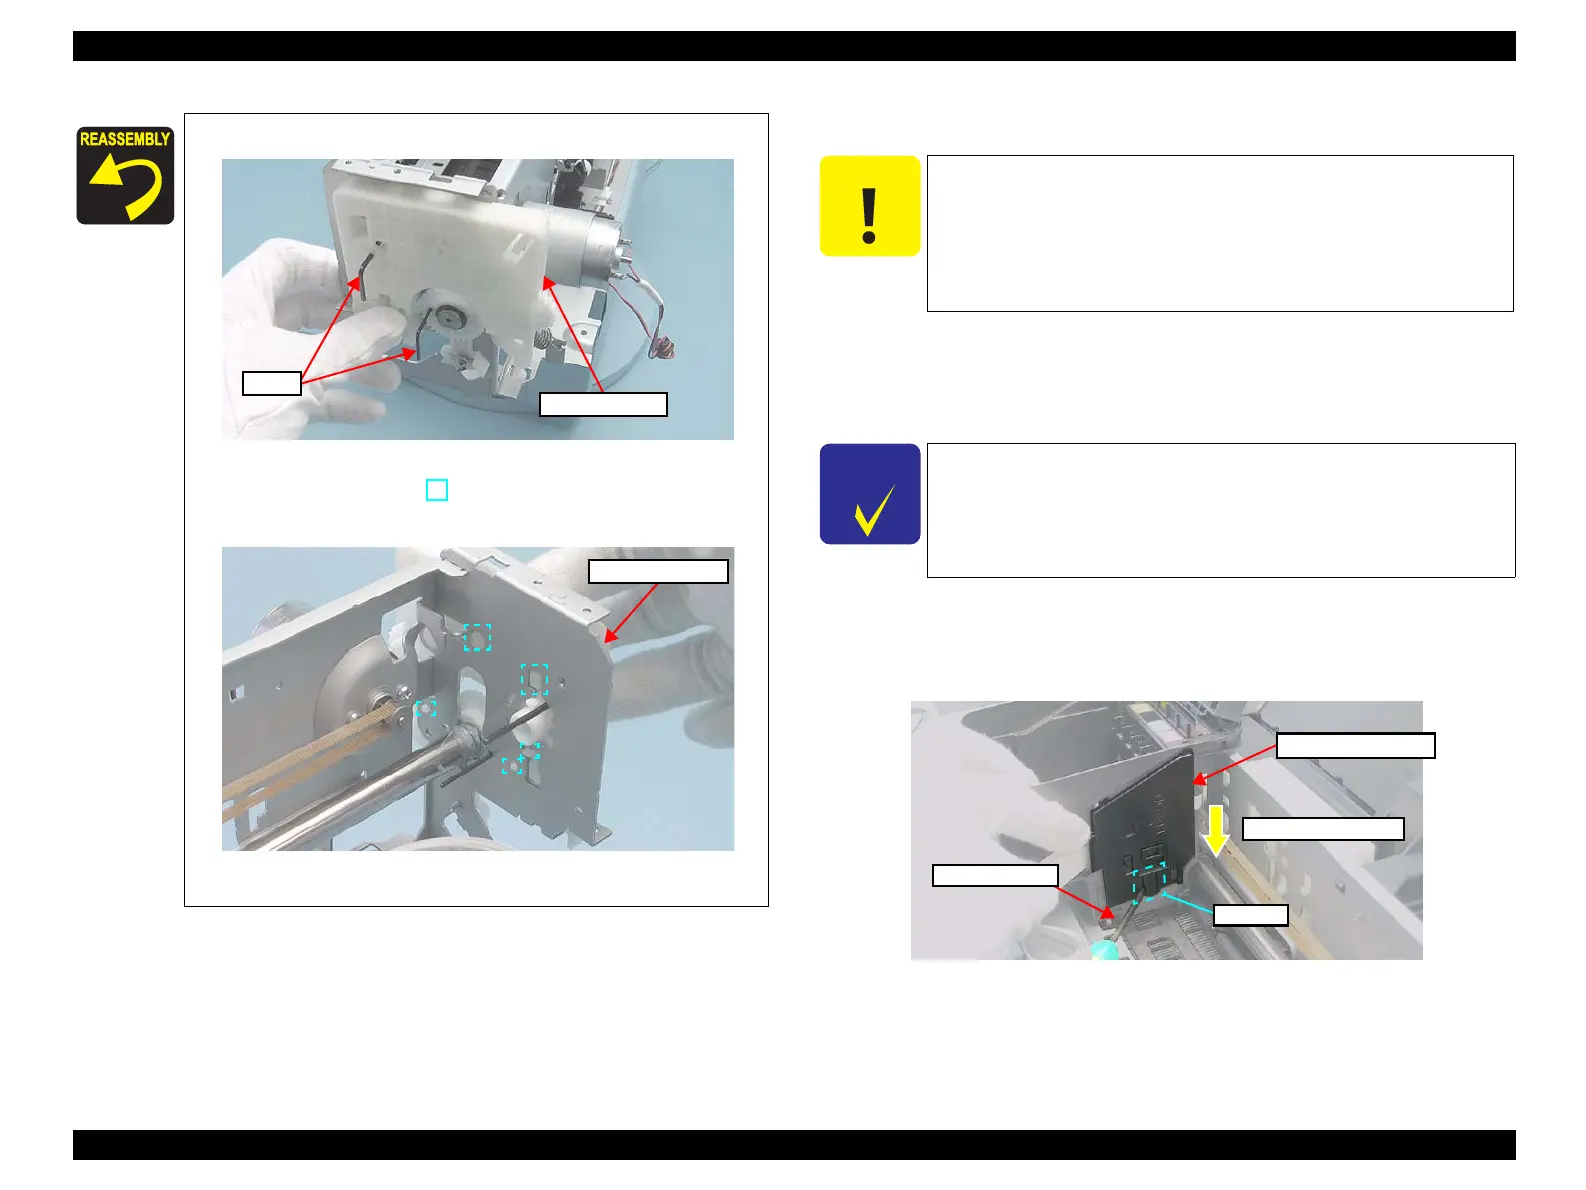
3. Install the APG Unit to the Main Frame.
Figure 4-93. Reinstalling the APG Unit (3)
4. Check that the hooks ( ) are attached to the positioning
holes of the Main Frame, then screw the APG Unit.
Figure 4-94. Reinstalling the APG Unit (4)
APG Unit
Pin
Main Frame
C A U T I O N
Take extra care to avoid injury from sharp metal edges. Before
starting, see the page given below to check the dangerous edges.
• “4.1.8 Sharp Metal Edges (Danger!)” (p.62)
When removing the Head FFC Cover and the Head FFC Cover
Inner, do not use tools with sharp ends as the FFC may get
damaged.
C H E C K
P O I N T
See the section given below on how to unlock the carriage.
• “4.1.7 How to Unlock the Carriage (p.62)”
Refer to the Orientation Definition below for the directions
indicated in the following procedures.
• “4.1.6 Orientation Definition (p.61)”
Head FFC Cover
Screw Driver
Removal Direction
Hook
 Loading...


