R4CD400
Setup Guide Rev. C
ENGLISH.FM A4 size
12/15/04
R
Proof Sign-off:
KOW M.Arai K.Nishi
K.Nishi
NOC K.Lee
5
English
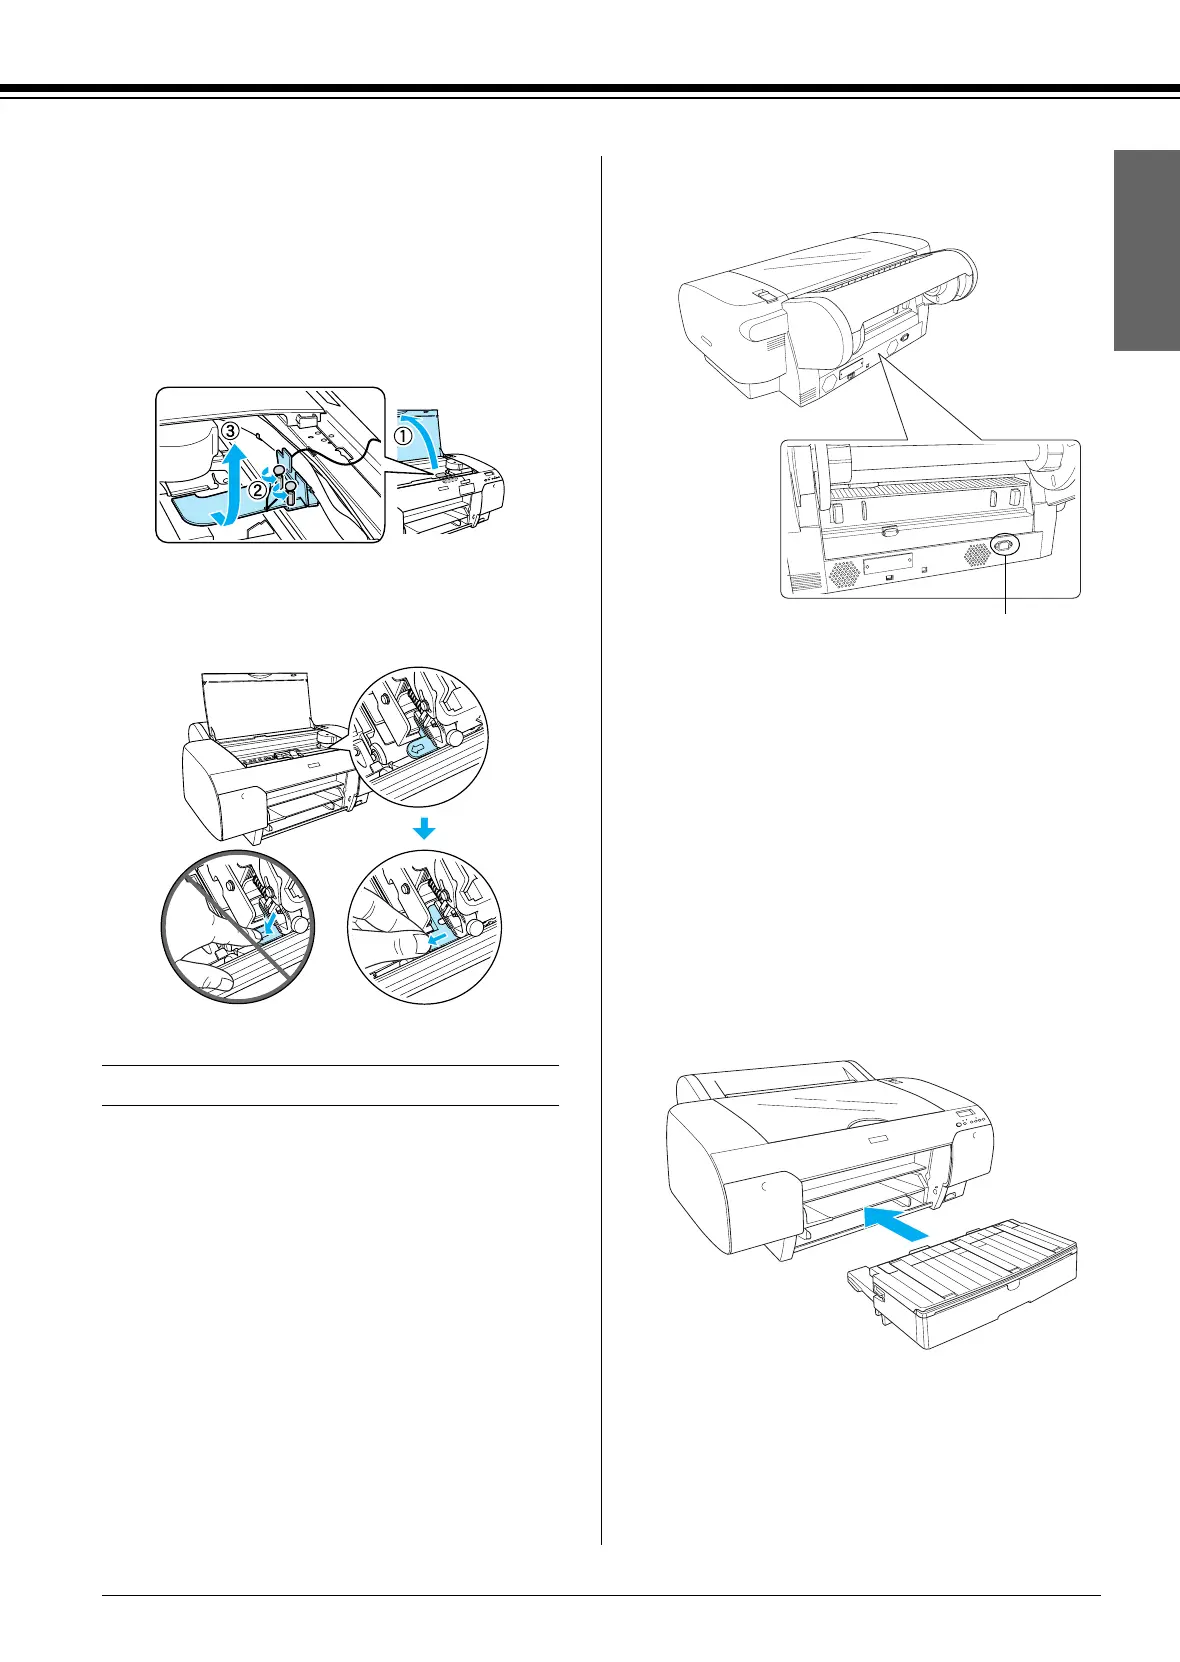
Removing the protective materials
To prevent damage during shipping, your printer
is packed with several pieces of protective
material. Remove the protective material from
your printer before using it. Open the top cover,
loosen the two screws, and then pull out the
carriage fixed board.
You also need to unlock the print head, by pulling
the green tab on the left side of the print head.
Setting Up the Printer
Connecting the power cord
1. Check the label on the back of the printer to
make sure the voltage required by the printer
matches that of the wall outlet. Also, make
sure that you have the correct power cord for
your power source.
c
Caution:
It is not possible to change the printer’s
voltage. If the rated voltage and your outlet
voltage do not match, do not plug in the
power cord, and contact your dealer for
assistance.
2. Connect the power cord to the AC inlet on the
back of the printer.
3. Plug the power cord into a properly grounded
wall outlet.
c
Caution:
Do not use an outlet that is controlled by an
automatic timer or a wall switch; otherwise,
accidental shut down or damage to your
printer may occur.
Installing the paper tray
Insert the paper tray in the slots at the front of the
printer.
AC inlet

 Loading...


