54
❏
Printing with PhotoEnhance selected may increase the time required
for printing, depending on your computer system and the amount
of data contained in your image.
You can select from the following settings.
If you are printing photos taken with a digital camera, you can
also select the
Digital Camera Correction
check box to give your
printed images the smooth, natural appearance of photographs
taken with a film camera.
Using the Custom settings
The Custom mode offers ready-made settings designed for
printing data such as text, graphs, charts, and digital camera
images, and for applying a color-matching method. You can also
create and save your own custom settings.
You can select from the following ready-made settings.
Follow these steps to select a custom setting.
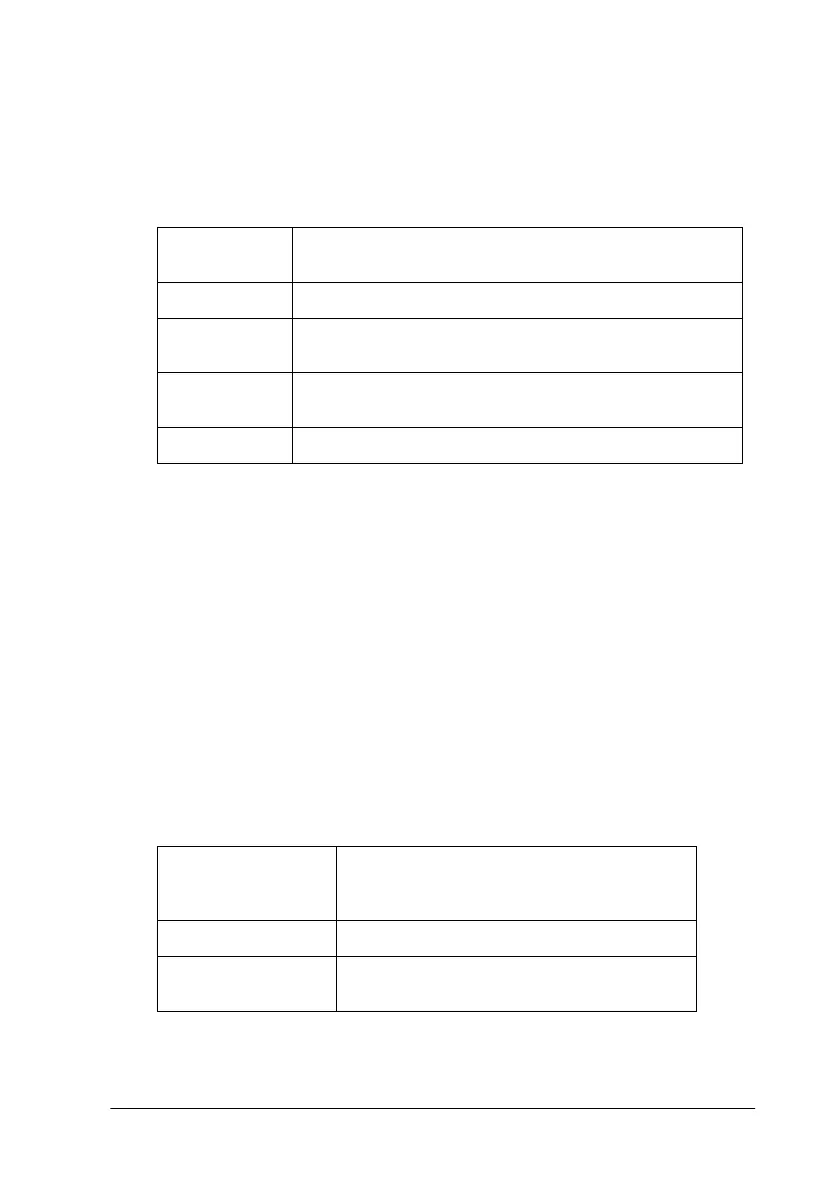
Standard
This setting provides standard image correction for
most photos. Try this first.
People
This setting is best for photos of people.
Nature
This setting is best for outdoor scenery such as
mountains, sky, and oceans.
Soft Focus
This setting makes your photos look as if they were
taken with a soft-focus lens.
Sepia
This setting applies a sepia tone to your photos.
Text/Graph
This setting is good for printing
presentation documents such as graphs
and charts.
Economy
This setting is best for printing drafts of text
ColorSync
This setting automatically adjusts printout
colors to match colors on your screen.
 Loading...


