Confidential
Adjustment Details of Adjustments 59
Epson WF-5690/4640/4630/5620/5190/5110 series Revision D
3.2.2 Rear ASF Timing Belt Tension Check
This section describes Rear ASF Timing Belt tension check.
Tools
Sonic tension gauge
Plastic tweezers
Adjustment procedure
1. Set the following parameters to the sonic tension gauge:
Weight: 1.3 g/m
Width: 4 mm
Span: 107 mm
2.
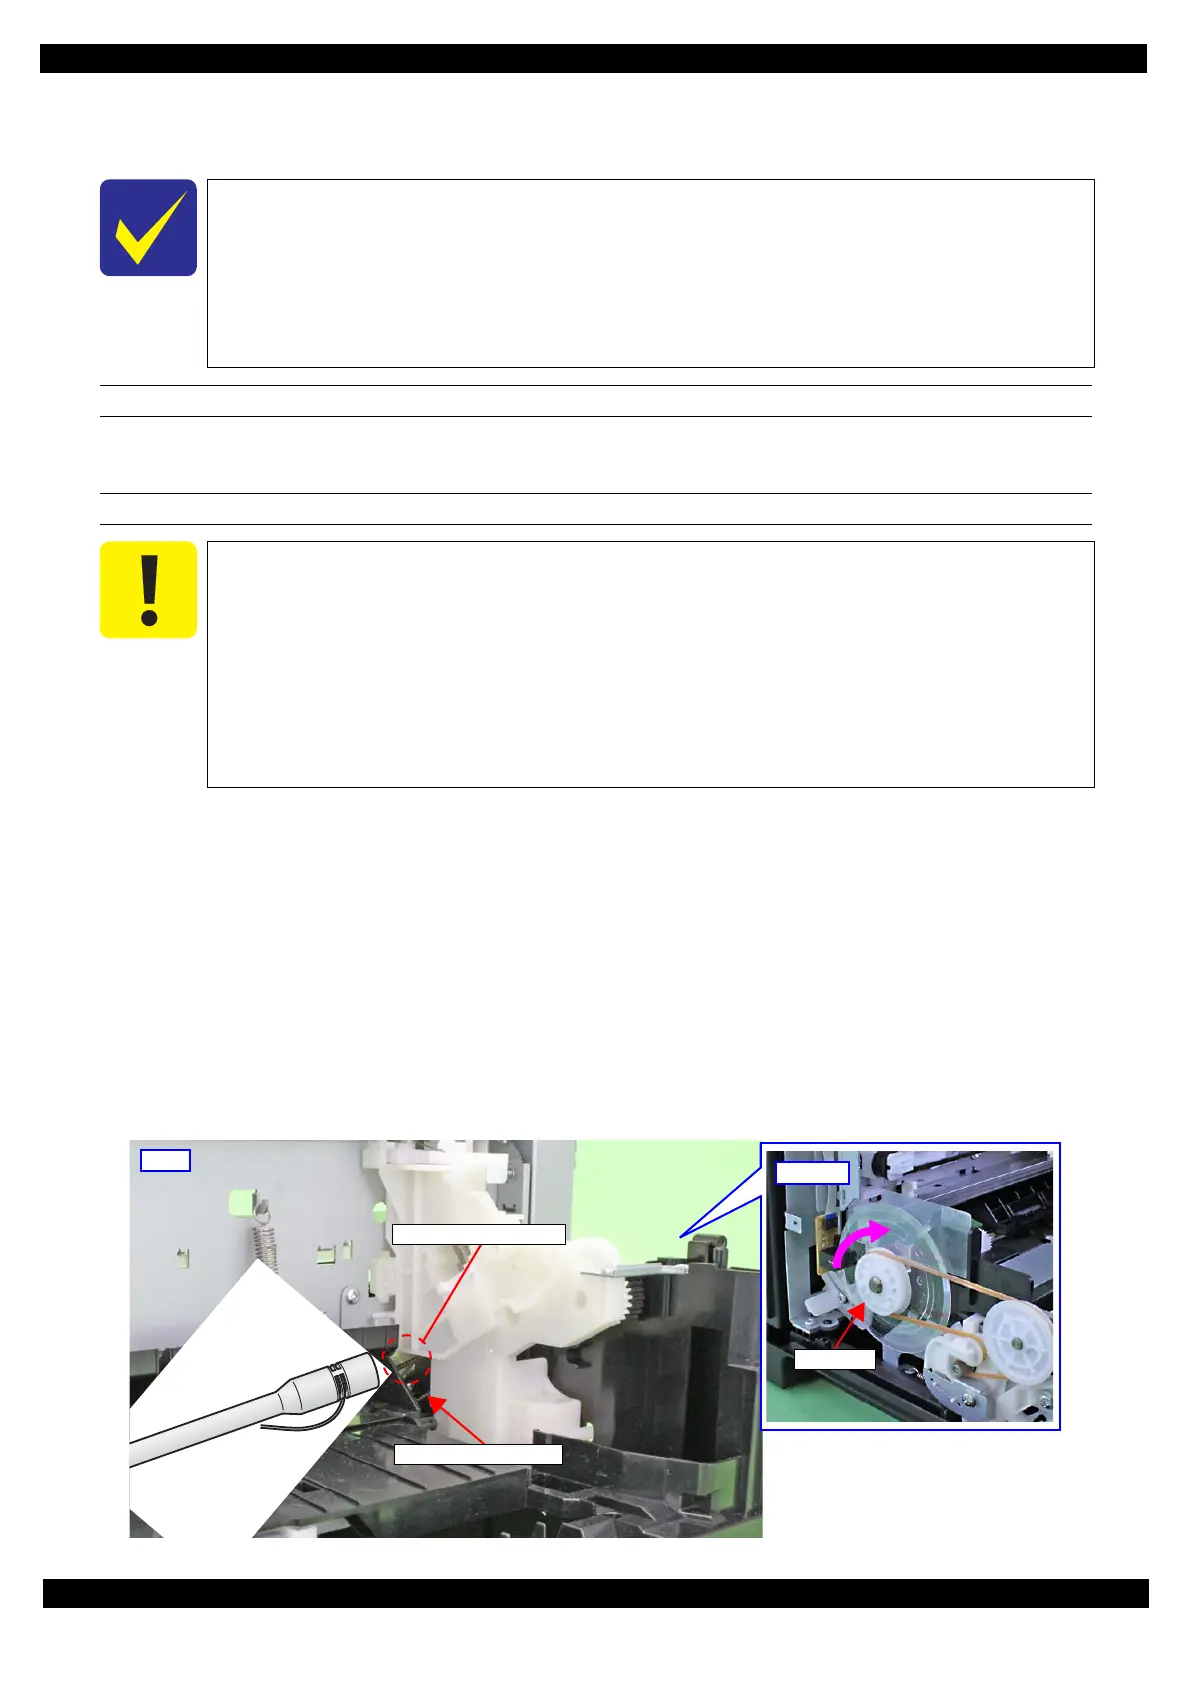
Bring the microphone of the sonic tension gauge close to the Rear ASF Timing Belt on the position shown in
Figure 3-2.
3. Press the “MEASURE” button of the sonic tension gauge and flip the
Rear ASF
Timing Belt with plastic
tweezers and measure the tension of the belt.
4. Rotate the PF Roller one turn in the direction of the arrow, and measure the tension of the belt. Repeat the
same measurement four times (including the first one). After measuring it five times in total, check the
average of the measured values falls within the standard range.
Figure 3-2. Rear ASF Timing Belt Tension Check
This printer is designed so that the tension of the Rear ASF Timing Belt falls within the
expected range if you correctly reassemble the unit according to this manual. However,
deformation of any related part(s) can cause improper tension of the belt. In such case,
replace the Printer Mechanism (Frame Base Assy).
The standard tension range of the Rear ASF Timing Belt is as follows:
• Standard: 6.0 ~ 7.5 N
When performing the Rear ASF Timing Belt tension measurement, make sure of the
following.
Perform Rear ASF Timing Belt tension measurement before installing the Rear ASF
Assy.
Bring the microphone of the sonic tension gauge within 5 mm from the Rear ASF Timing
Belt but do not let it touch the belt.
Flip the Rear ASF Timing Belt as weak as the sonic tension gauge can measure it.
Be careful not to damage the Rear ASF Timing belt when flipping it with the plastic tweezers.
Rear ASF Timing Belt
Rear
Measurement position
 Loading...


