Epson WF-5690/4640/4630/5620/5190/5110series Revision D
Disassembly/Reassembly Detailed Disassembly/Reassembly Procedure for each Part/Unit 38
Confidential
2.3 Detailed Disassembly/Reassembly Procedure for each Part/Unit
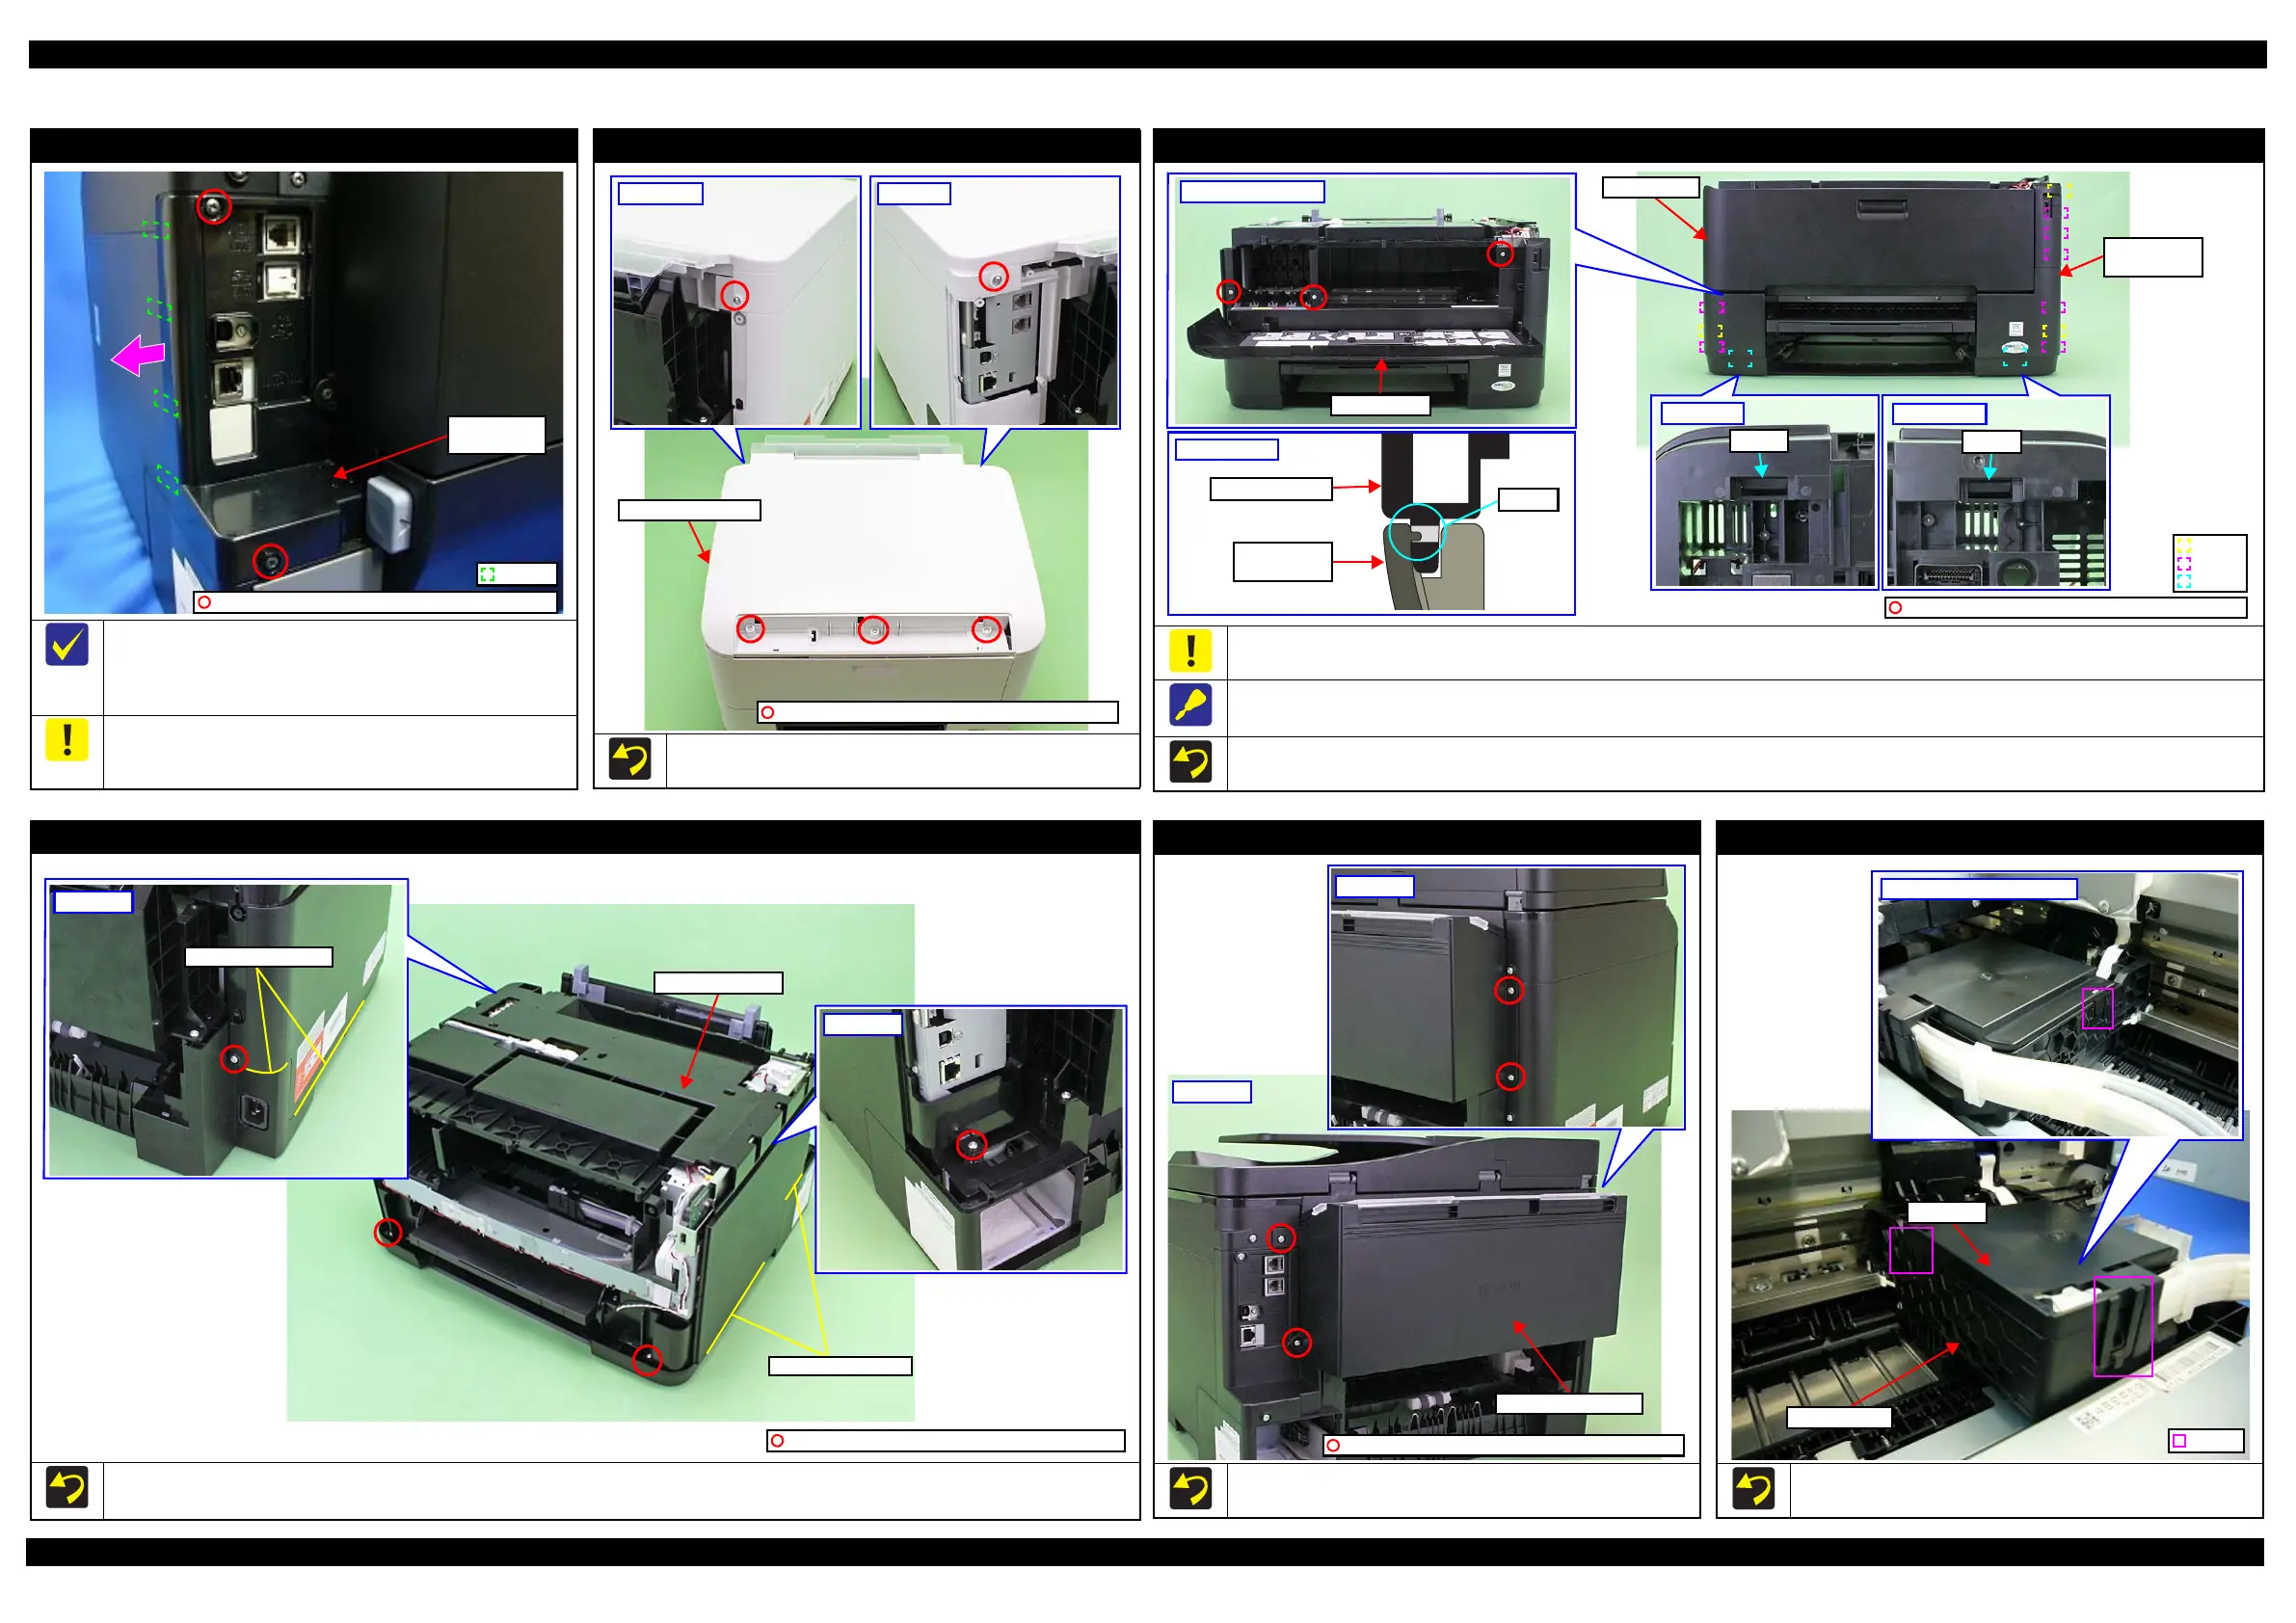
FAX Cover/USB Cover
The name and the shape of this part differ, but the disassembly
procedure for this part is the same. The names are FAX Cover for
WF-5690/4640/4630/5620 series and USB Cover for WF-5190/
5110 series.
Remove the FAX Cover/USB Cover by sliding it in the direction of
the arrow shown above carefully not to damage the rib A (x4) that
secure the FAX Cover/USB Cover.
Rib A
C.B.P-TITE SCREW 3x10 F/ZN-3C (6 ± 1 kgf·cm)
FAX Cover/
USB Cover
Housing Upper Assy (WF-5190/5110 series)
The above figure shows the kind and position of the screw.
C.B.P-TITE SCREW 3x10 F/ZN-3C (6 ± 1 kgf·cm)
Housing Upper Assy
Front Housing Assy
The structure of the rib A on the Front Housing Assy is as shown in the cross-section above, and it is extremely fragile. Therefore, be careful not to
damage the rib A when removing the Front Housing Assy.
The positions of the rib A (x3) and rib B (x7) of the Front Housing Assy are shown in the figure above.
When releasing the hooks (x2) of the Front Housing Assy, insert a screw driver or the like from the hole on the bottom of the printer and release them.
The above figure shows the kind and position of the screw.
Inside Front Cover
Front Cover
Front Cover
Rib A
C.B.P-TITE SCREW 3x10 F/ZN-3C (6 ± 1 kgf·cm)
Cross-section
Middle Housing
Rib A
Front
Housing Assy
Middle Housing
After reassembling the Middle Housing, make sure the ribs of the Frame Base are aligned and fit in with the Middle Housing without any gap.
The above figure shows the kind and position of the screw.
Middle Housing
C.B.P-TITE SCREW 3x10 F/ZN-3C (6 ± 1
Rear left
Ribs of Frame Base
Housing Rear Assy
The above figure shows the kind and position of the screw.
Housing Rear Assy
C.B.P-TITE SCREW 3x10 F/ZN-3C (6 ± 1 kgf·cm)
CR Cover
After installing the CR Cover to the Carriage Assy, make sure the
CR Cover is firmly secured with the hooks (x3) shown above.
Right side of Carriage Assy
 Loading...


