Epson WF-7620 / WF-7610 / WF-7110 Series Revision B
Disassembly/Reassembly Detailed Disassembly/Reassembly Procedure for each Part/Unit 44
Confidential
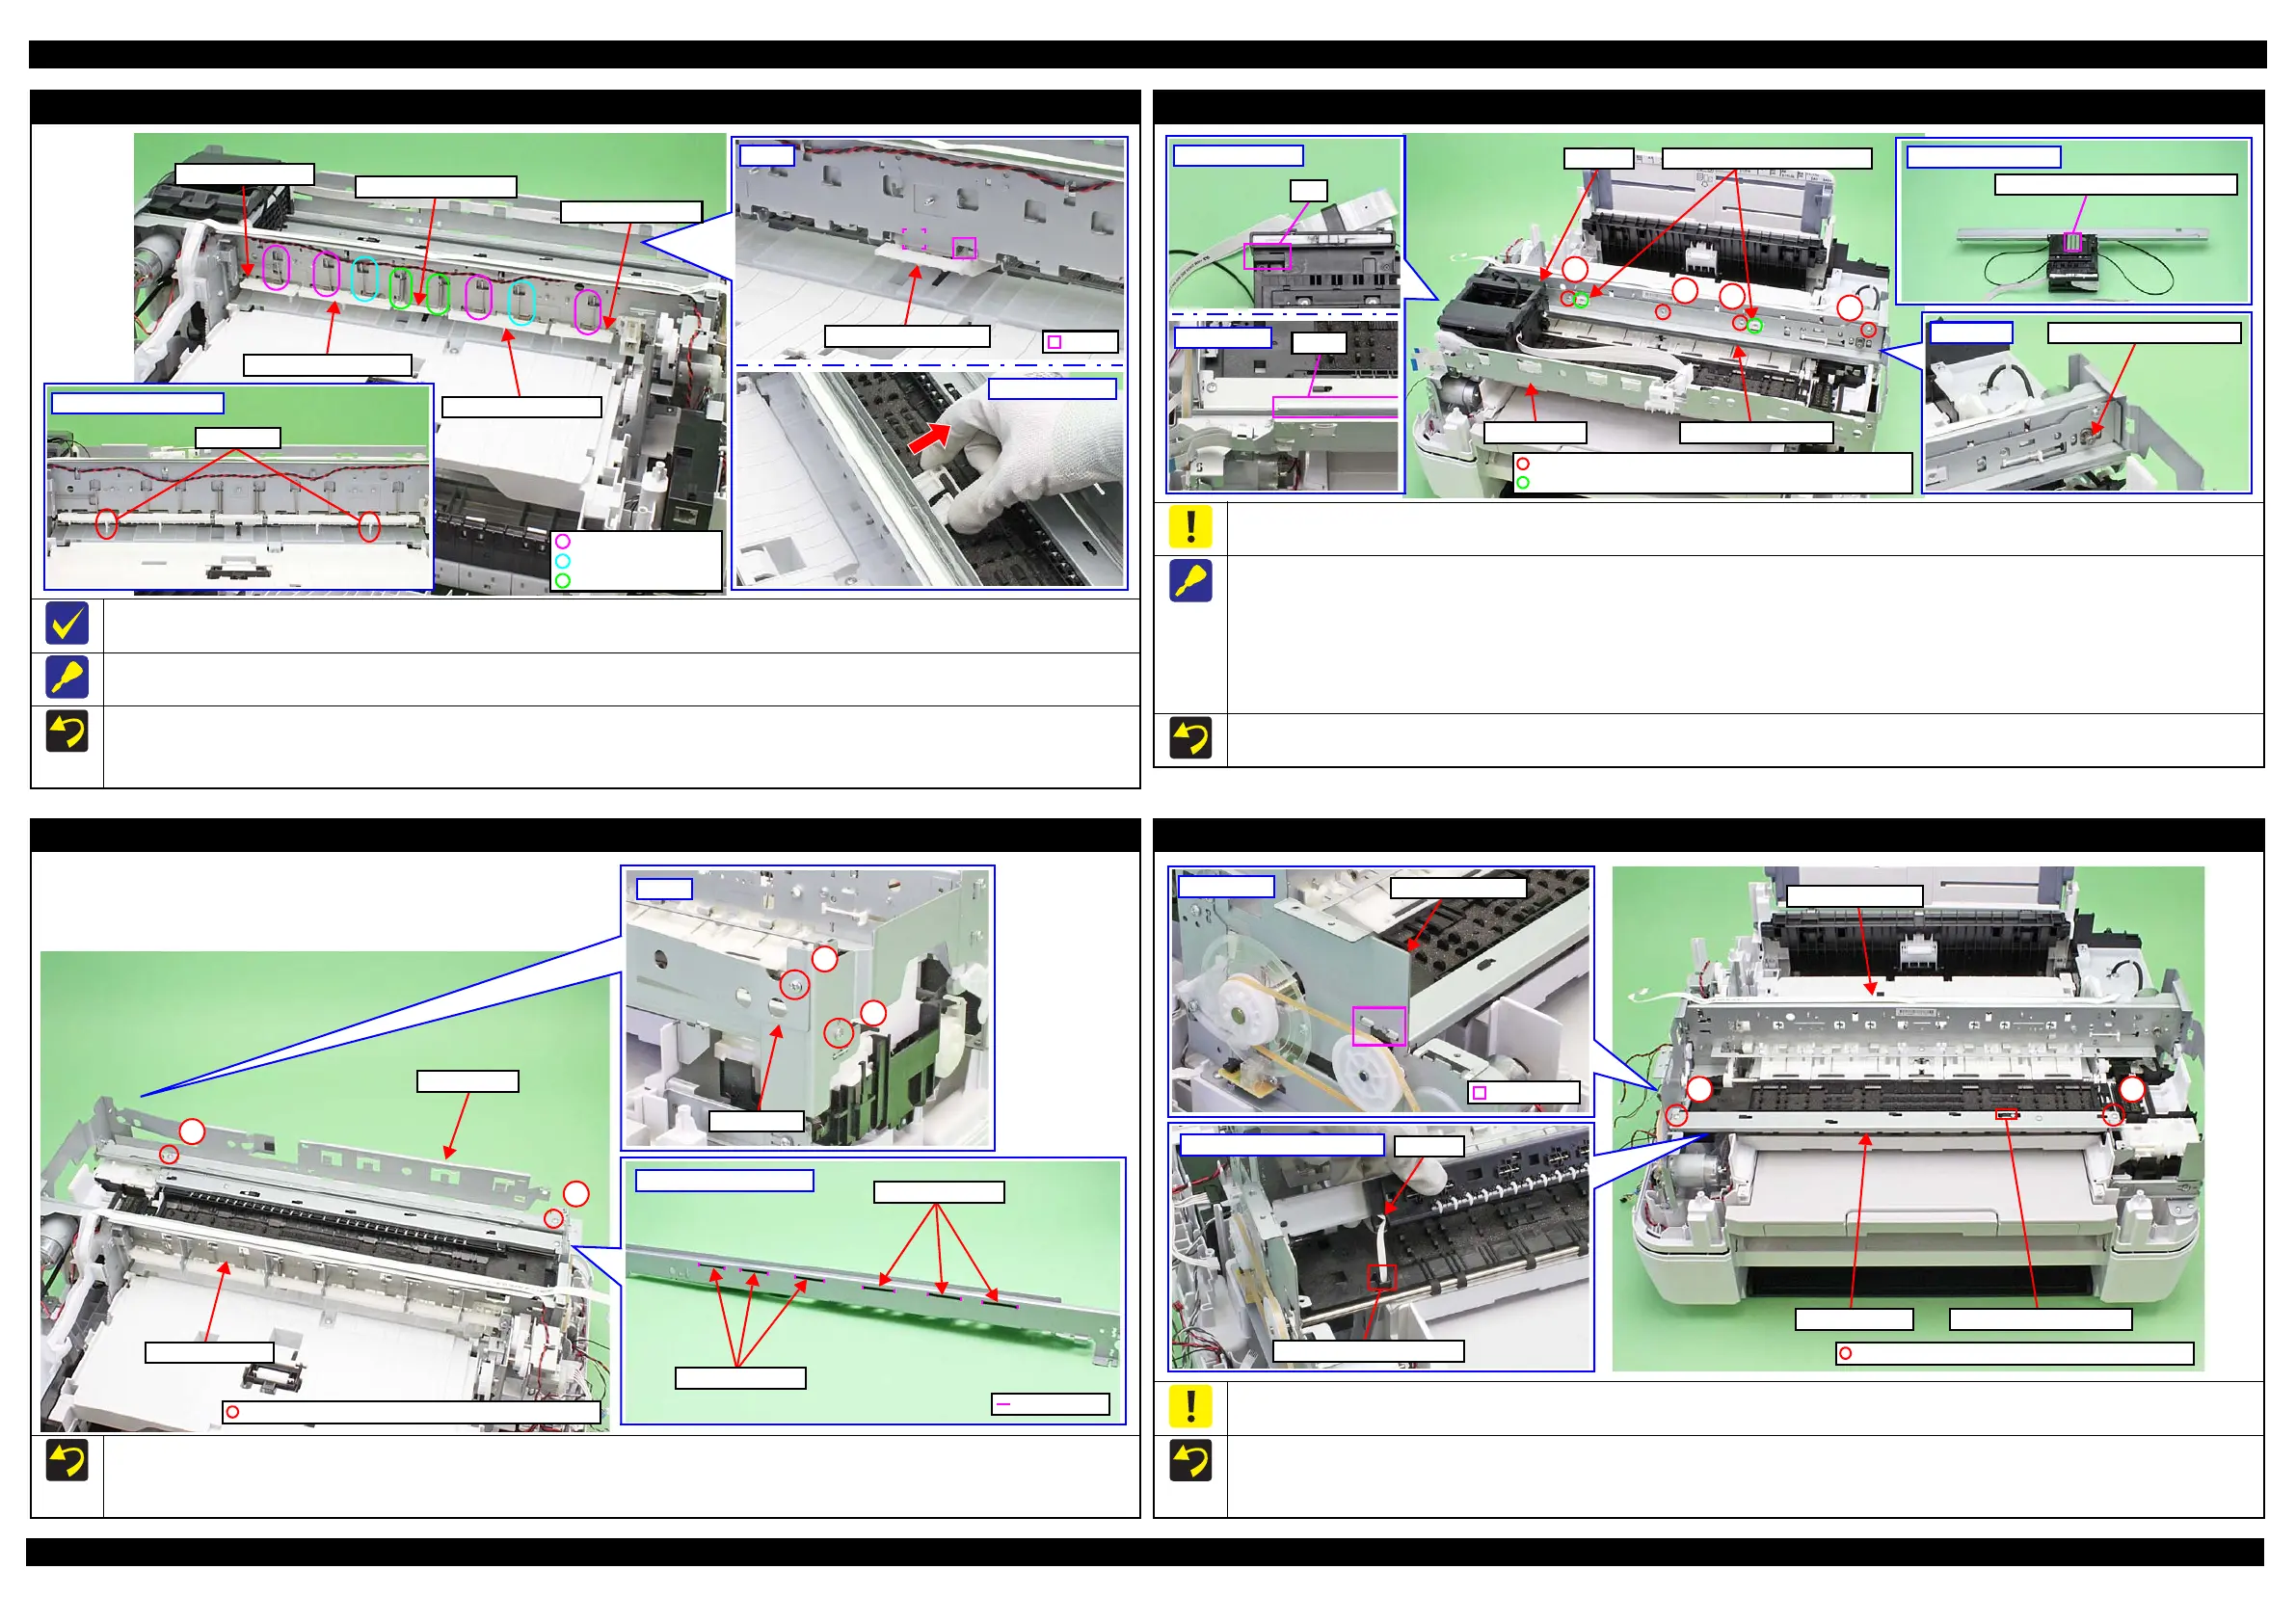
Paper Guide Upper Assy
In this manual, the Paper Guide Mid Assy/Paper Guide ML Assy/Paper Guide MR Assy/Paper Guide L Assy/Paper Guide R Assy are called the
Paper Guide Upper Assy collectively.
When removing the Paper Guide Mid Assy, release the hooks (x2), and then pull it out toward the front of the printer.
Install the Paper Guide Mid Assy/Paper Guide ML Assy/Paper Guide MR Assy/Paper Guide L Assy/Paper Guide R Assy to the positions shown above.
Install the Paper Guide L Assy and Paper Guide R Assy with the sub levers inward.
Install the Torsion spring 241.9 L, Torsion spring 241.9 R, and Extension spring 0.99 to the positions shown above.
Rear
Paper Guide Mid Assy
Hook
Paper Guide L/R Assy
Sub levers
Paper Guide R Assy
Torsion spring 241.9 L
Torsion spring 241.9 R
Extension spring 0.99
Paper Guide Mid Assy
Paper Guide ML Assy
Paper Guide MR Assy
Paper Guide L Assy
CR Guide Frame Assy (w/CR Unit)
If you remove the CR guide frame assy (w/ CR Unit) with the Printhead mounted on the CR Unit, take care not to damage the nozzle plate surface of
the Printhead.
Remove the CR guide frame assy (w/ CR Unit) as follows.
1. Move the CR Unit to the end on the 130-digit side, and detach its rail from the guide on the Front Frame.
2. Remove the screws (x2) that secure the CR guide frame stoppers (x2), and remove the stoppers.
3. Remove the screws (x4) that secure the CR guide frame assy (w/ CR Unit).
4. Disengage the hole on the CR guide frame assy (w/ CR Unit) from the pinion gear of the CR Motor.
5. Hold the CR Unit and the CR guide frame assy, and remove the CR guide frame assy (w/ CR Unit) upward.
Secure the CR guide frame assy (w/ CR Unit) with screws in the order given in the figure above.
0-digit side
CR Motor's pinion gear
Nozzle plate surface of Printhead
CR guide frame assy
C.B.S-TITE(P4) SCREW 3x8 F/ZN-3C (6±1 kgf·cm)
C.B.S-TITE SCREW 3x6 F/ZN-3C (8±1 kgf·cm)
CR guide frame assy
CR Guide Frame Stoppers
1
2
3
4
Front Frame
Front Frame
When applying the Antistatic Cloth (x6), apply them while aligning them with the standard lines.
Align the section A with the outside of the Main Frame Unit as shown above.
Tighten the screws in the order indicated in the figure above.
Bottom of Front Frame
Standard line
Antistatic Cloth
Antistatic Cloth
C.B.S-TITE SCREW 3x6 F/ZN-3C (8±1 kgf·cm)
Front Frame
1
3
Star Wheel Assy
When disassembling/reassembling the Star Wheel Assy, take care not to touch the detector on the PIS Sensor.
Route the PIS FFC through the hole on the Paper Guide Front.
Align the ribs (x2) on the Star Wheel Assy with the holes (x2) on the Main Frame Unit when reassembling the assy.
Tighten the screws in the order indicated in the figure above.
C.B.S-TITE SCREW 3x6 F/ZN-3C (8±1 kgf·cm)
130-digit side
Rib and Hole
Main Frame Unit
PIS FFC
Hole on Paper Guide Front
Bottom of Star Wheel Assy
Star Wheel Assy Detector on PIS Sensor
12
Main Frame Unit
 Loading...