Confidential
Adjustment Details of Adjustments 68
Epson WF-7620 / WF-7610 / WF-7110 Series Revision B
3.2.2.3 PG adjustment procedure
Adjustment of the 0-digit side
1. Loosen the screws (x4) on the CR Guide Frame and the screws (x2) on the PG adjustment cams (L/R) on
both sides of the printer. (See " CR Guide Frame Assy (w/CR Unit) (p44)", Figure 3-9.)
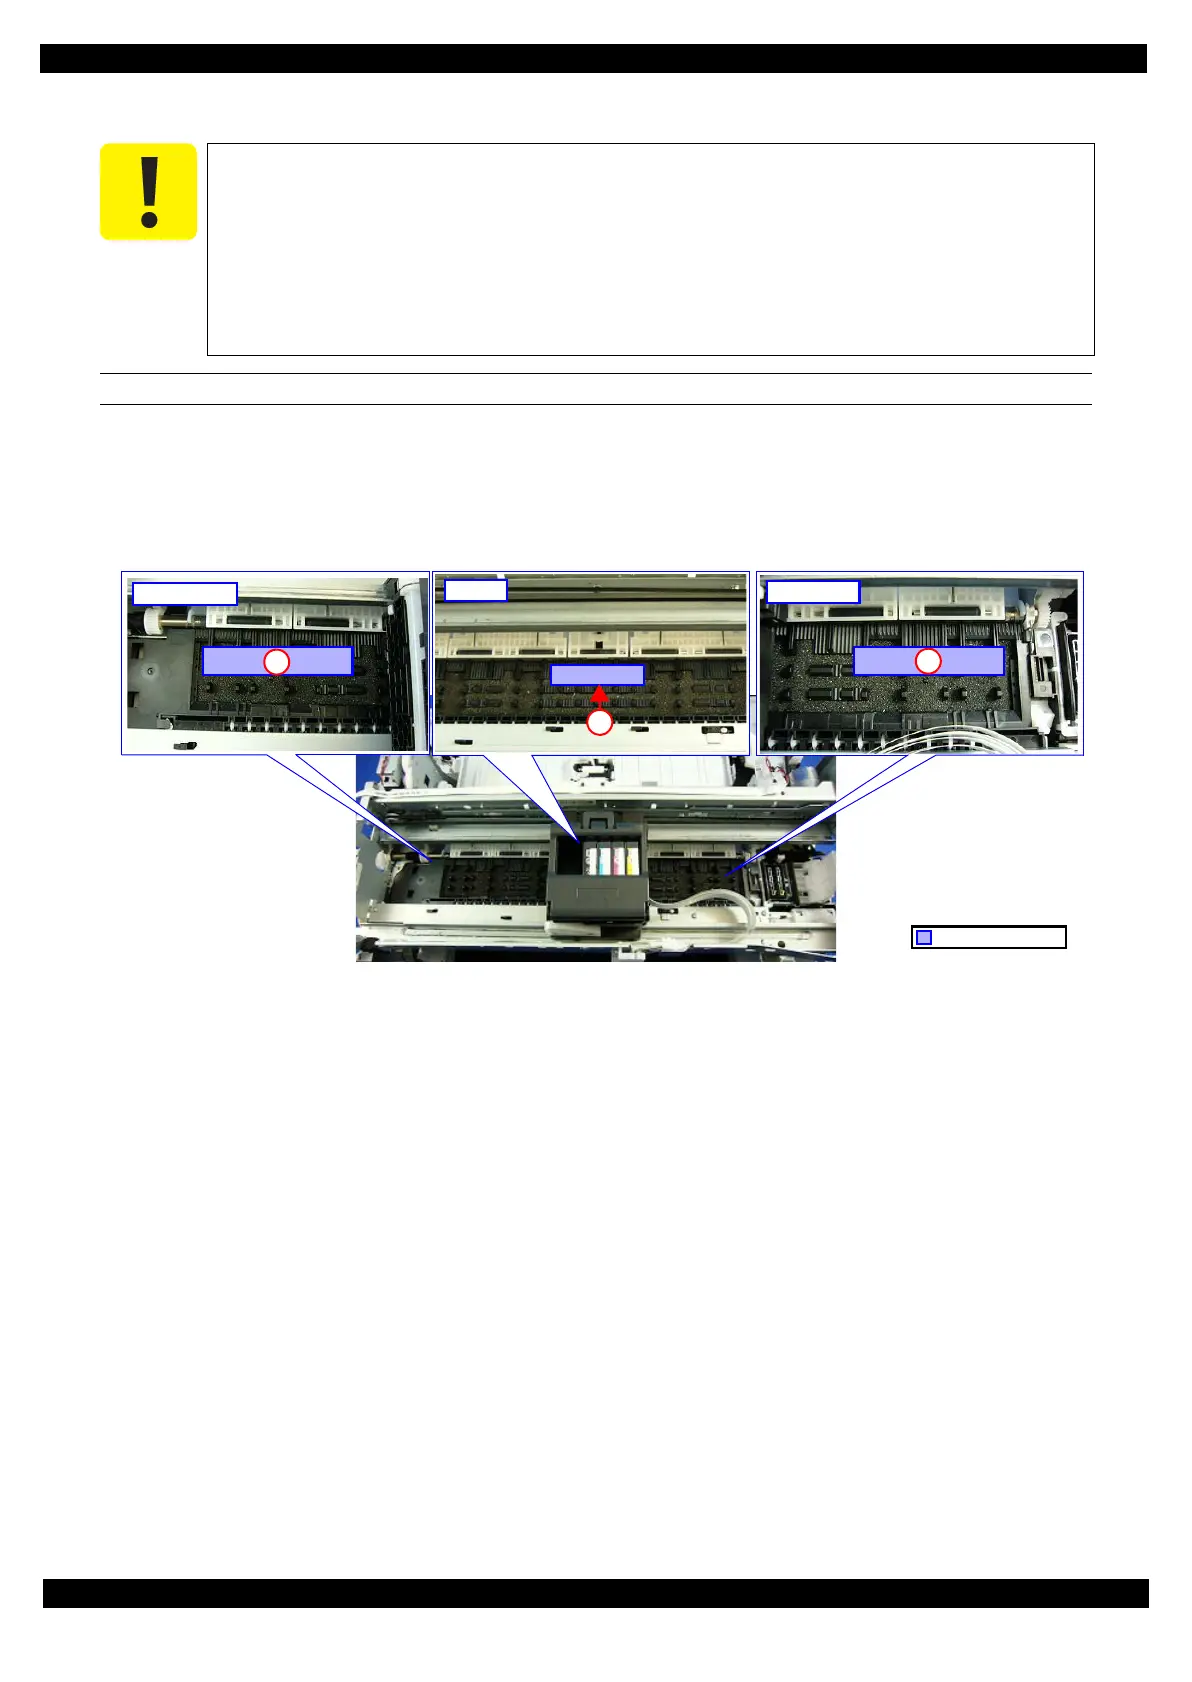
2. Move the CR Unit in the middle of the printer, then place the 1.6 mm thickness gauge with Teflon tape
applied at the position A shown in Figure 3-9.
Figure 3-9. Placement of the Thickness Gauge
3. Move the CR Unit to the thickness gauge and check if the CR Unit touches the gauge. If it touches the gauge,
adjust the PG as follows. If not, go to the next step.
1. Bring the CR Unit back to the middle of the printer, and increment the PG adjustment cam on the 0-digit side
by one notch. (See Figure 3-8.)
2. Move the CR Unit to the thickness gauge and check if the CR Unit touches the gauge.
• When the CR Unit does not touch the thickness gauge
Tighten the screw on the PG adjustment cam on the 0-digit side and go to " Adjustment of the 130-digit side
(p69)".
• When the CR Unit touches the thickness gauge
Go back to Step 3-1 and try again.
4. Adjust the PG as follows.
1. Bring the CR Unit back to the middle of the printer, and increment the PG adjustment cam on the 0-digit side
by one notch. (See Figure 3-8.)
2. Move the CR Unit to the thickness gauge and check if the CR Unit touches the gauge.
• When the CR Unit touches the thickness gauge
Increment the PG adjustment cam on the 0-digit side by one notch, then tighten the screw on the PG
adjustment cam to secure it and go to" Adjustment of the 130-digit side (p69)".
• When the CR Unit does not touch the thickness gauge
Go back to Step 4-1 and try again.
When performing the PG adjustment, make sure of the following.
Perform the PG adjustment with the new cartridges installed on the CR Unit before
installing the CR Scale.
Move the CR Unit by pulling the top pf the CR timing belt.
Be careful not to damage the nozzle surface of the Printhead with the thickness gauge.
When make the Printhead touch the thickness gauge, be careful not to let the Printhead
run onto the gauge.
 Loading...