Confidential
Adjustment Details of Adjustments 67
Epson WF-7620 / WF-7610 / WF-7110 Series Revision B
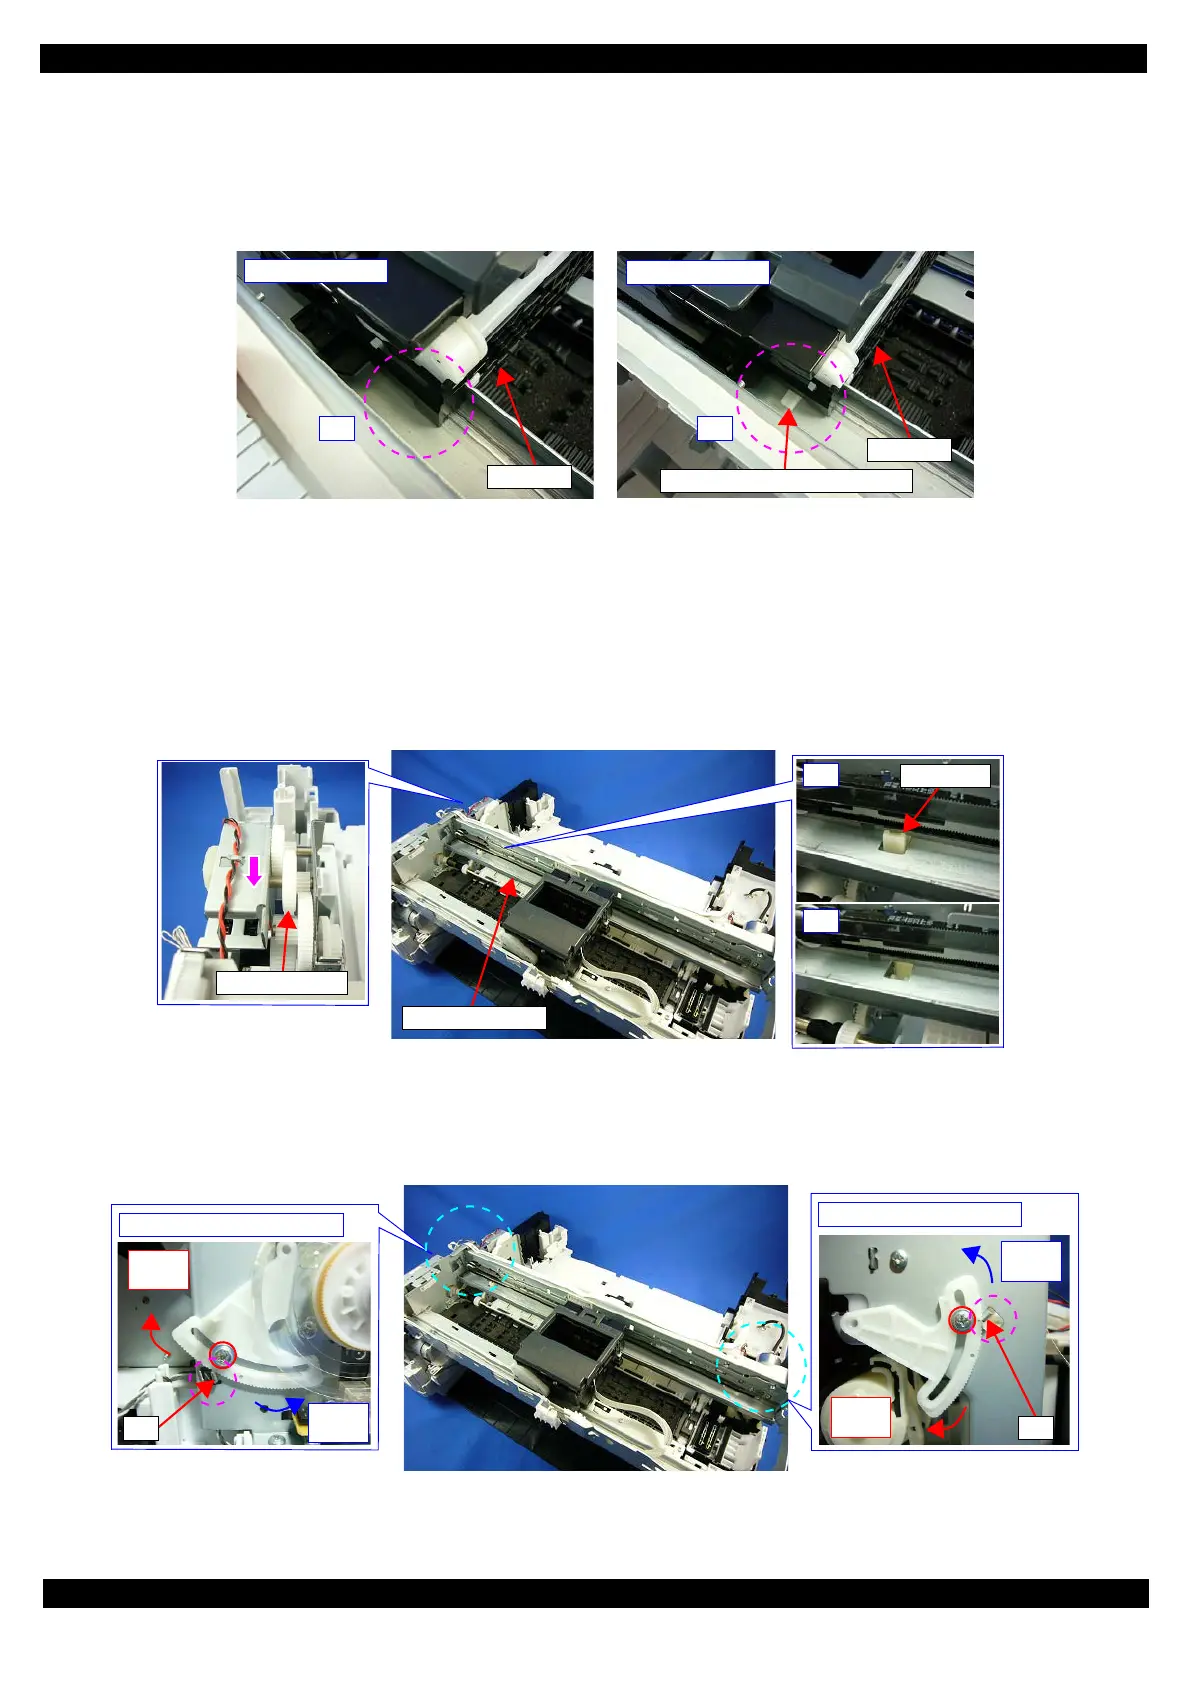
APG Position Check
Make sure the APG position is in the [PG1] position.
How to check
If it is in the [PG1] position, the lever of the APG transmission slider on the rear of the CR Unit cannot be seen.
(See Figure 3-6.)
Figure 3-6. APG Position Check
If the lever is in the NG condition shown in Figure 3-6, set it in the [PG1] position as follows.
1. Move the Carriage Assy to the center of the printer.
2. Rotate the gear on the APG Unit shown in Figure 3-7 in the direction of the arrow until the APG Lever comes
out from the hole on the Main Frame.
3. Move the CR Unit to the 130-digit side until it touches the APG Lever.
4. Check the APG transmission slider is in the “OK” status shown in Figure 3-6.
Figure 3-7. APG Lever
Confirmation of the PG adjustment cam positions
Make sure the center of the notches on the PG adjustment cam on both sides of the printer is set to the rib of
the frame.
Figure 3-8. PG Adjustment Cams
Lever of APG transmission slider
NG
CR Unit
Rear of CR Unit
Rib
To -
PG: Max.
To +
PG: Min.
Rib
To +
PG: Min.
To -
PG: Max.
PG adj. cam L (130-digit side)
PG adj. cam R (0-digit side)
 Loading...