EASY-ROTOR-CONTROL M V2.2 Instructions
___________________________________________________________________________
© Ing.-Büro E. Alba de Schmidt web : www.schmidt-alba.de
Tannenstr. 16 Page 23 of 44 email : erc@schmidt-alba.de
86836 Untermeitingen / Germany
This document is for the user only. Any publishing (printed or in electronic form) is not allowed.
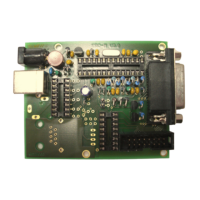
4. Rotor-Card (optional)
4.1 Bill of material
The BOM is in the order how you should use the parts.
Rotor-card V1.6 Bill Of Material
QTY
Type Value Reference Comments
1
PCB RC 2-layer 67.5x43.6mm V1.6
1
Capacitor ceramic 100n 50V 20% C1
3
Diode 1N4004 D1,D2,D3 alt. 1N4007
1
Diode P6KE33CA D4
1
Coil 10u 10% SMCC L1
1
Terminal-block 2 pol. 5mm X6
5
Terminal-block 3 pol. 5mm X1,X2,X3,X4,X5
1
Connector Mini-DIN 6-pole print X7
3
Relay FTR F1CA012V K1,K2,K3
alt. LMR2-12D
alt. RT424012
4
Spring-washer 3.2mm
4
Screw M3x8mm
2
Nut M3
2
Mounting-angle 11x10x7mm
1
Cable with 6-pole mini-DIN 1m To ERC-M
1
Cable black 0.5m 0.75sqmm for cableing
1
Cable blue 0.5m 0.75sqmm for cableing
3
Cable-tie 150mm for cableing
4.2 Assembly of the Rotor-Card PCB
Assemble and solder the components according to the following drawings.
Please read the following instructions before you start:
1. The vertical assembled Diodes should have a distance (1-2mm) to the PCB while soldering.
Otherwise there is the risk of overheating these components while soldering.
2. Put the 2-pole terminal-block X6 and the 3-pole terminal block X2 together before assembly. You
will get a 5-pole terminal-block.
Do the same with 2 of the 3-pole terminal-blocks for X1 and X3 to build a 6-pole terminal-block.
3. Take care of polarization of the following components :
- Diodes D1,D2,D3 (D4 is bidirectional, no polarization)
- Terminal-blocks X1,X2,X3,X4,X5,X6 (cable entry to the outside)
Those components are marked red in the following drawing.
Diodes :
=