EasyManua.ls Logo

ESAB Rogue ES 180i Pro - User Manual

ESAB Rogue ES 180i Pro
30 pages
Print Icon
To Next Page IconTo Next Page
Loading...
Rogue
Instruction manual
0463 709 101 US 20201116
Valid for: A01-, A02-, A03-, HA19-, HA042-xxxx-xxxx
ES130iPRO, ES180iPRO

Other manuals for ESAB Rogue ES 180i Pro

Questions and Answers

  • D
    Dennis CoffeyAug 2, 2025
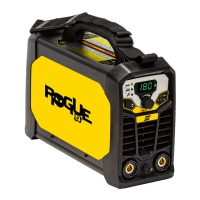
    How to troubleshoot MMA welding problems with my ESAB Rogue ES 180i Pro Welding System?
    • K
      Kimberly HernandezAug 2, 2025
      If you're experiencing issues with MMA welding on your ESAB Welding System, make sure that the welding process is set for MMA. Also, verify that the welding and return cables are correctly connected to the power source. Ensure the return clamp has good contact with the workpiece. Check that you're using the correct electrodes and polarity (refer to the electrode packaging for polarity). Confirm the correct welding current (A) is set, and adjust Arc Force and Hot start as needed.
  • P
    Patricia HarrisAug 6, 2025
    How to fix TIG welding problems on my ESAB Rogue ES 180i Pro?
    • A
      amandasalinasAug 6, 2025
      If you're having TIG welding problems with your ESAB Welding System, ensure the welding process is set for Live TIG as necessary. Confirm that the TIG torch and return cables are correctly connected to the power source. Ensure the return clamp has good contact with the workpiece and that the TIG torch lead is connected to the negative welding terminal. Also, be sure you're using the correct shielding gas, gas flow, welding current, filler rod placement, electrode diameter, and welding mode on the power source. Finally, check that the gas valve on the TIG torch is ON.
  • K
    Kayla RodriguezAug 10, 2025
    What to do if my ESAB Welding System has no arc?
    • L
      Lauren OlsonAug 10, 2025
      If your ESAB Welding System has no arc, start by checking that the electrical power supply switch is turned on and that the display is on, verifying the power source has power. Also, check that the setting panel displays correct values. Ensure the welding and return cables are correctly connected and inspect the electrical power supply fuses.
  • S
    Stephen GrimesAug 15, 2025
    How to troubleshoot Live TIG (GTAW) welding problems with my ESAB Welding System?
    • L
      Lisa AlvarezAug 15, 2025
      If you're experiencing issues with Live TIG (GTAW) welding on your ESAB Welding System, ensure the welding process is correctly set for Live TIG. Verify that both the TIG torch and return cables are properly connected to the power source, and the return clamp has good contact with the workpiece. Confirm the TIG torch lead is connected to the negative welding terminal. Check that you are using the correct shielding gas, gas flow, welding current, filler rod placement, electrode diameter, and welding mode on the power source. Finally, ensure the gas valve on the TIG torch is turned ON.
  • M
    Michael GeorgeAug 25, 2025
    Why does the thermal protection trip frequently on my ESAB Rogue ES 180i Pro Welding System?
    • A
      Amber JacksonAug 25, 2025
      If the thermal protection on your ESAB Welding System trips frequently, ensure that you have not exceeded the recommended duty cycle for the weld current, referring to the "Duty cycle" section in "TECHNICAL DATA". Also, verify that the air inlets or outlets are not clogged. Clean the inside of the machine using routine maintenance methods.
  • A
    Abigail MooreAug 28, 2025
    What to do if welding current is interrupted during welding with my ESAB Welding System?
    • L
      Laura LawrenceAug 28, 2025
      If the welding current is interrupted during welding with your ESAB Welding System, check whether the Over Temperature LED (Thermal Protection) on the setting panel is illuminated. Then, continue troubleshooting as if there is "No Arc."
  • D
    David WagnerSep 10, 2025
    How to solve Stick (SMAW) welding problems on my ESAB Welding System?
    • N
      Nathan MontgomerySep 12, 2025
      To troubleshoot Stick (SMAW) welding issues on your ESAB Welding System, first, check that the welding process is set for Stick (SMAW). Then, confirm that the welding and return cables are correctly connected to the power source and that the return clamp has good contact with the workpiece. Verify that you are using the correct electrodes and polarity (check the electrode packaging for polarity). Ensure that the correct welding current is set. Adjust the Arc Force and Hot start settings as needed.

Summary

Safety Information and Precautions

Meaning of Symbols

Explains the meaning of warning symbols used in the manual for hazard identification.

General Safety Precautions

Provides essential safety guidelines and precautions for operating the welding equipment.

Fire and Explosion Hazards

Details risks associated with fires and explosions during welding operations and necessary precautions.

Electrical Shock Hazards

Outlines the dangers of electrical shock and essential preventive measures for safe operation.

Health and Environmental Safety

Covers health risks from EMF, fumes, gases, and safe cylinder handling practices for user well-being.

Mechanical and Maintenance Safety

Addresses safety related to moving parts and proper equipment maintenance procedures.

User Responsibility

Defines user obligations for safe operation and workplace suitability.

Specific Hazard Warnings

Highlights specific dangers like arc rays, noise, hot surfaces, fire, and regulatory warnings.

Introduction to the Welding Power Source

Product Overview

Introduces the Rogue ES 130i PRO and ES 180i PRO welding power sources and their capabilities.

Included Equipment

Lists the components and accessories included with the welding power source package.

Technical Data and Specifications

Electrical and Performance Specifications

Details electrical specifications like voltage, current, power, and duty cycle for performance analysis.

Operating and Environmental Conditions

Provides operating temperature, dimensions, weight, and enclosure class information.

Installation Procedures

Location and Lifting Instructions

Specifies recommended placement and safe lifting procedures for the welding unit.

Main Power Supply Connection

Details requirements for connecting to the main power supply, including fuses, cables, and generators.

Operating the Welding Power Source

Overview and Control Devices

Introduces operation and identifies control panel components, terminals, and connections.

Powering On;Off and Functions

Explains how to power the unit, fan control, thermal protection, and basic welding functions.

Welding Methods and Features

Describes TIG welding, specific electrode settings (Cel 6010), and the Voltage Reduction Device (VRD).

Setting Panel and Remote Control

Details the functions of the setting panel indicators and how to use the remote control.

Maintenance and Cleaning

Routine Maintenance Schedule

Outlines a schedule for regular equipment checks and cleaning during normal conditions.

Cleaning Procedures

Provides detailed steps for cleaning the welding power source to maintain performance and longevity.

Troubleshooting Common Issues

Fault Diagnosis and Correction

Lists common welding problems and their corresponding troubleshooting steps before contacting service.

Ordering Spare Parts

Spare Parts Ordering Information

Guides users on how to order spare and wear parts from ESAB dealers, including necessary product details.

Diagrams and Schematics

Electrical Schematics

Provides electrical diagrams for different serial number ranges of the power source.

Product and Manual Ordering Numbers

Product and Manual Identification

Lists ordering numbers for welding power sources and the instruction manual for identification.

Available Accessories

Accessory List and Descriptions

Lists and describes various accessories available for purchase to enhance the welding power source functionality.

ESAB Rogue ES 180i Pro Specifications

General IconGeneral
BrandESAB
ModelRogue ES 180i Pro
CategoryWelding System
LanguageEnglish

Related product manuals