16
Wait until the next scheduled time
Run the task as soon as possible
Run the task immediately if the time since its last
execution exceeds specified interval (the interval can
be defined using the Minimum task interval scroll
box)
In the next step, a summary window with information
about the current scheduled task is displayed. Click the
Finish button.
The new scheduled task will be added to the list of
currently scheduled tasks.
The system, by default, contains essential scheduled
tasks to ensure correct product functionality. These
should not be altered, and are hidden by default. To
change this option and make these tasks visible, enter
the Setup > Enter application preferences ... > Tools >
Scheduler and select the Show system tasks option.
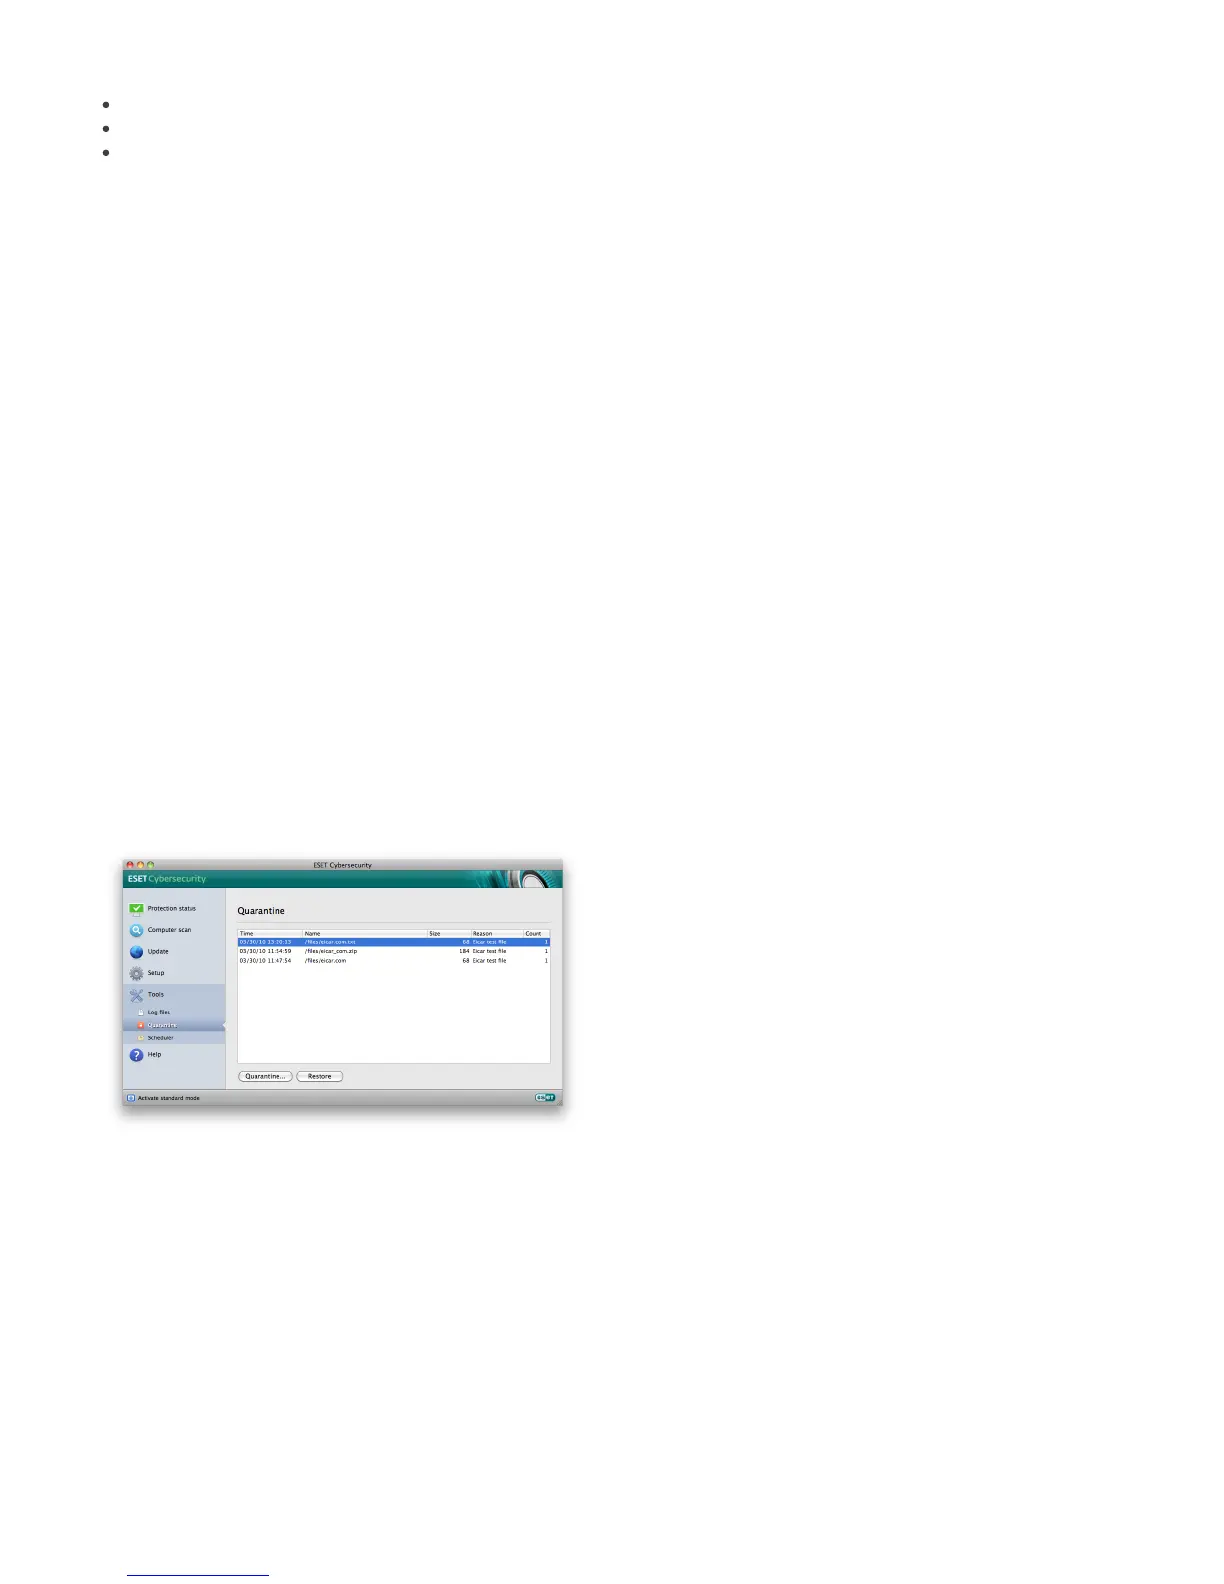
4.4 Quarantine
The main task of quarantine is to safely store infected
files. Files should be quarantined if they cannot be
cleaned, if it is not safe or advisable to delete them, or if
they are being falsely detected by ESET Cybersecurity.
You can choose to quarantine any file. This is advisable if
a file behaves suspiciously but is not detected by the
antivirus scanner. Quarantined files can be submitted for
analysis to ESET’s Threat Lab.
Files stored in the quarantine folder can be viewed in a
table which displays the date and time of quarantine, the
path to the original location of the infected file, its size in
bytes, reason (e.g., added by user…), and number of
threats (e.g., if it is an archive containing multiple
infiltrations). The quarantine folder with quarantined
files (/Library/Application Support/Eset/cache/esets/
quarantine) remains in the system even after uninstalling
ESET Cybersecurity. Quarantined files are stored in a safe
encrypted form and can be restored again after installing
ESET Cybersecurity.
4.4.1 Quarantining files
ESET Cybersecurity automatically quarantines deleted
files (if you have not cancelled this option in the alert
window). If desired, you can quarantine any suspicious
file manually by clicking the Quarantine... button. The
context menu can also be used for this purpose – right-
click in the Quarantine window, choose file you want to
quarantine and click the Open button.
4.4.2 Restoring from Quarantine
Quarantined files can also be restored to their original
location. Use the Restore button for this purpose;
Restore is also available from the context menu by right-
clicking on the given file in the Quarantine window,
then clicking Restore. The context menu also offers the
option Restore to..., which allows you to restore a file to
a location other than the one from which it was deleted.
4.4.3 Submitting file from Quarantine
If you have quarantined a suspicious file that was not
detected by the program, or if a file was incorrectly
evaluated as infected (e.g., by heuristic analysis of the
code) and subsequently quarantined, please send the file
to ESET‘s Threat Lab. To submit a file from quarantine,
right-click the file and select Submit file for analysis
from the context menu.
4.5 Log files
The Log files contain information about all important
program events that have occurred and provide an
overview of detected threats. Logging acts as an
essential tool in system analysis, threat detection and
troubleshooting. Logging is performed actively in the
background with no user interaction. Information is
recorded based on the current log verbosity settings. It
is possible to view text messages and logs directly from
the ESET Cybersecurity environment, as well as to
archive logs.
Log files are accessible from the ESET Cybersecurity main
menu by clicking Tools > Log files. Select the desired log
type using the Log drop-down menu at the top of the
window. The following logs are available:
1.
Detected threats – Use this option to view all
information about events related to the detection of
infiltrations.
2.
Events – This option is designed for system
administrators and users to solve problems. All
important actions performed by ESET Cybersecurity
are recorded in the Event logs.
3.
Computer scan – Results of all completed scans are
displayed in this window. Double-click any entry to
view details of the respective On-demand computer
scan.
In each section, the displayed information can be directly
copied to the clipboard by selecting the entry and
clicking on the Copy button.