P-300 Web Controller Configuration and Troubleshooting Manual 11
2.1.2 Web Controller Configuration Procedure
1. Navigate to the web controller setup page, and click on the “Configure web controller” button. When the
dialog box asks for the configuration password, enter “4141” and click the OK button.
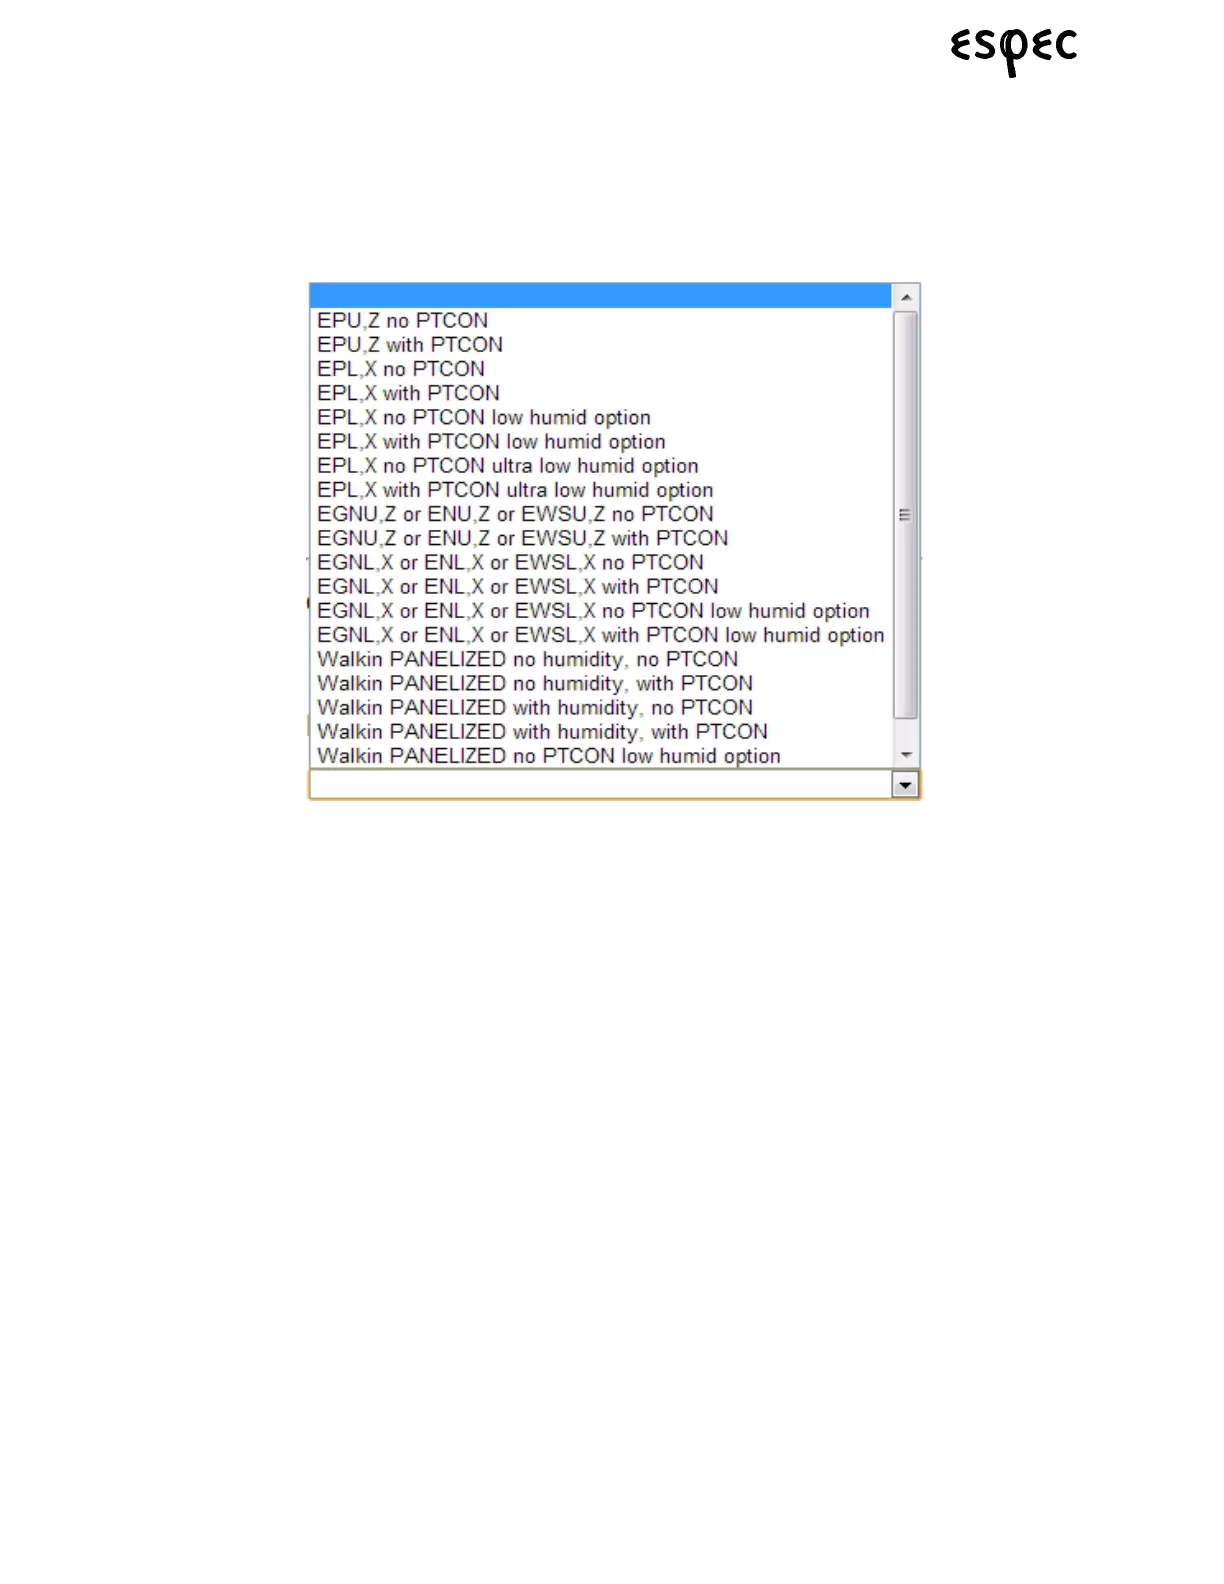
2. The initial preference for configuration is to use a configuration “preset”. You need to know the model
type of your chamber (EP, EGN, EN, etc.). Click on the “Load Preset” dropdown (shown below) and
locate your chamber in the list. Make sure to select the correct line item, based on whether or not your
chamber has product temperature control and if it has low humidity or ultra low humidity options.
3. If your exact chamber is in the list, continue to step #4. If your chamber is not on the preset list, skip to
step #5 so that you can load the configurations manually in the “Edit config” area of the web page.
4. Click on the appropriate preset and wait for the web server to load the data. A message box that says
“Loaded preset to configuration file” will appear when the configuration data has been loaded. Click the
OK button to dismiss the box. Now, go to step #10 to complete the configuration process.
5. Using the “Polling interval” numeric data box, select the polling interval you wish to use for data collec-
tion with the web server. Manually type the data collection interval in the edit box, or use the plus and
minus buttons to change the value one second at a time. This interval time is directly related to the
amount of data that the web server can store, as detailed below.
10 second interval - 3 days of data storage
30 second interval - 9 days of data storage
60 second interval - 18 days of data storage
120 second interval - 36 days of data storage
6. Click the appropriate “on” or “off” radio button for “Product control”. This value corresponds to item #4
from the data chart that you filled in at the start of this process.
7. Click the appropriate “on” or “off” radio button for “Humidity control”. This value corresponds to item #2
from the data chart that you filled in at the start of this process.