PIN DEFINITION
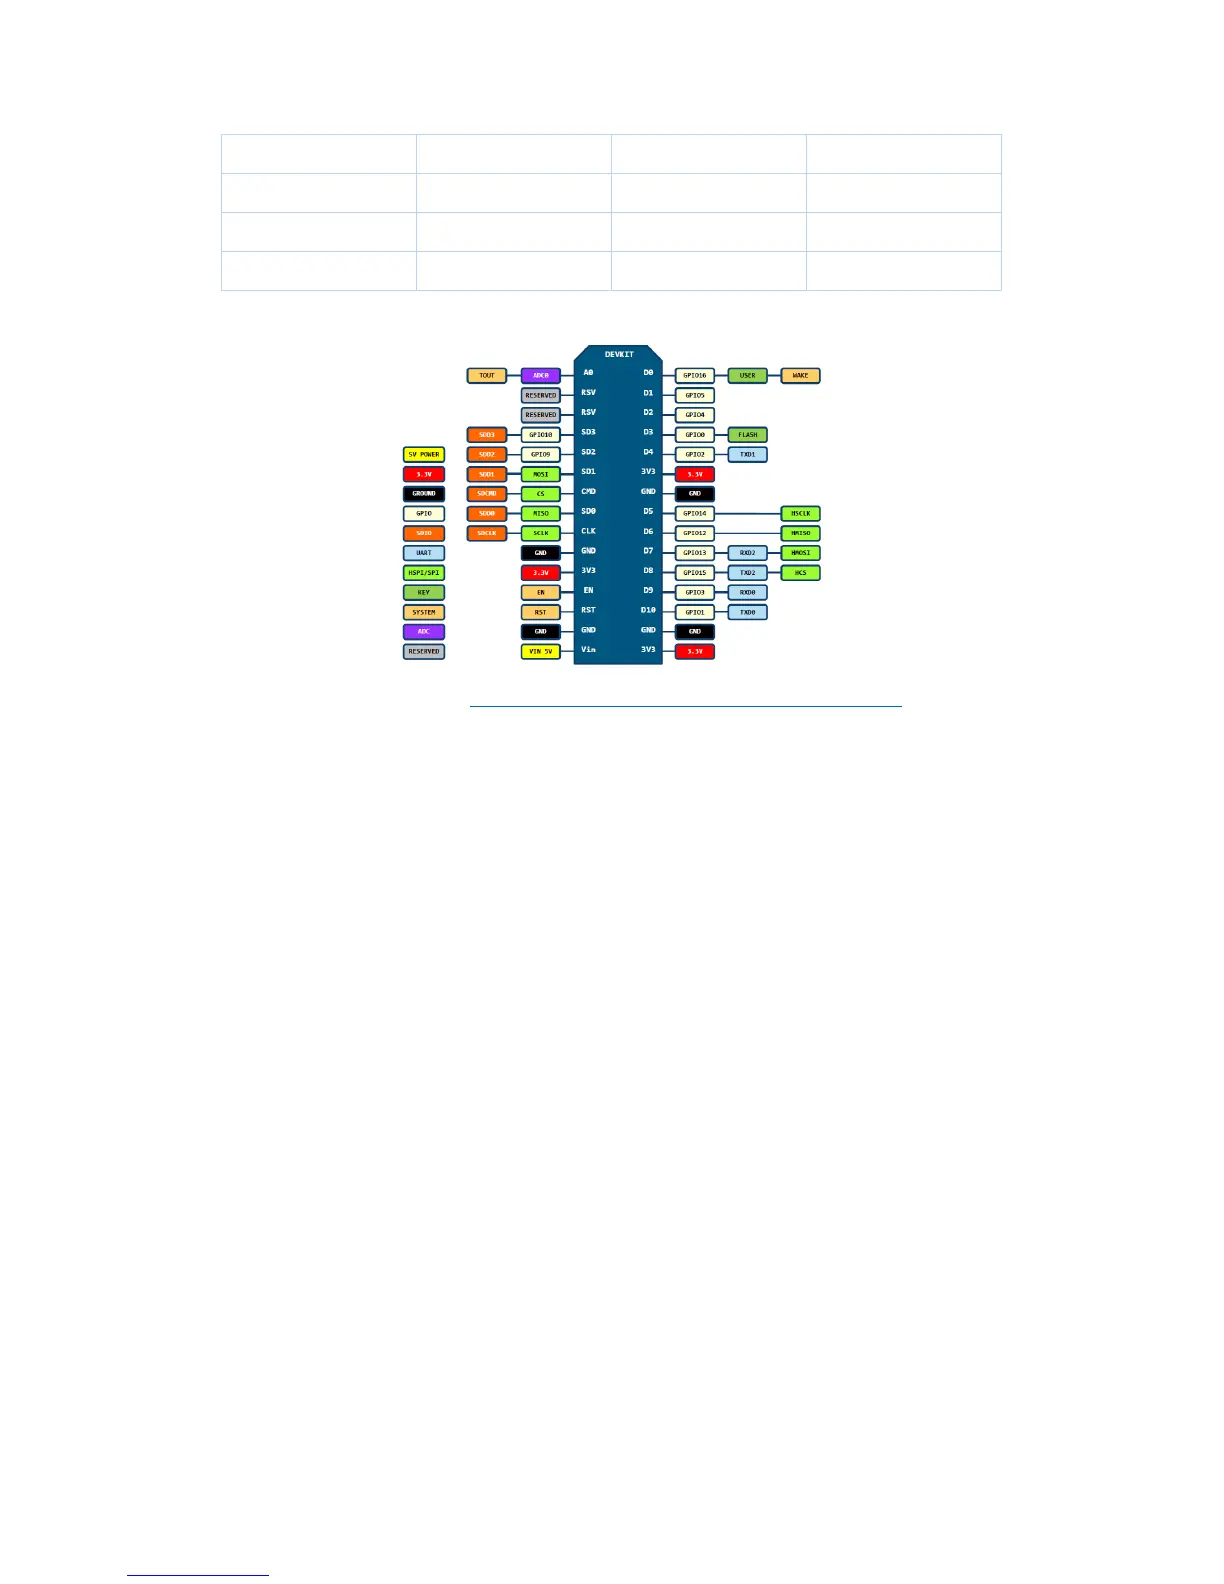
NodeMCU DevKit Pin Map https://github.com/nodemcu/nodemcu-devkit-v1.0
D0(GPIO16) can only be used as gpio read/write, no interrupt supported, no pwm/i2c/ow
supported.
Exercise 04.02: Can’t touch this!?
In this exercise, you are going to read from the button on your NodeMCU labelled with FLASH.
This button is connected to the D3 pin. Put the D3 pin to input mode in the setup() method
and read from the pin repeatedly in the loop() and write the results to the console.
Exercise 04.03: Led it shine!
Let’s control an LED! Your NodeMCU has one built in and it is connected to D0. Like in the
previous example set the pin to the correct mode and then toggle it once per second.
Exercise 04.04: Every breath you take! (Bonus for Experts)
Pure blinking is boring. We want our little ESP8266 to live! Control the intensity of the LED
and make it look as if the ESP8266 was breathing. Note: if the LED was on another pin than
D0 we would use pulse width modulation (PWM) and the writeAnalog(PIN, INTENSITY)
method. But this feature is not available on D0 so you will have to do this in your code.