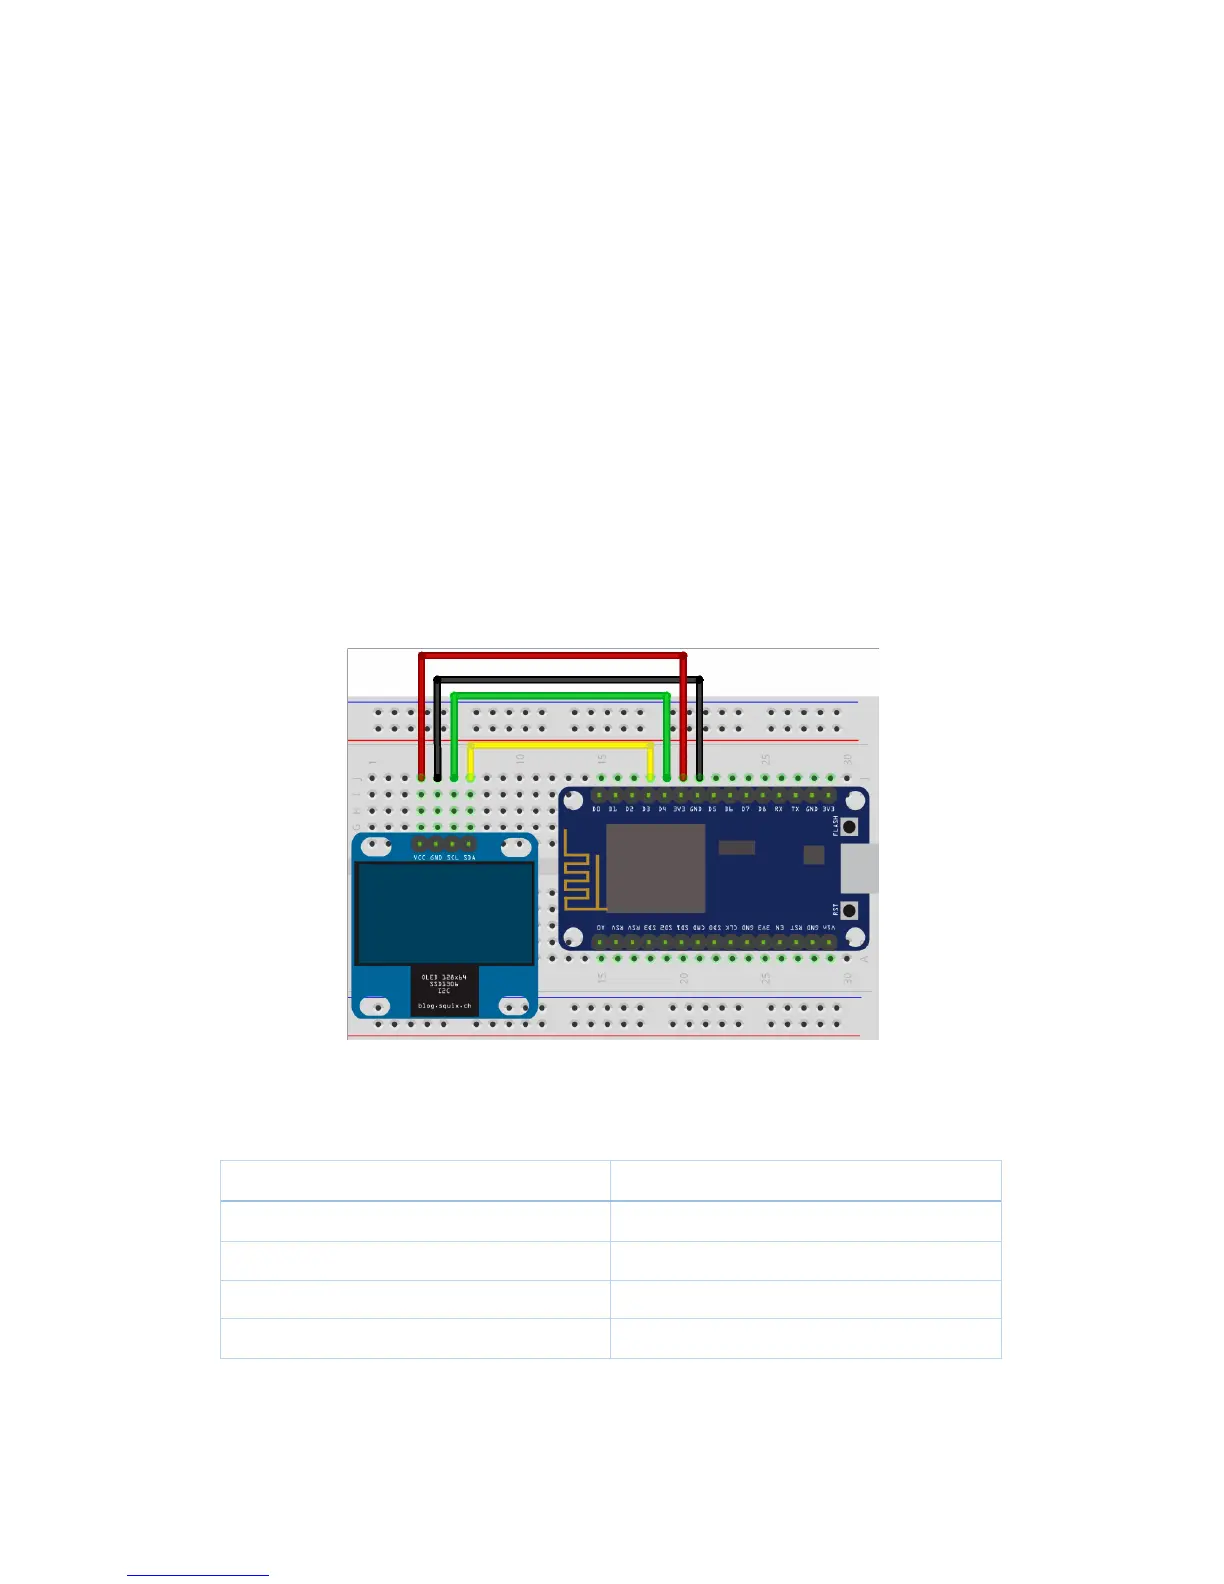
The WeatherStation Kit comes with an OLED display that has four connectors: VCC, GND, SCL
and SDA. They have the following meaning:
⚫ VCC and GND are the power supply of the display. VCC is the positive supply voltage
and GND stands for “ground”. They will be connected to 3V3 and GND on the NodeMCU
board
⚫ SCL and SDA are the data lines of the I2C protocol. SCL stands for Serial Clock and SDA
for Serial Data.
In the following diagram, I used a breadboard and male-to-male jumpers to connect the
components. But you can also connect them directly with four (colored) female-to-female
jumpers. They come with the WeatherStation Kit. Just peel the first four wires off of the bundle
and connect them according to the picture. The colors do not matter.
Wiring the Weather Station
Please note: there are versions of the OLED display with swapped GND and VCC pins.
Becareful to connect them according to the printed labels, not (necessarily) this diagram!
As mentioned earlier, there exists a little confusion about the pin names. The Arduino IDE
uses the GPIO number given by the chip. The NodeMCU team who designed the board