12
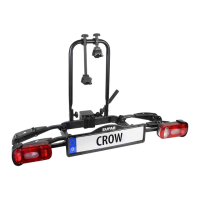
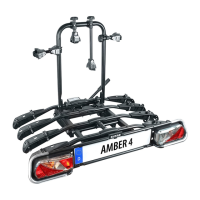
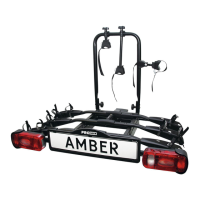
The rst bicycle is placed in the rst bicycle rail (closest to the vehicle) and secured to the U-shaped bracket with the short frame holder. To do this, use the side
of the frame holder with the tensioning strap to secure to the bicycle frame. The wheels are secured by placing the tensioning straps around the wheel rim of
your bicycle and tightening the straps. Caution: The front wheel must be secured with two small tensioning straps to prevent it from turning (Figure 16). The
second bicycle is used placed in the second rail, facing the opposite direction and secured to the U-shaped bracket with the long frame holder. The wheels are
secured in the same way as for the rst bicycle. It may be necessary to oset the individual bicycles dierently on the rack to ensure that the frame holders may
be correctly secured. Now secure the bicycles with the long safety strap. Wrap the safety strap through the bicycle frames and the U-shaped bracket and tighten.
(See Figure 17)
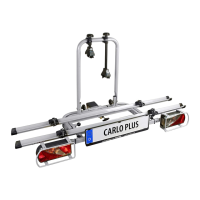
5.5 Mounting the bicycles to the rear rack
Without this safety strap, the
bicycle rack may not be used.
Figure 16: Tensioning straps for front wheel Figure 17: Safety strap
Safety strap
6. Maintenance and care
7. Notes regarding environmental protection
5.6 Folding up the bicycle rack
8. Contact information
• After use, store the bicycle rack in a clean and dry place. Wash any mud or other dirt o using water.
• Keep the trailer coupling clean and free of grease
• Keep the rack tow bar clean and free of grease.
• Check the bicycle rack regularly for damages. Damaged or worn parts must be replaced immediately. Only original replacement parts may be used.
• Check the bolts and nuts of the bicycle rack regularly and tighten when necessary.
• Immediately treat any damage to paintwork with paint.
• Regularly lubricate rotating and moving parts.
Please dispose of this device via the recycling bin or the public/municipal collection points.
The materials are recyclable. You make an important contribution to protecting our environment by recycling, material utilisation or other forms of reusing
waste equipment!
First fold the wheel rails back onto the rack table. Push the locking mechanism of the rear lights (Position 1 in
Figure 18) outwards, and then swivel the light mount back (Position 2 in Figure 18). Push it rmly against the rack
table until it engages perceptibly. Proceed accordingly on the other side of the rack.
In order to store the bicycle rack as atly as possible, you can also fold the U-shaped bracket down. To do this,
undo the two knob nuts until the U-shaped bracket comes out of the locking mechanism. Now you can fold the
U-shaped bracket down onto the rack table.
EAL GmbH
Otto-Hausmann-Ring 107
42115 Wuppertal
Germany
Telephone: +49 (0)202 42 92 83 0
Fax: +49 (0)202 42 92 83 160
Internet: www.eal-vertrieb.com
Email: info@eal-vertrieb.com
Figure 18: Folding in the rear lights