8
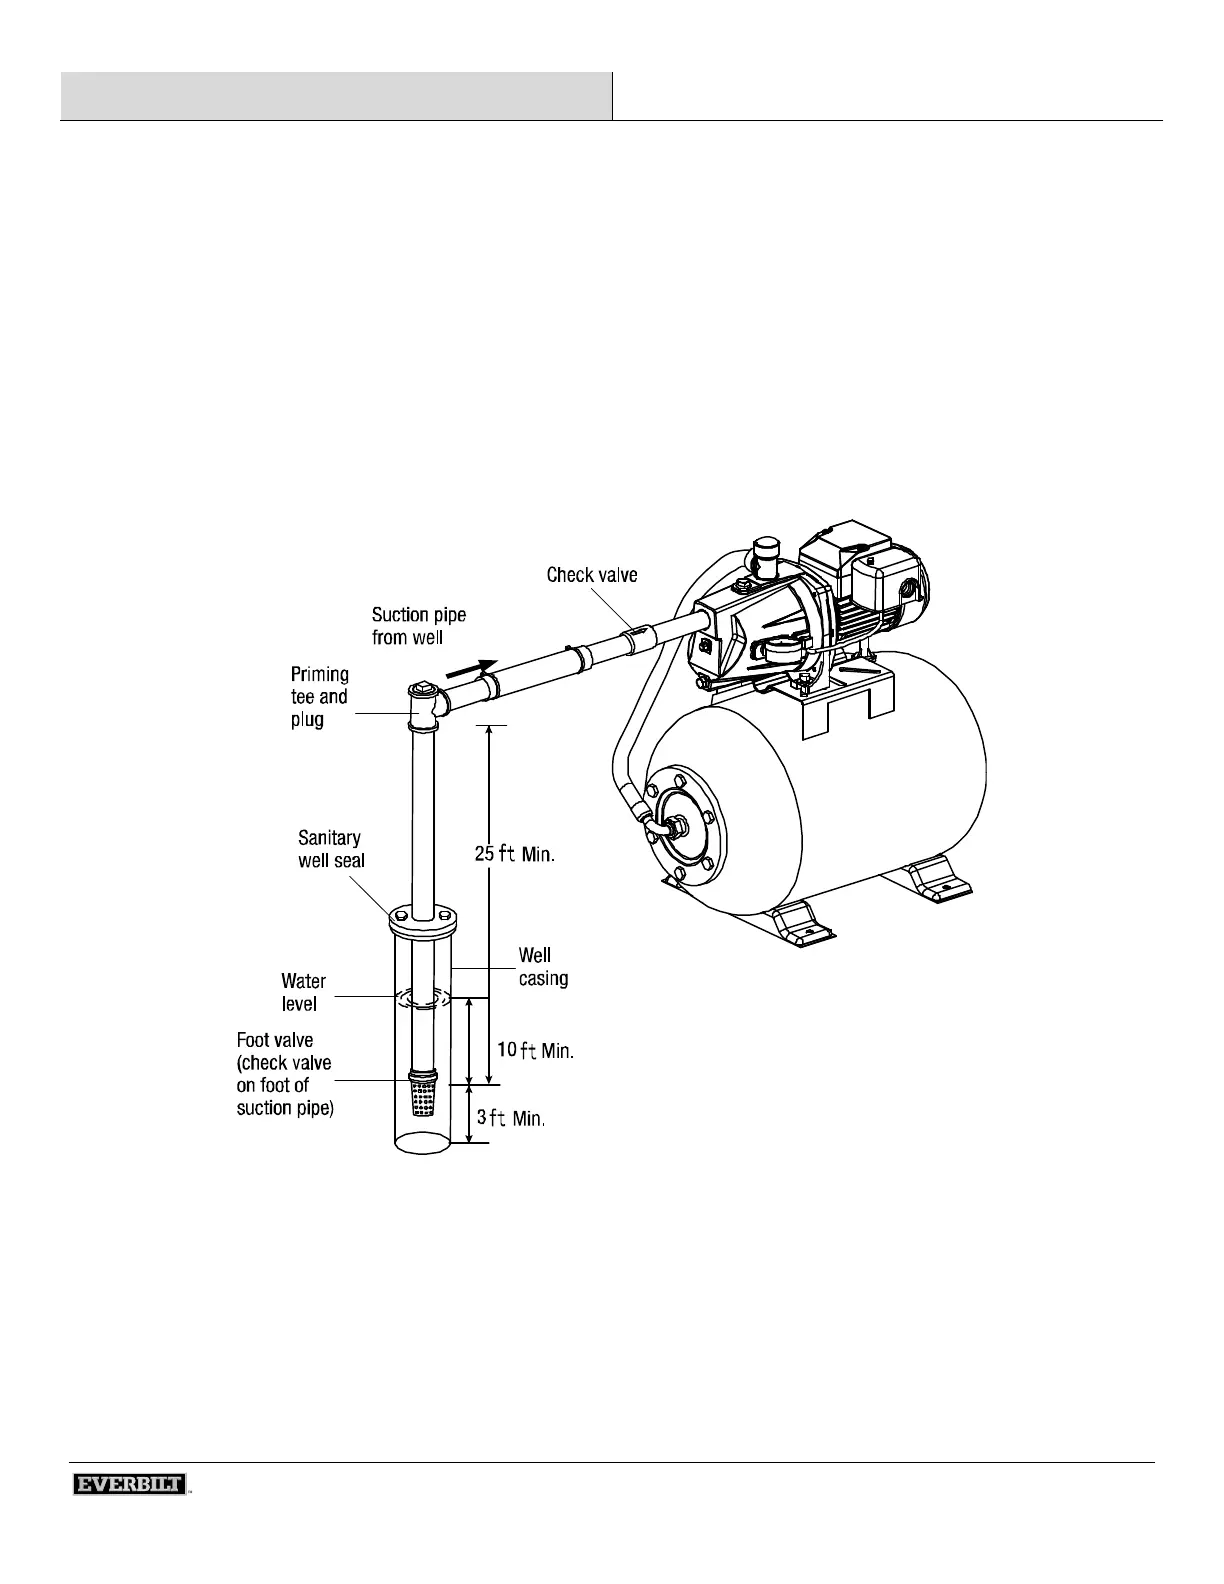
CASED WELL INSTALLATION, 2 IN. ORLARGER CASING
Mount the pump as close to the well as possible.
Assemble the foot valve, strainer, and well pipe. Make sure that the foot valve works freely.
Lower the pipe into the well until the strainer is 5 ft. above the bottom of the well. It should also be at least 10 ft. below the well’s water
level while the pump is running in order to prevent the pump from sucking air. Install a sanitary well seal.
Install a priming tee, priming plug, and suction pipe to the pump. Connect the pipe from the well to the pump suction port, using the
fewest possible fittings – especially elbows – as fittings increase friction in the pipe (however, include a foot valve). The suction pipe
should be at least as large as the suction port on the pump. Use teflon tape on threaded pipe joints. Support the pipe so that there are no
dips or sags in the pipe, so it does not strain the pump body, and so that it slopes slightly upward from the well to the pump (high spots
can cause air pockets which can air lock the pump). Seal the suction pipe joints with teflon tape. Joints must be air-tight and water-
tight. If the suction pipe can suck air, the pump cannot pull water from the well.
You have just completed the suction piping for your new shallow well jet pump. Please go to Pages 10 and 11 for discharge pipe and
tank connections.