EHN3261/3361
20
4. Record
Click the Record button to start / stop recording the current video stream. By default, this icon is
only for one-minute video recording and the recordings will be saved at C:\EverFocus\. To change
the recording time, see File Size in 7.1.3 Storage. To change the location, see Record to Local in 7.1.3
Storage. To record long-period recordings, please set up a recording schedule (7.3.2 Schedule
Settings). To change the source video stream and recording format, see Recording and Snapshot
Settings in 7.1.3 Storage.
Note: For Microsoft IE10 and above users, some settings have to be complete to enable this
function (see B. Snapshot/Record error message in 10. Troubleshooting).
5. Speaker / Microphone
Click the Speaker and Microphone buttons to switch the sound on/off for the speakers and
microphones respectively (if such external devices have been connected to the camera directly or
via the network). To activate the Audio function, the Enable Audio must be selected. See Audio
Settings in 7.2.1 Streaming and Audio. Note that the camera provides the TRS line-in terminal I/O,
therefore, TRS microphones with a (built-in) amplifier and external power supply are required.
6. Setting
Click the Setting button to enter the Settings page (see 7. Settings).
7. Wizard
Click the Wizard button to enter the Setup Wizard.
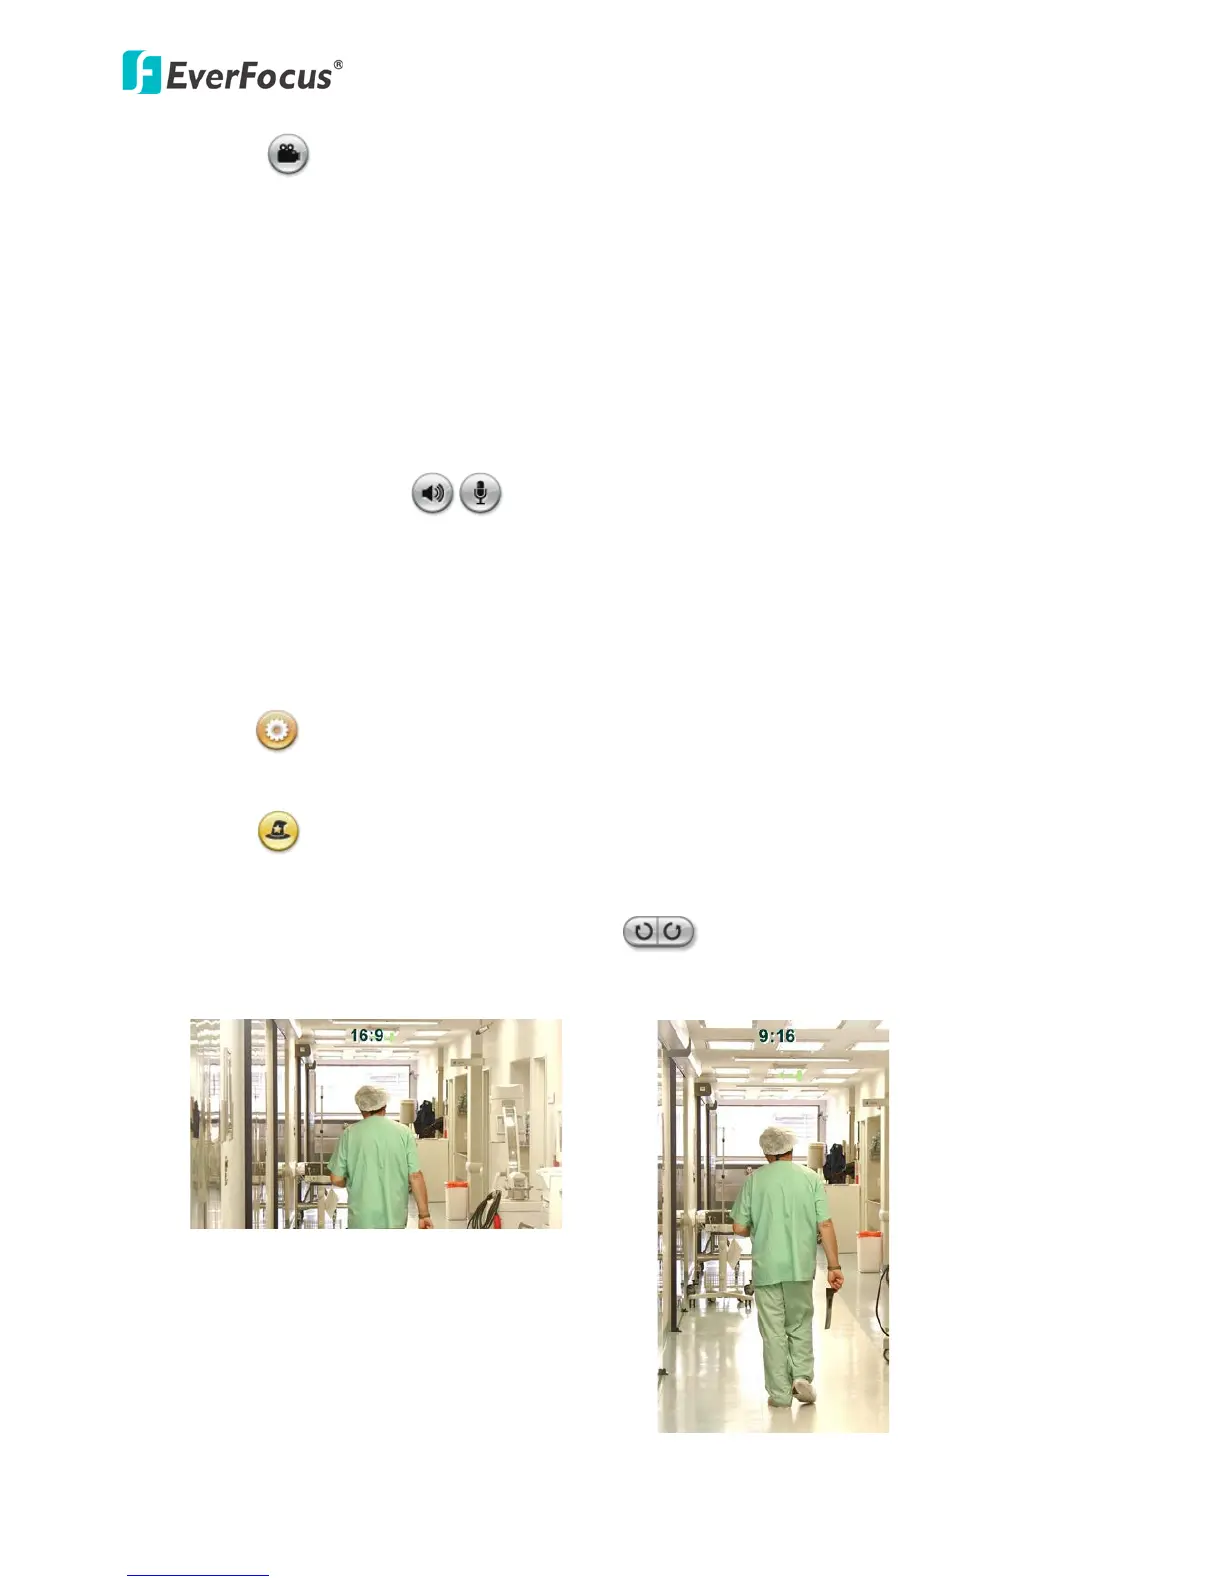
8. Hallway Display (9:16): Click the Rotate button to rotate the live image. This function
allows users to monitor vertically-oriented areas such as hallway, corridors and aisles.